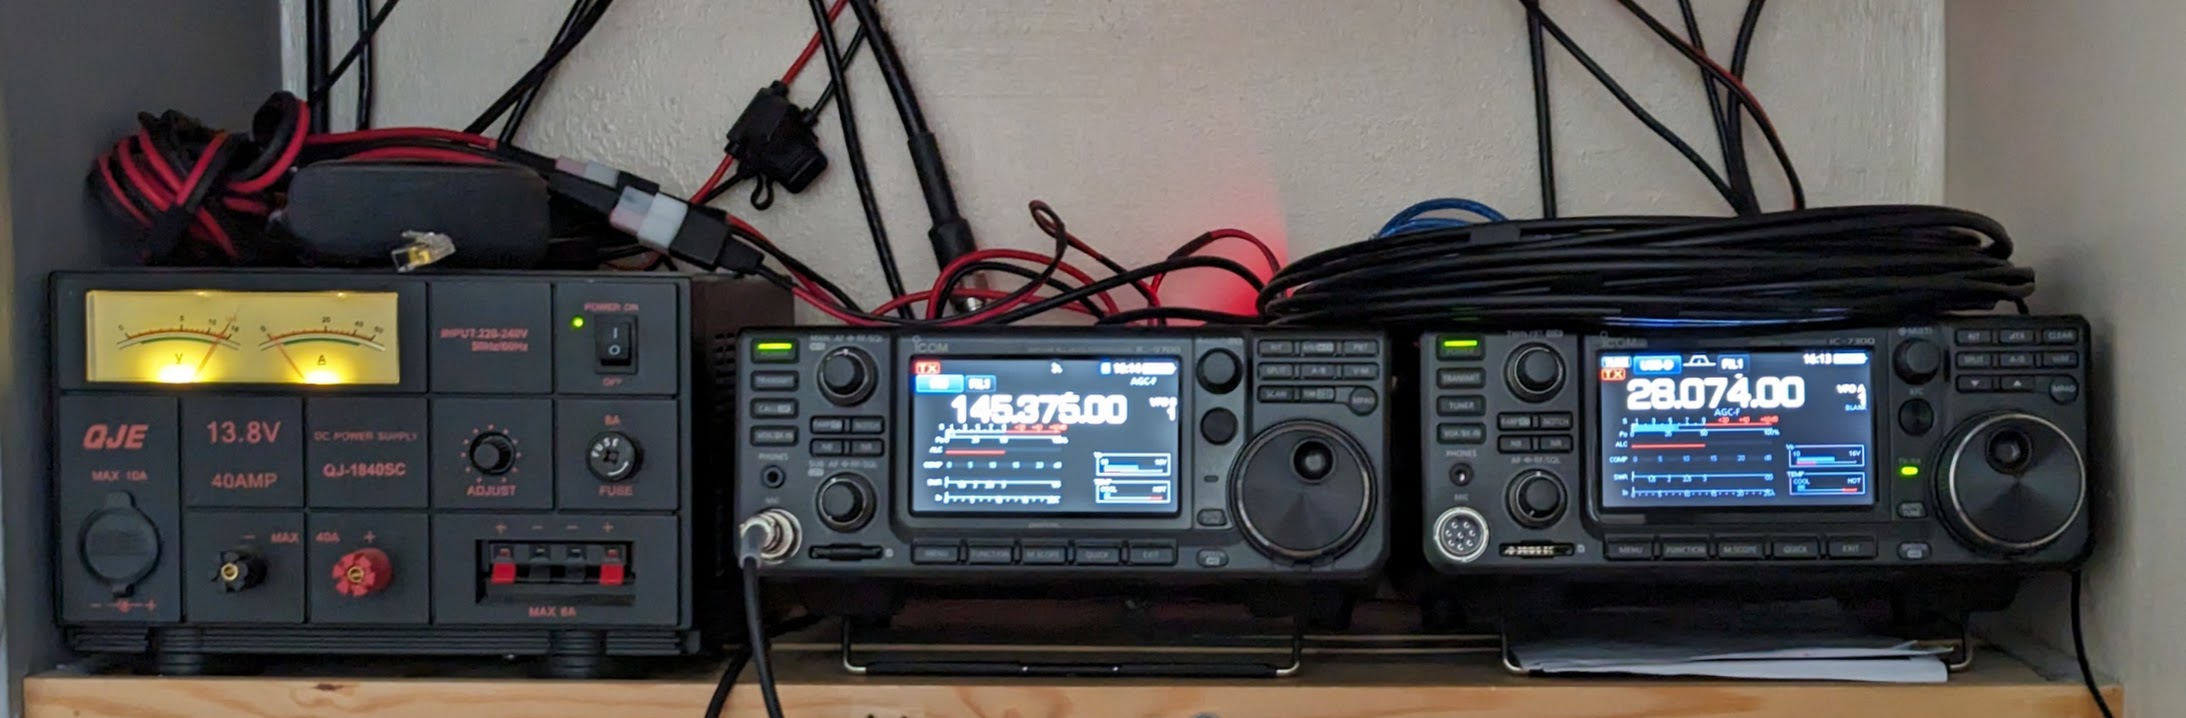
Just recently I decided to play a bit with ham radio amateur satellites – I have never done in it in my life before. After watching some YouTube tutorials and reading articles and decided to buy a quite pricey Icom IC-9700 which looks beautiful on the shelf together with my already owned Icom IC-7300
Please be aware that this particular article is NOT my project (kind of not my) so for very detailed information you need to visit the Sarcnet website! The reason of publishing this article is to show some ideas and point building problems, but also to show modification I did to the original project and to explain why I decided to do the modifications 🙂
To work satellites, you need a directional antenna. Of course you can try to use a collinear vertical VHF/UHF antenna and probably you will be able to work through ISS or maybe SO-50 satellite, but the goal is definitely to use a directional antenna.
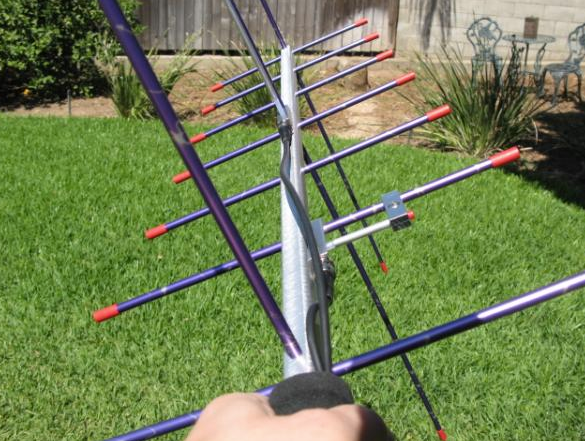
My first directional antenna I decided to use was “Arrow Yagi”
These antennas are made in two versions and two variants 🙂 You can buy a longer or shorter version, also they come with duplexer built in inside of the grip foam handle (with one cable, shown on the picture) or the version I decided to buy – with two cables, as my radio has two separated, independent transceivers. Antenna cost is around £150.
The foam handle is attached to the antenna for using in portable conditions:
Of course holding antenna during satellite QSO would be pain in the bottom, so even for working the portable I would have some rotator.
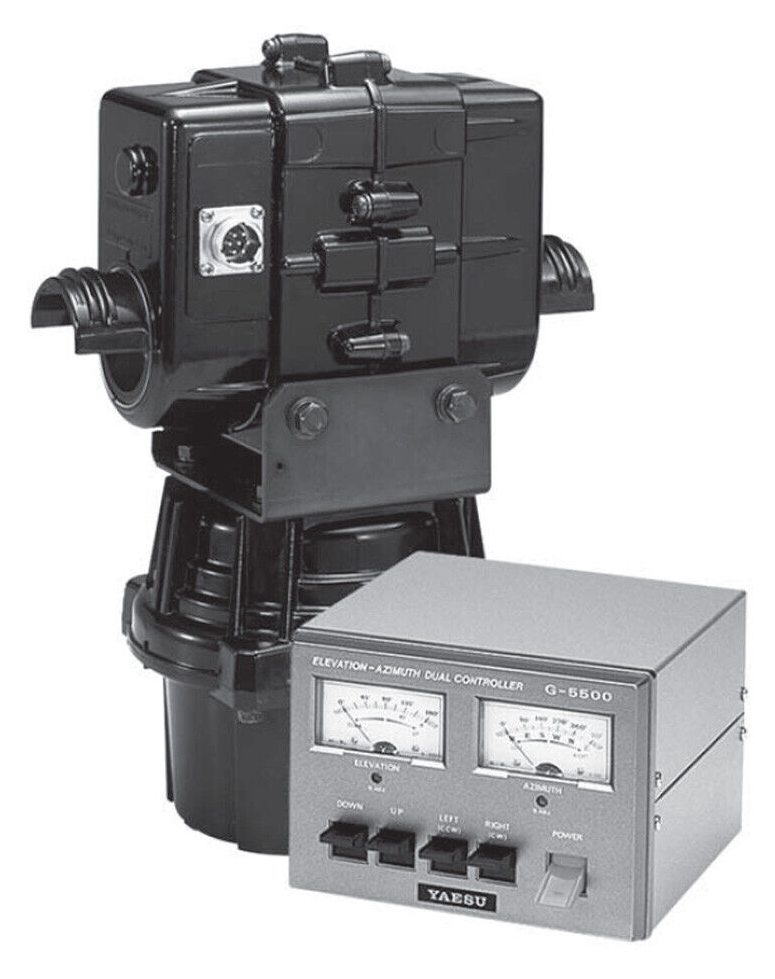
Quick research disappointed me a bit. Good quality azimuth / elevation rotators for working through satellites cost well over £600 – like Yaesu G-5500:
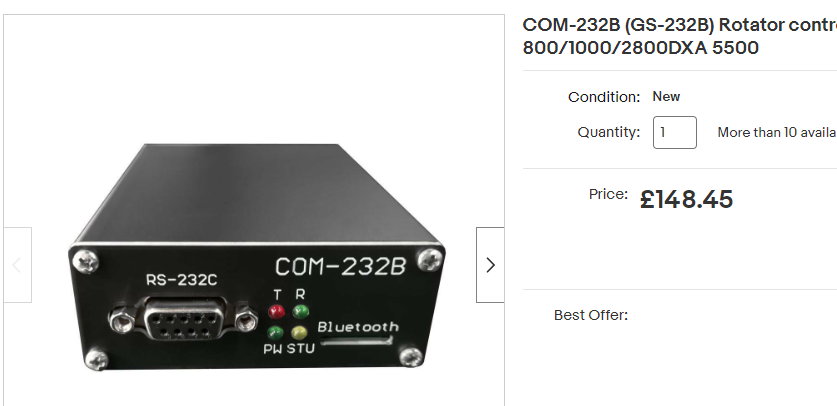
… and in additional, you need to buy a computer controller interface for additional £150:
So after buying Icom IC-9700 and the extra antenna my bank controller (wife) said no more 🙂
As I needed a rotator anyway, I found a very interesting project here:
Link: https://www.sarcnet.org/rotator-mk1.html
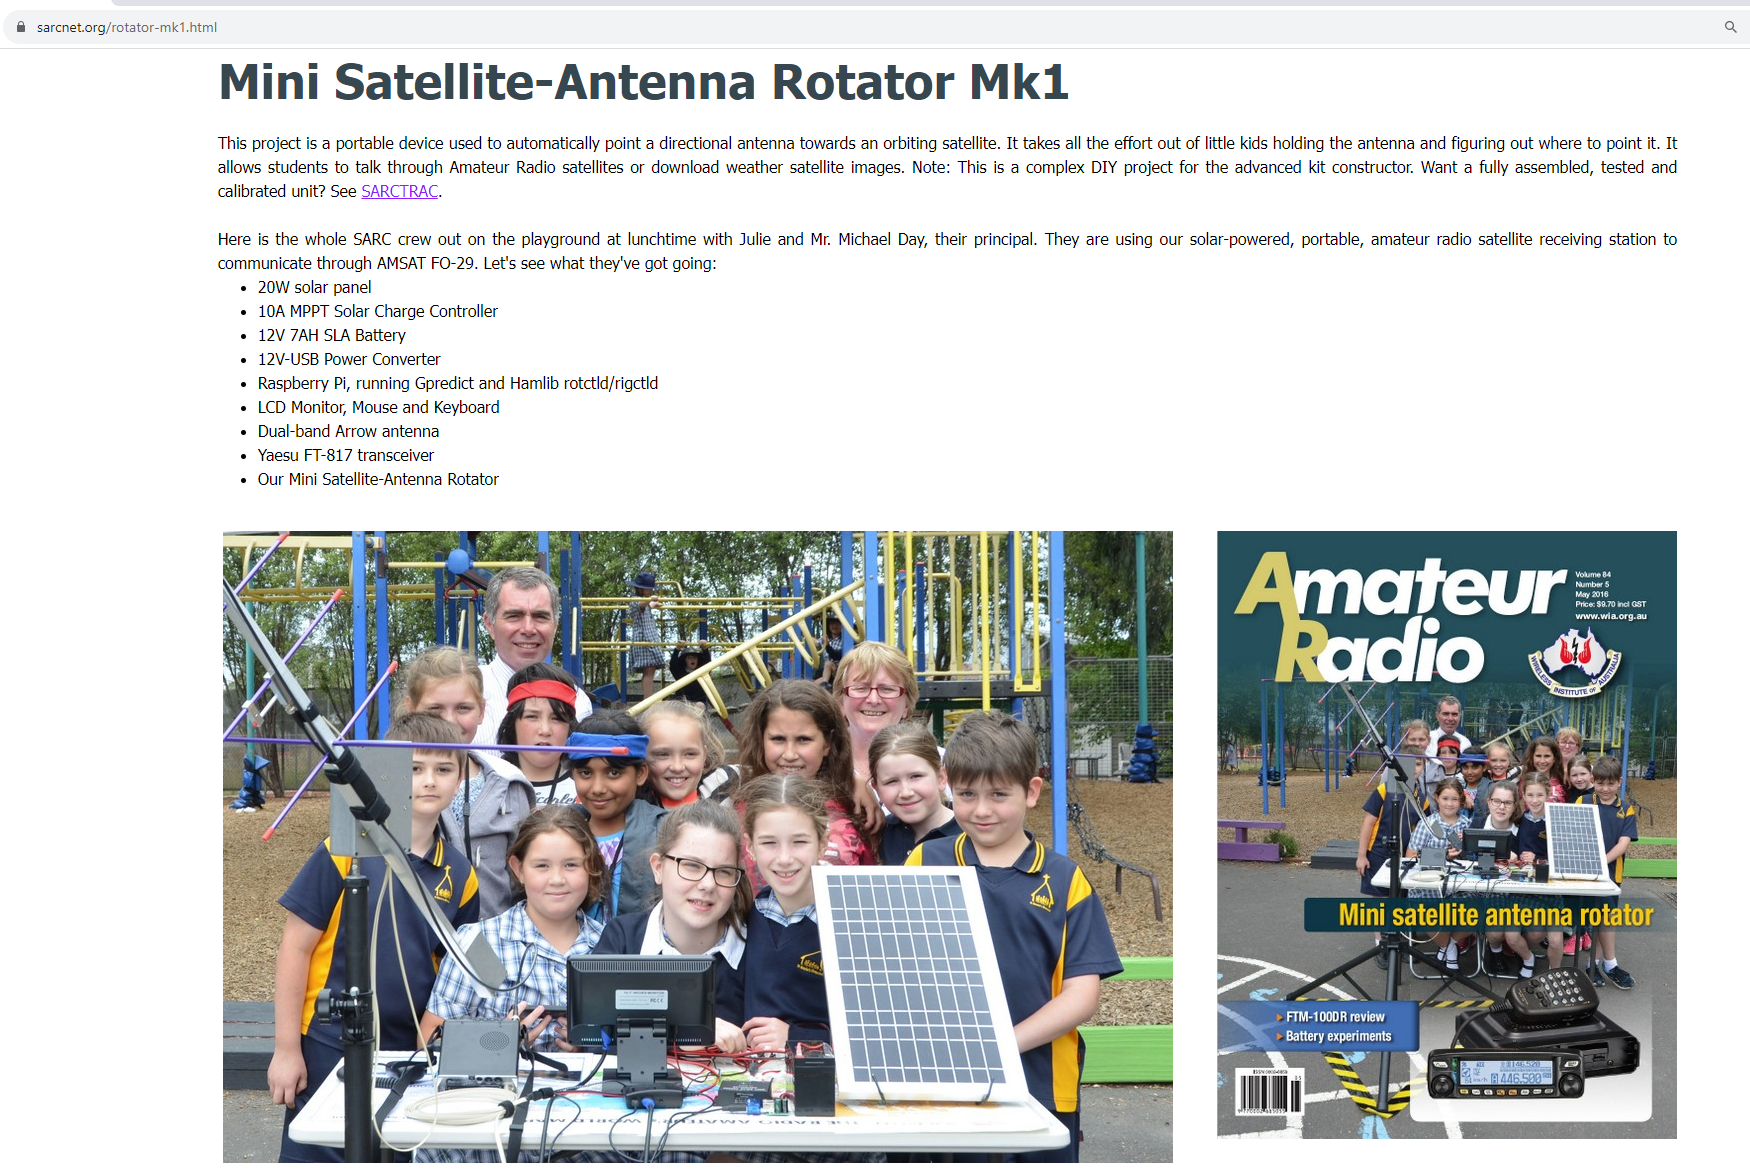
I decided to make their MK1B version. In the past they used to sell kits for a small amount of MK1 version, then MK2, and currently they supposed to sell MK3 but apparently they do not do it for whatever reasons – probably as it is a school project idea, not a real factory 🙂

Anyway, the MK1 and MK2 is quite well documented (with some small errors) and as I mentioned in the past they used to sell kits and even already assembled devices.
I really would go for version MK3 but they do not sell it and also they do not share the software, but they DO share software for MK1 and MK2 version – thank you so much! To get the software you need to fill a form here:
https://www.sarcnet.org/msar-request.html
Before you start making the rotator, please be aware that none of them is a all year weatherproof rotator! They should not be installed at the top of the roofs with no supervision. The rotator (unless you modify it) is not weatherproof and also has no control for avoiding the cable snaps/twist. So if you do not watch it, the device could do too many rotations and as the result all/some cables may get damaged!
However what mentioned above is not a problem to me, as my roof is already packed with antennas so my idea was to make the antenna installation only temporary in my extremely small garden size 3m x 3m – yes, this is the size of my garden 🙁
Let’s start – MK1B version – the picture below is showing the finished antenna:

It is a bit humoristic picture, I did something wrong and I cut a copper pipe to short, so the steel counterbalance not far away from the shaft so I had to add a bottle with water to add the additional weight.
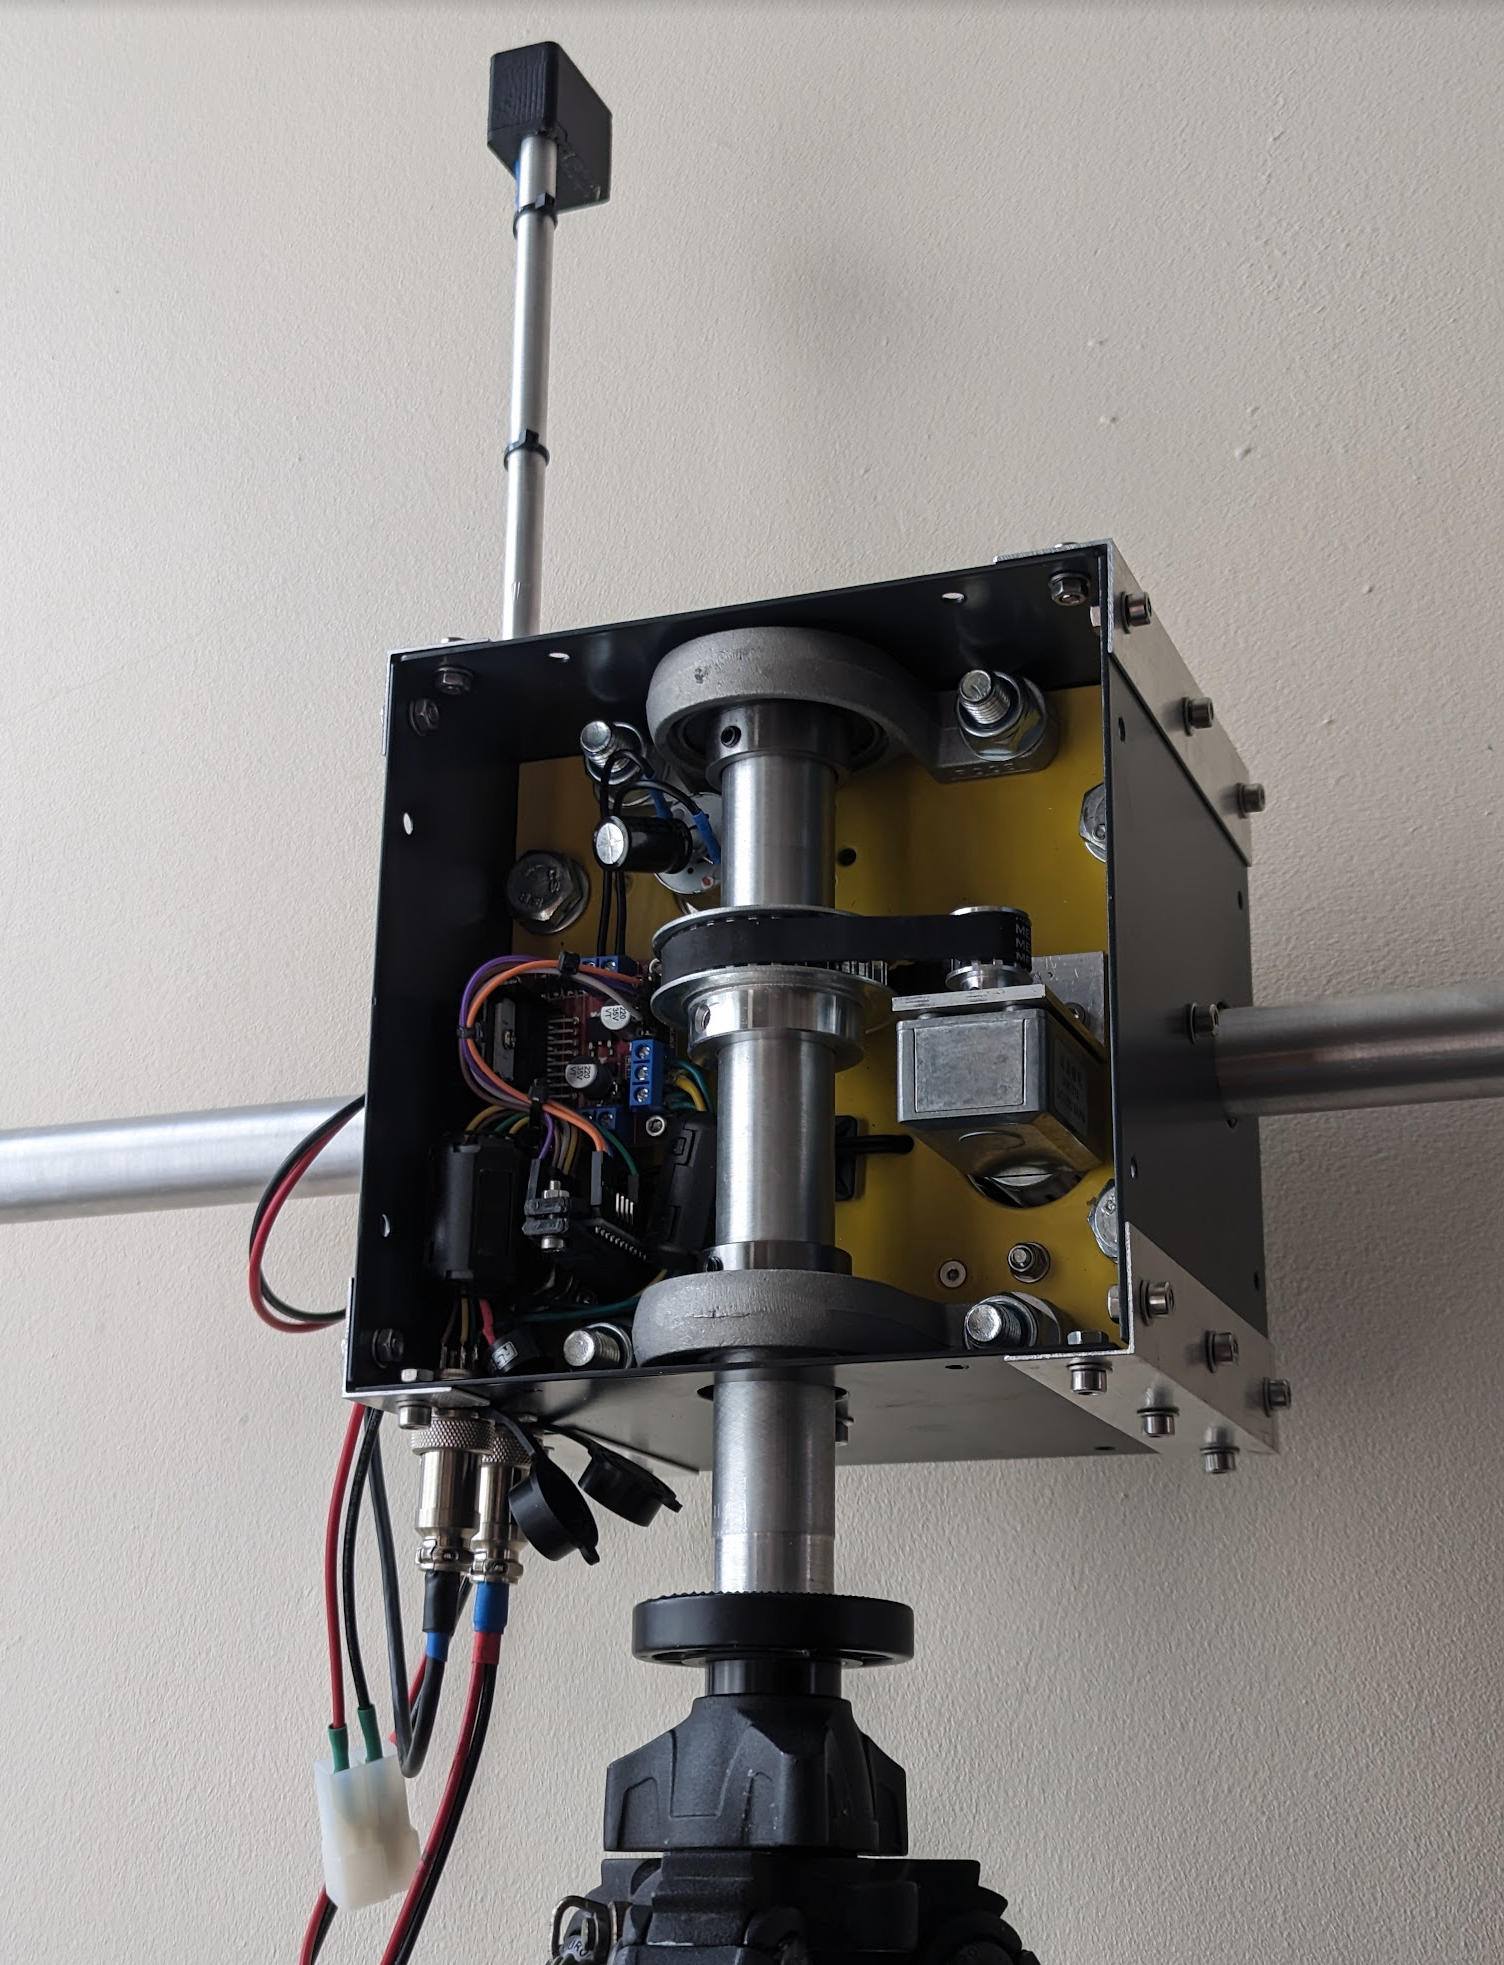
What does it look inside?
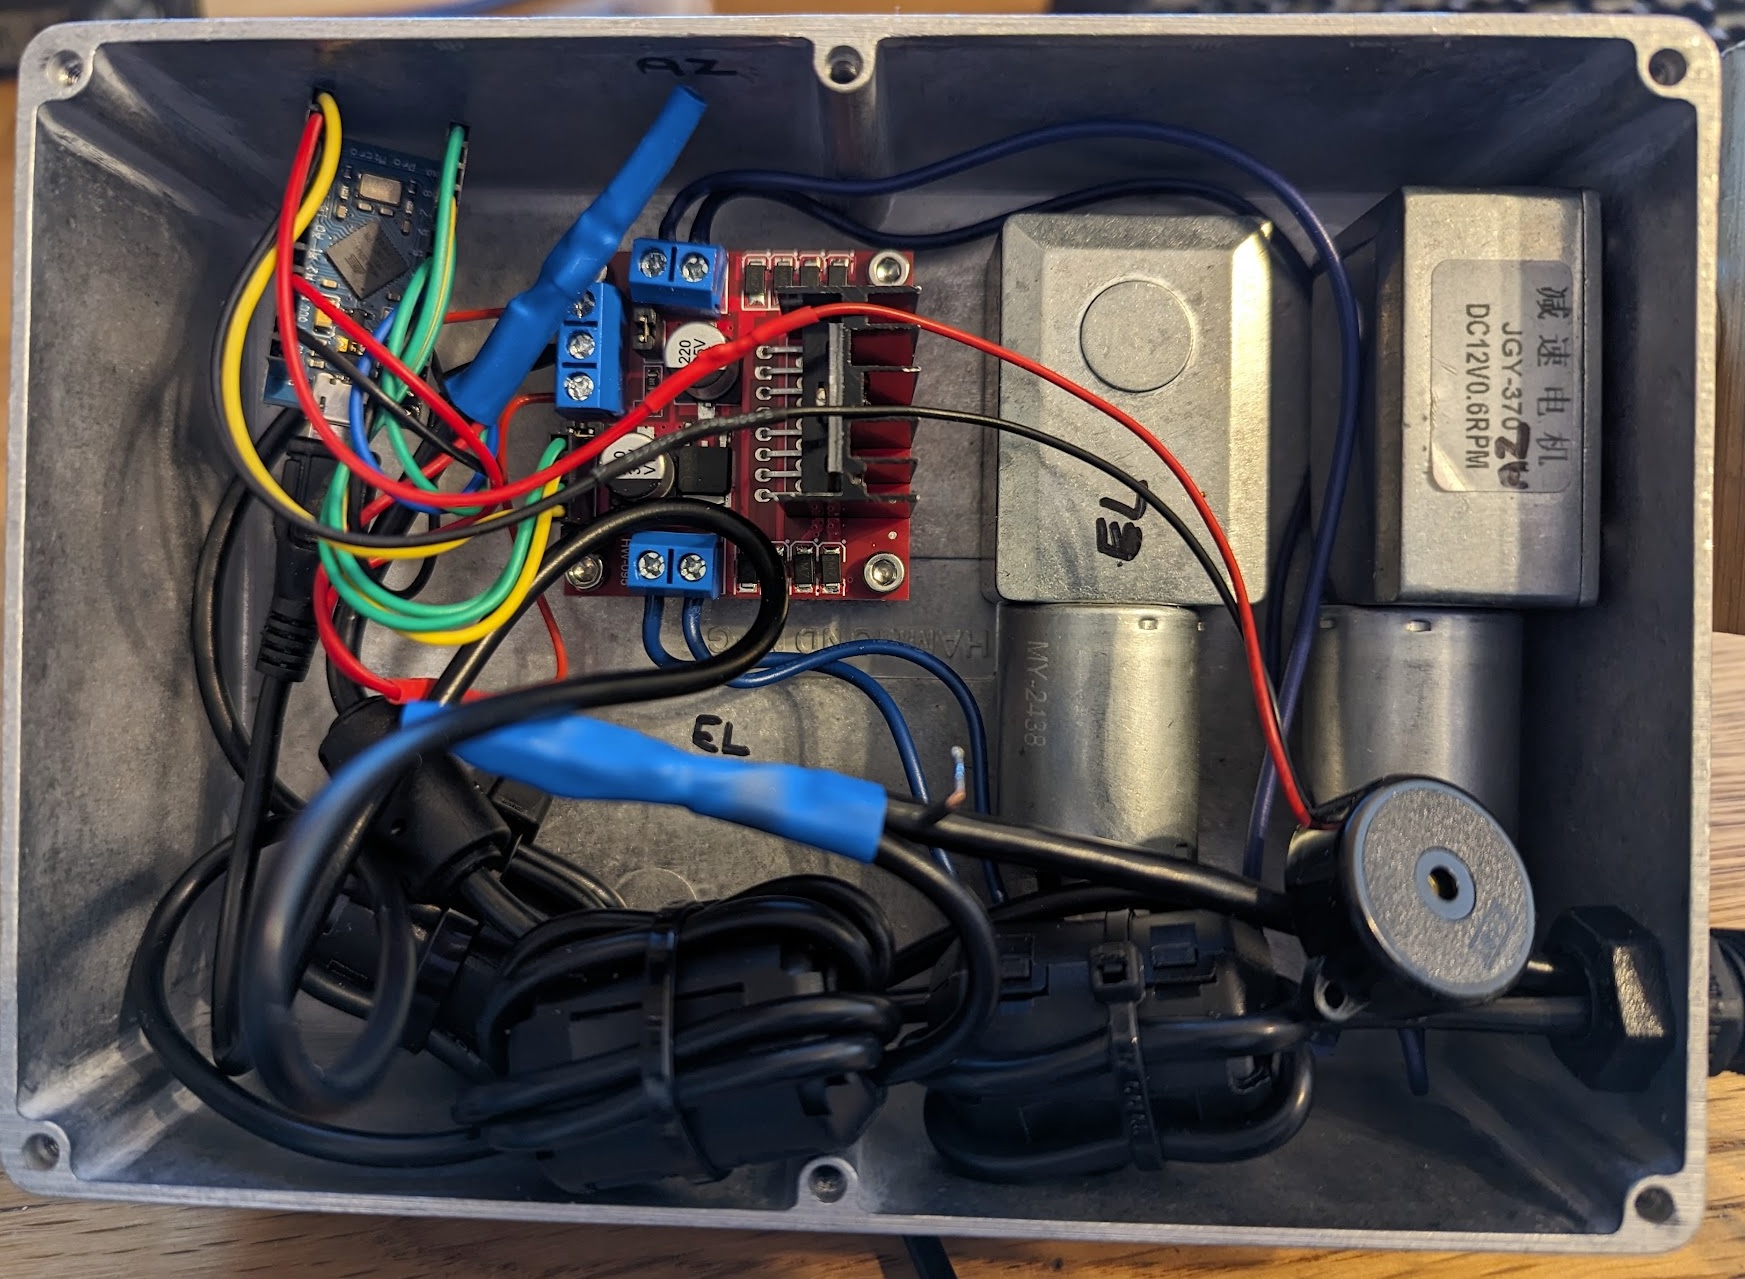
The idea of the counterbalance is to make sure the motor will be strong enough to lift the antenna up. And without the counterbalance it will not! 🙂 Unfortunately, the motors a quite small, so the additional counterbalance weight is overstressing the warm gear and this is why (not only one reason) I decided to go for MK2 version, heavily modified by myself. Before I show MK2 version, I would like to talk about MK1 which is absolutely fine especially for field activities.
I mentioned already all “mechanical” problems. Does it come with any other, like software problems? Yes, it is not problems free.
First of all, unless you really do a field work, the cable length become the problem. Despite using ferrite beads I realised that if the USB cable connecting Arduino to my laptop with length greater 10m, the Arduino was getting frozen when I was pressed PTT with 50W. I was not testing what power and USB cable length was OK but generally but with 5m long USB cable I was OK, but it was too short for my needs 🙁
So how does it work? All depends what rotator controlling software you use. If you use for example Ham Radio Deluxe (a very nice user interface):
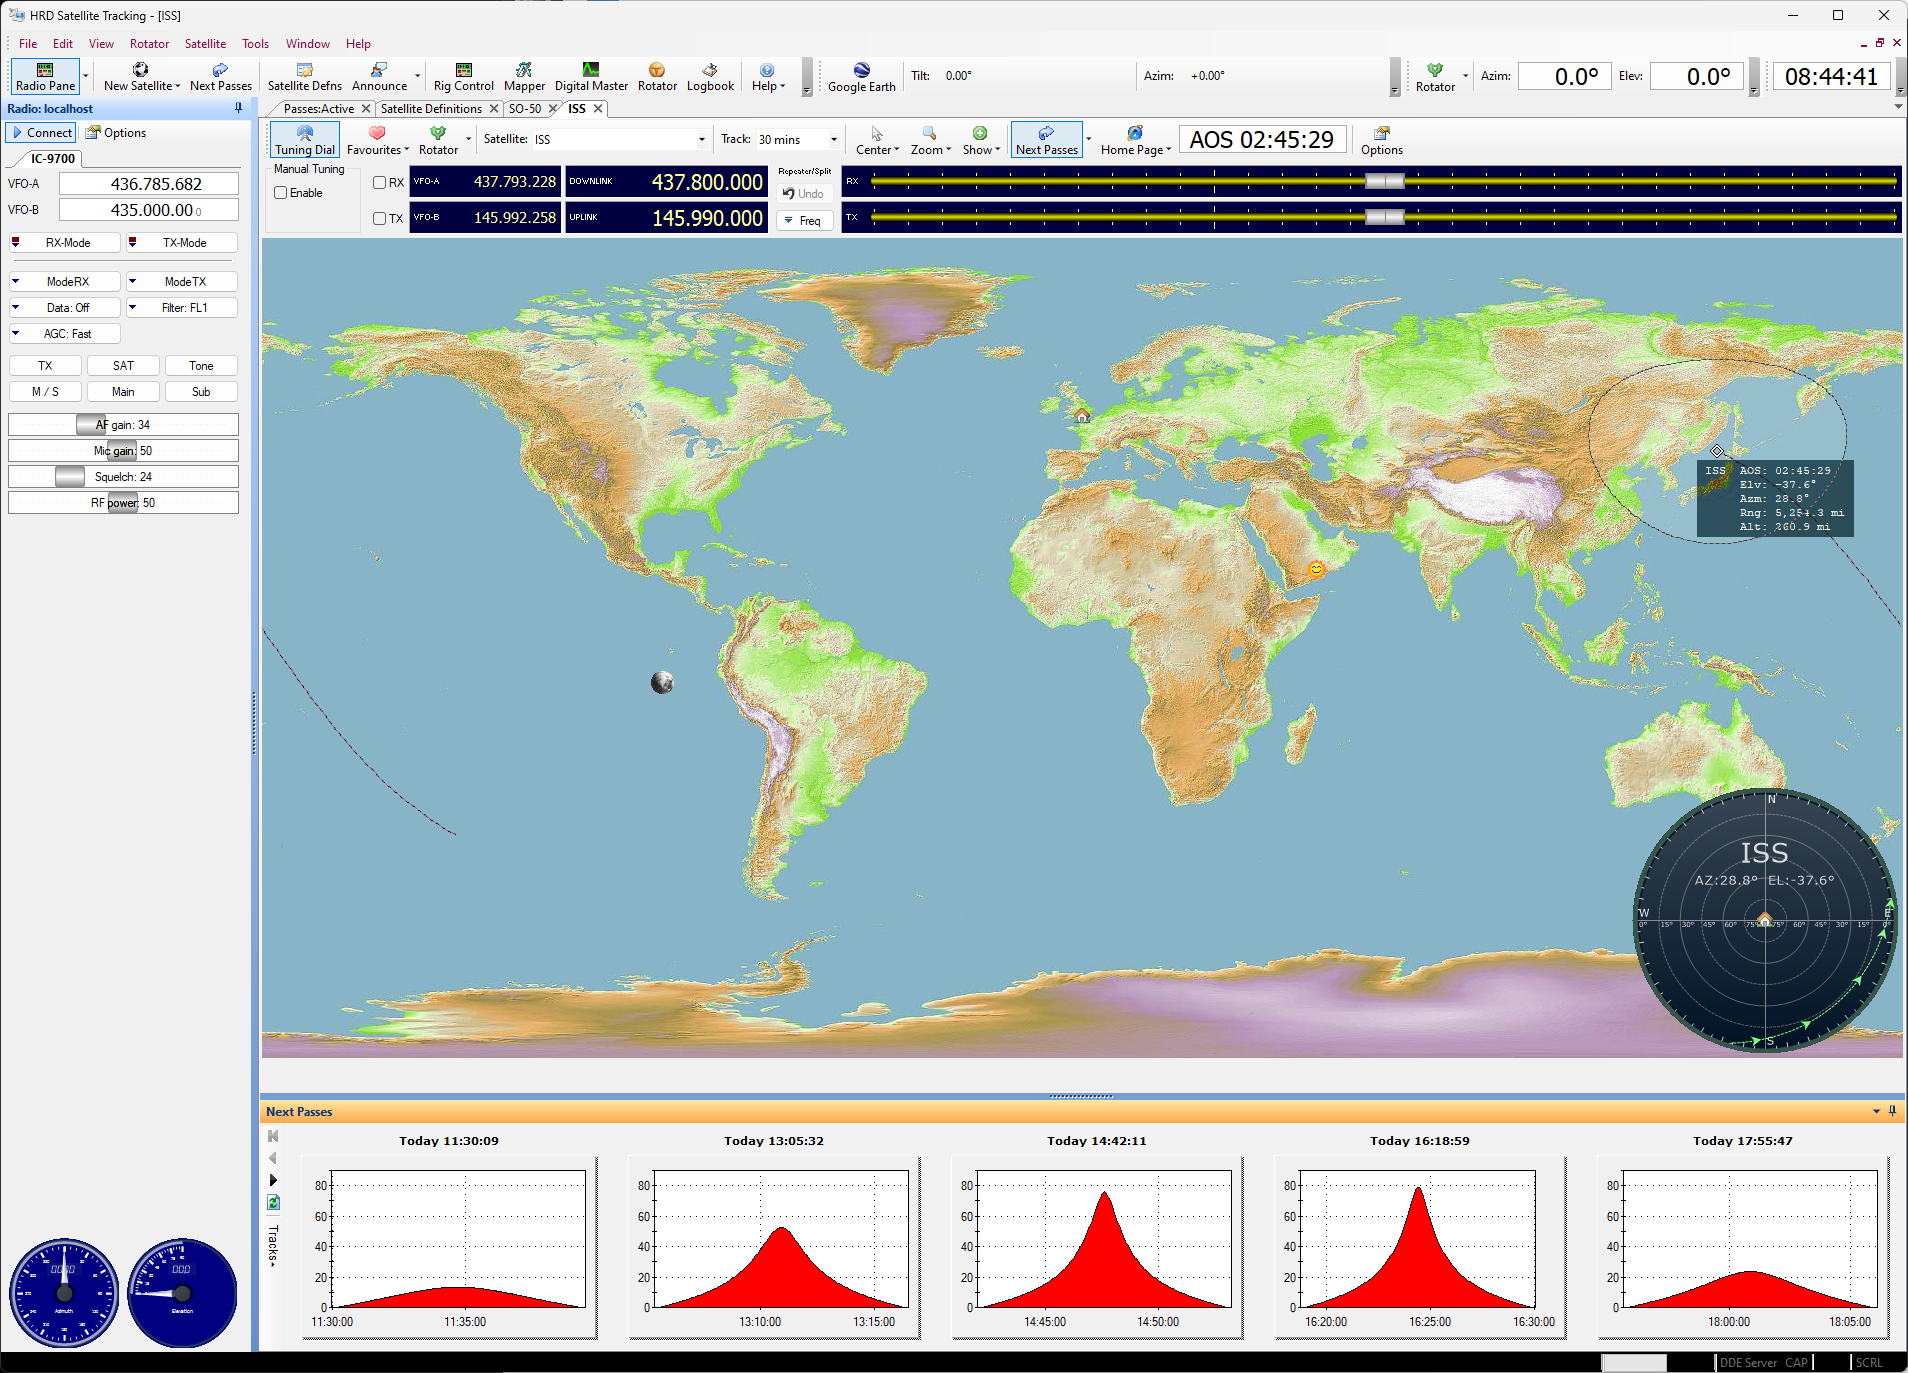
What you need to do is to connect the Arduino USB cable straight into your computer and set it up on COM9 (in my case, you may get it on any different COM number) and then set it as EasyComm II:

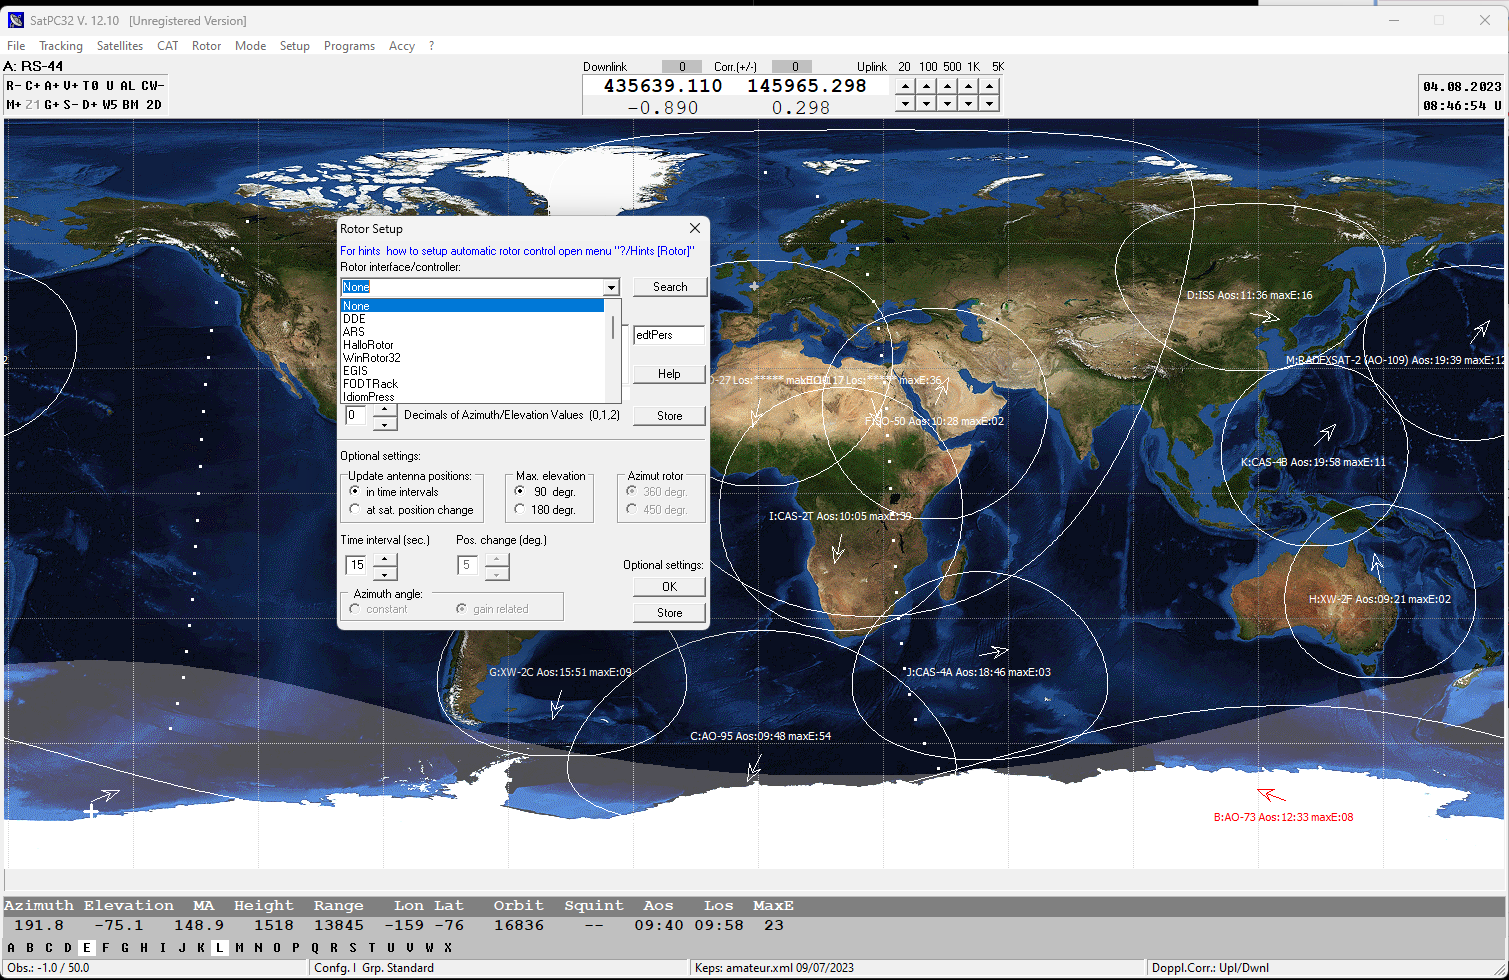
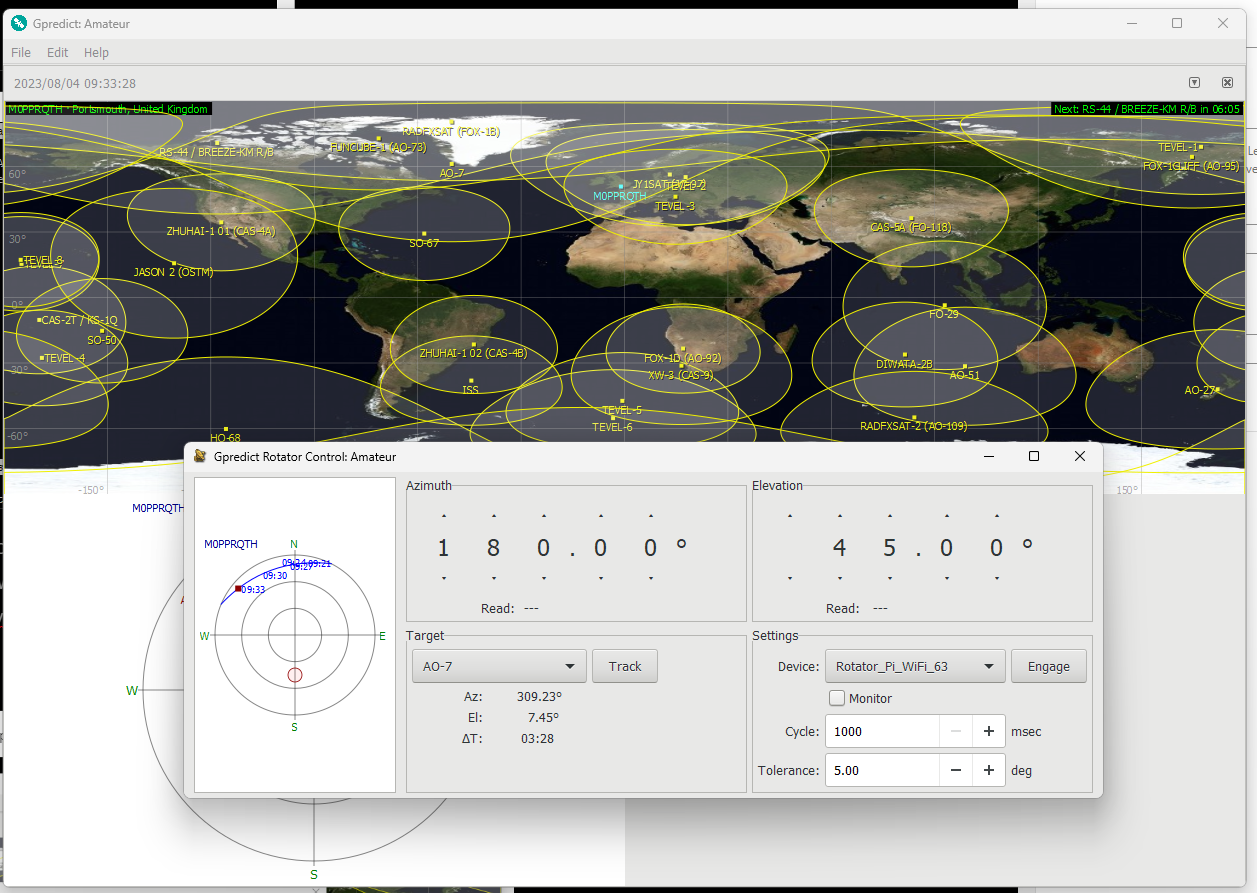
The things become a bit more complicated when you want to use software like Gpredict or SatPC32
Unfortunately I have never managed to make SatPC32 working with the Sarcnet SarcTRAC rotator. I am not saying it is not possible, but I do not know how to do it. However integration of SatPC32 with Icom 9700 was not a problem at all.
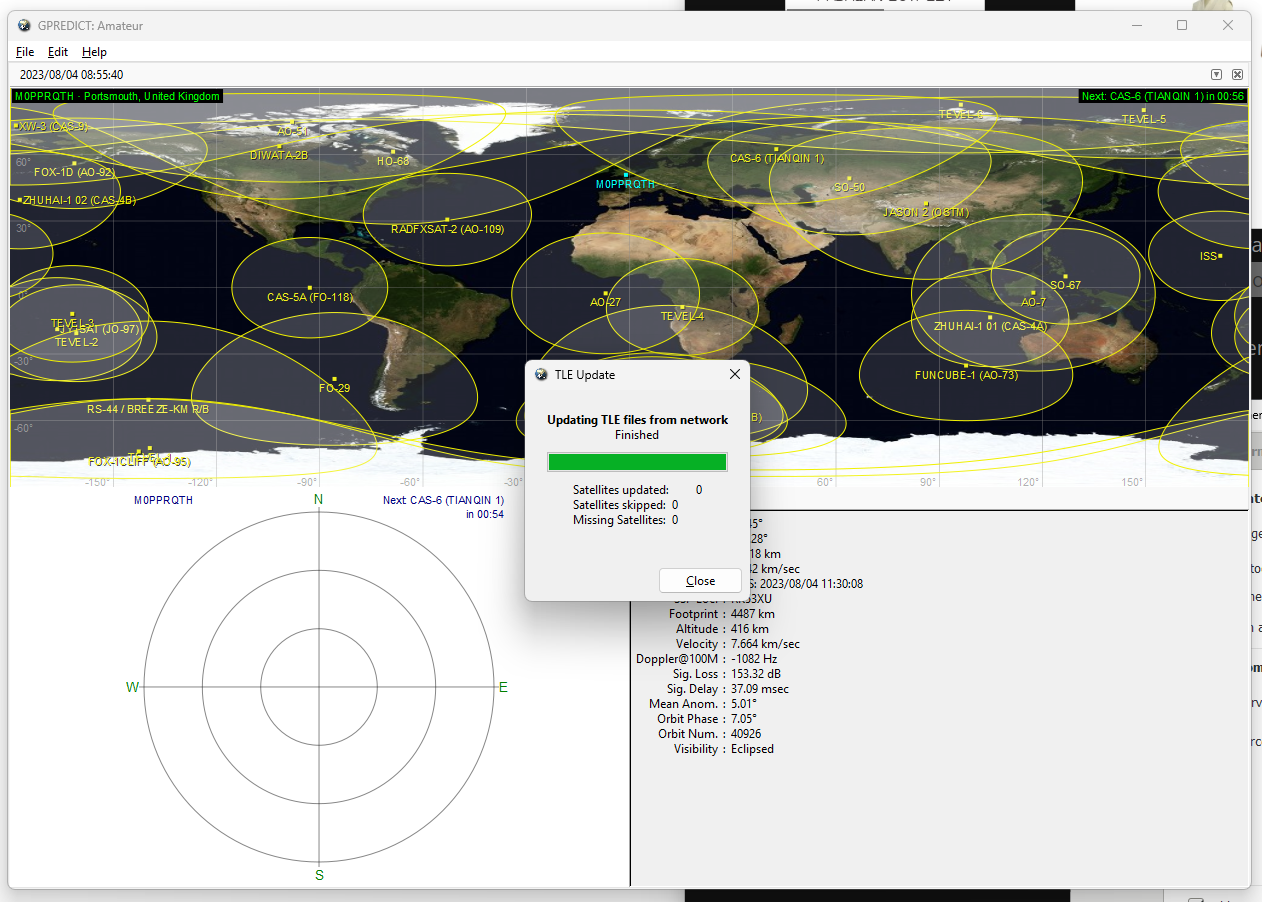
Another software which I tested with the SarcTRAC was Gpredict. The author of SarcTRAC says the last version of Gpredict which works correctly is 1.4. Now it is a VERY VERY old software from 2012 and it does not support satellite updates:
Edit: it does!! See my article here: https://www.rozenek.com/gpredict-does-not-update-satellites/ – it will help you to get updates on Gpredict!!
The idea of the Gpredict is to run a software which is connected to a virtual EasyCommII server run by your local computer – what you need to do is create a *.bat file:

Then the Arduino connects through the USB cable and COM port to that virtual server:
The only one problem is the old Gpredict does not get any updates, the new Gpredict does not work at all with the Hamlib virtual server and Arduino…
.. UNLESS you use Raspberry Pi as Hamlib server emulating EasyComm II !!!!!!!!!!
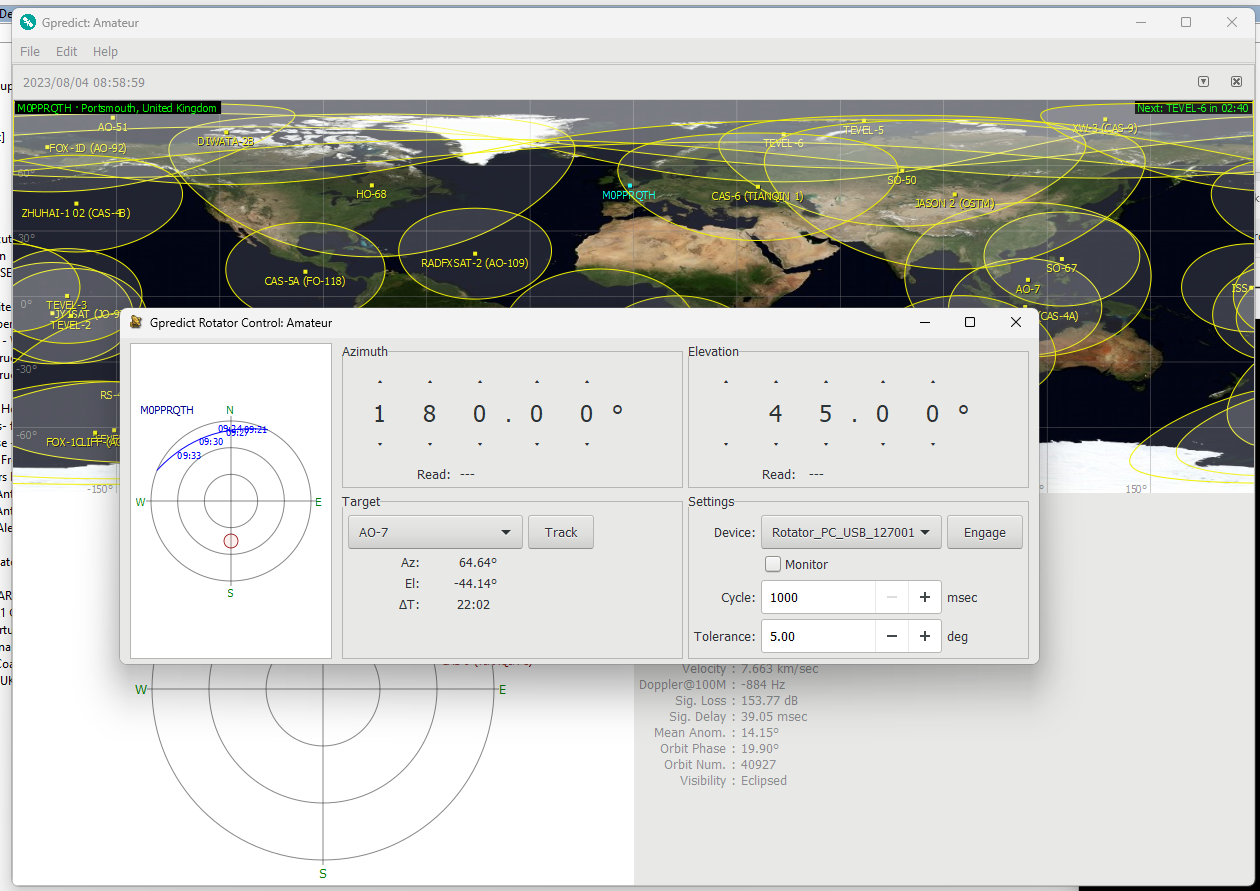
Also the none Gpredict shows the reading of actual position of the antenna. See picture above – there is only — in read position. You do not get back any information from the rotator, unless you do it through Raspberry Pi 🙂
Good news: The newest Gpredict is working correctly when connected to the Raspberry Pi server 🙂 Also the position of the antenna feedback is working correctly, happy days!
Raspberry Pi
if your USB cable is short (probably up to 5m) go for HRD (Ham Radio Deluxe) – this is the only one software you need to control everything. No EasyComm II server is required – I am assuming the software is build into the HRD. HRD controls the radio and the rotator (however you won’t get feedback of the position of the antenna back to the software).
If your USB cable is longer than 5m, then add Raspberry Pi (see section below) and control your rotator using Gpredict and control your radio using HRD – I have not managed yet to control the Icom 9700 radio using Gpredict, however I know it is possible – see the video below:
Disadvantage of the HRD and raspberry Pi together is that you have to use external software to control the Sarcnet rotator. The HRD is stupid enough to be able to connect to anything different that COM port, it cannot connect to the IP address – and your Arduino is now connected to Raspberry Pie which has the IP address. Fortunately Gpredit in the newest version is working correctly with the Sarcnet rotator when connected to the Raspberry Pi EasyComm II server.
So my solution for now is:
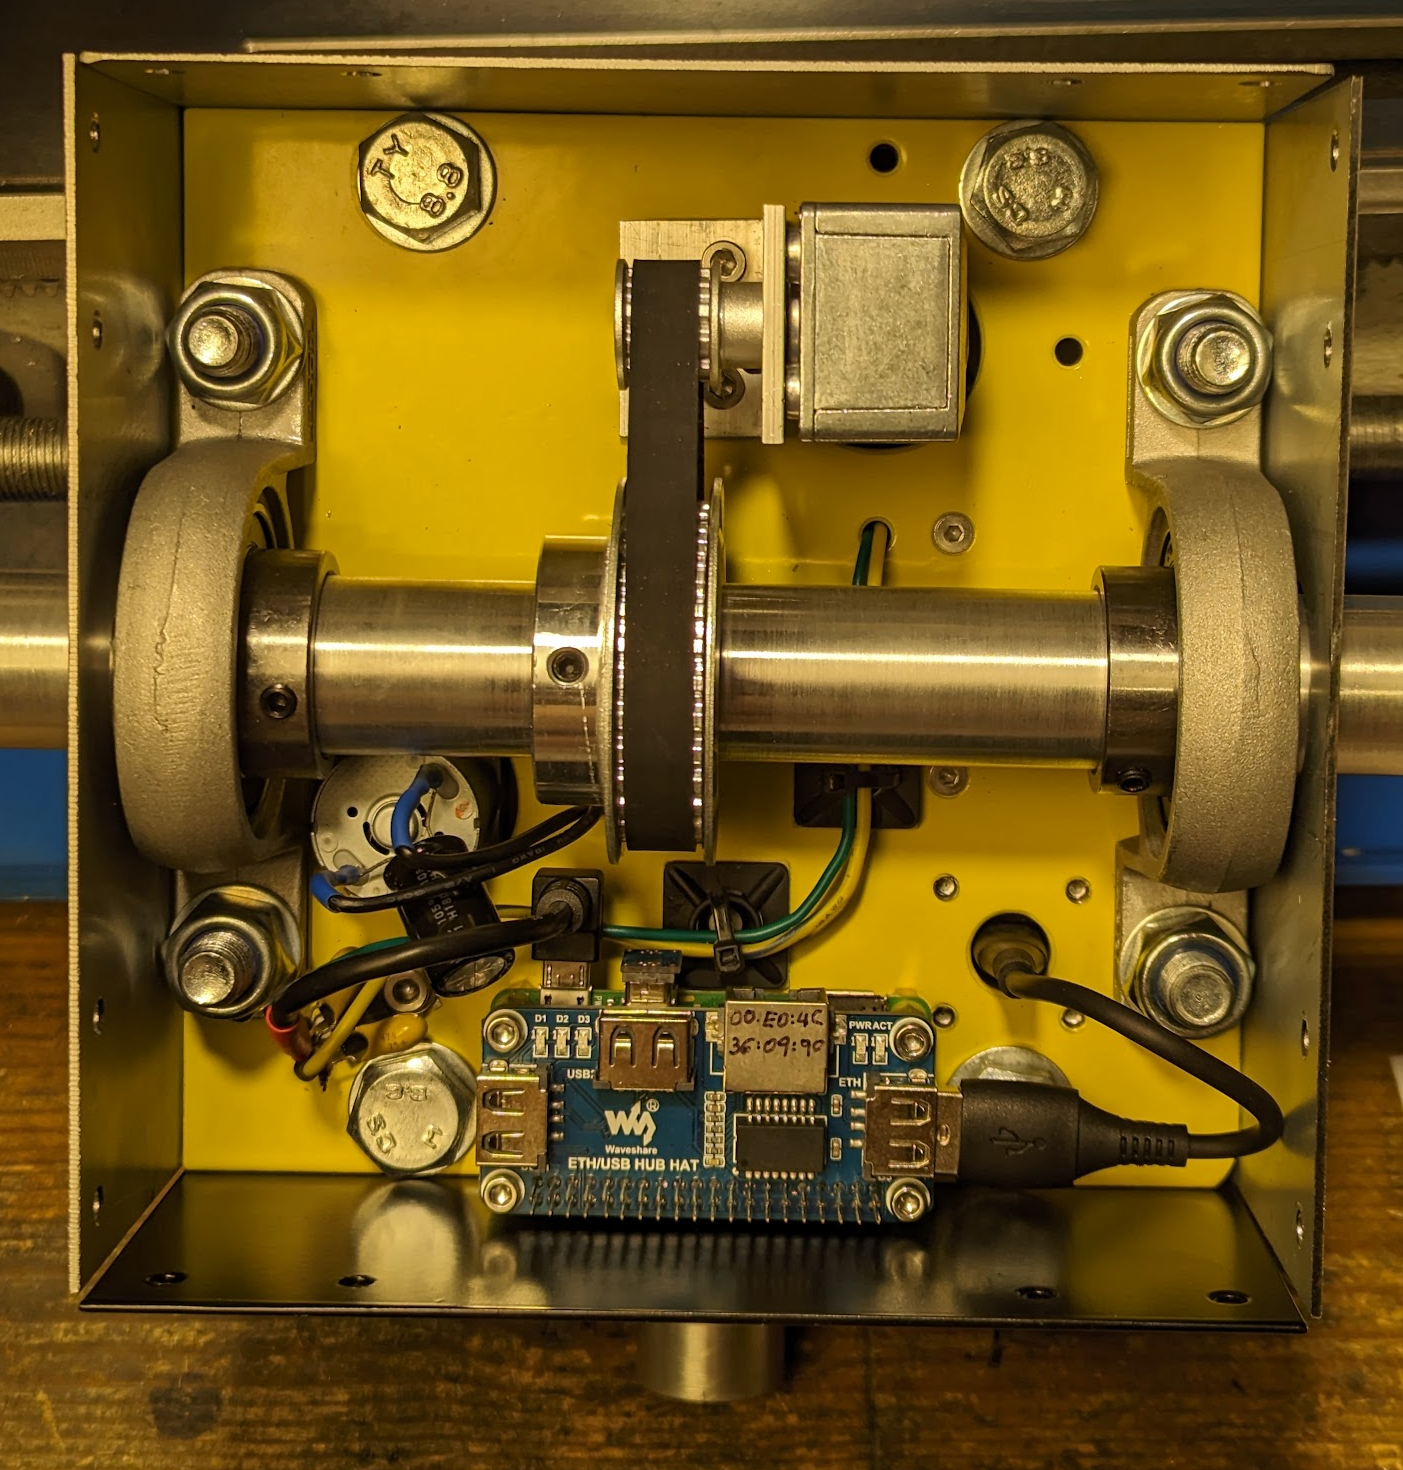
Connect Arduino NOT to your laptop, but to the Raspberry Pi – You can use raspberry Pi 4 or 3, but I use Raspberry Pi Zero 2 with additional USB hat. Then your Raspberry Pi will connect to your computer through your local WiFi network.
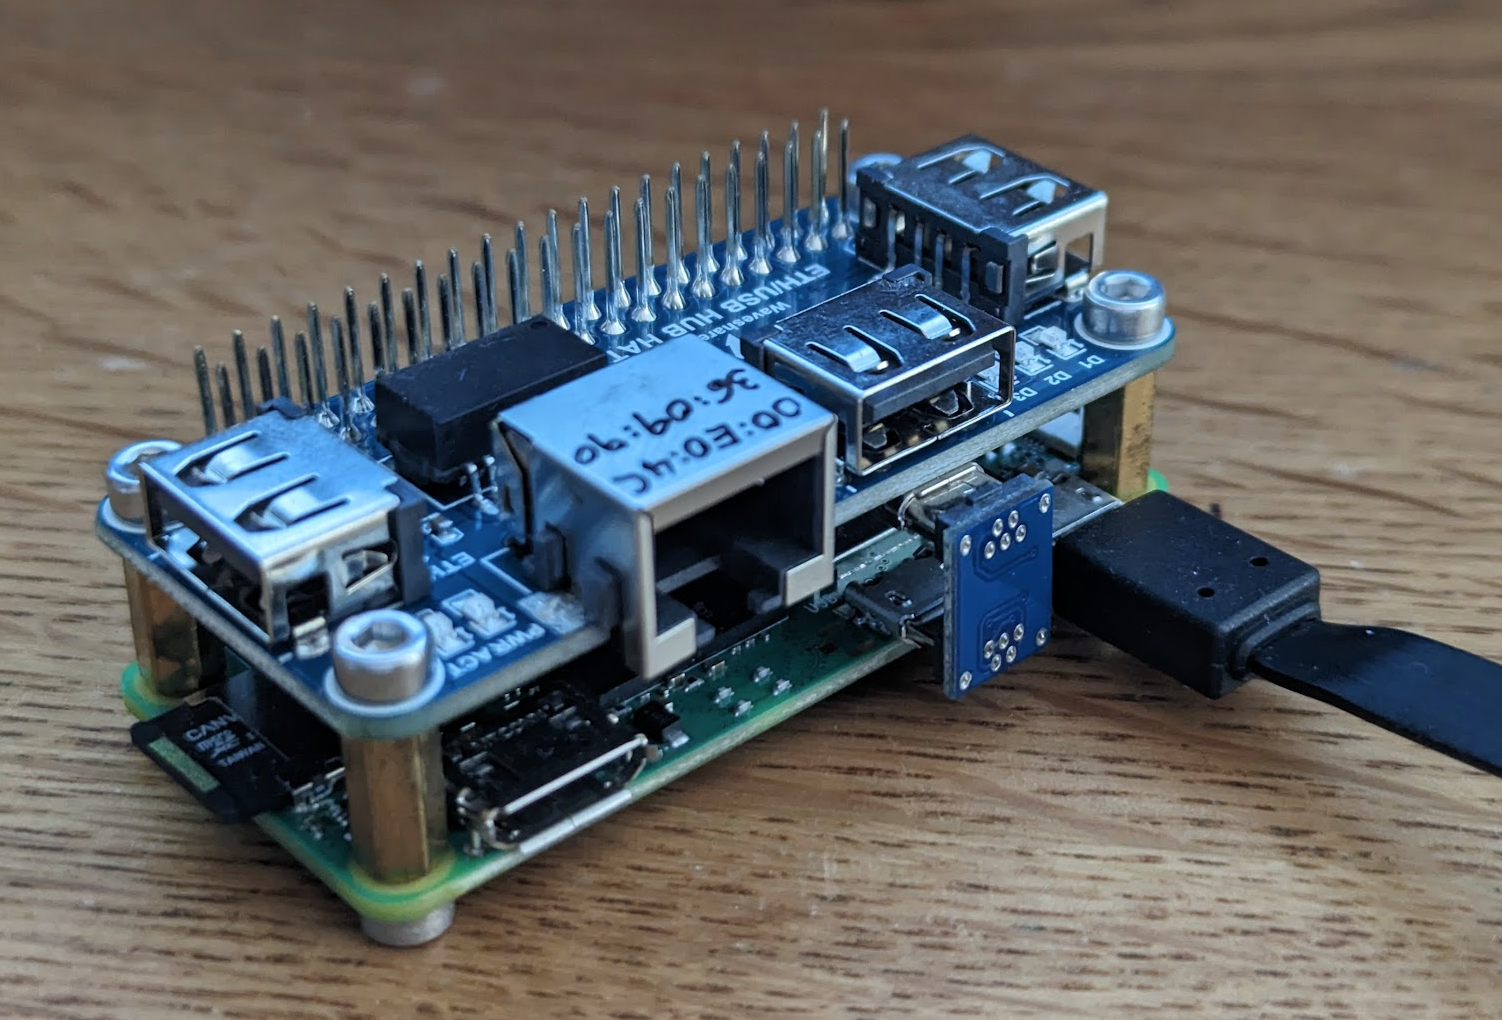
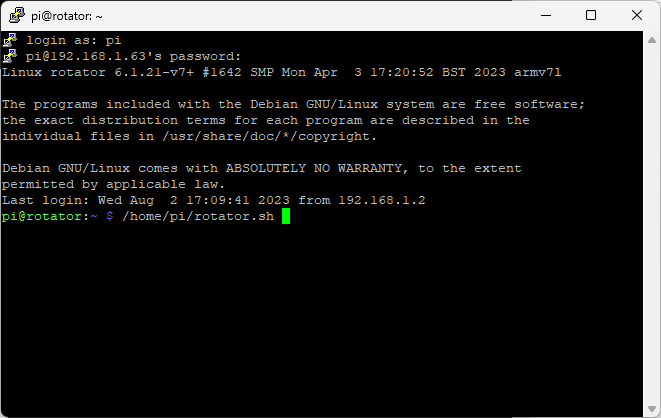
Raspberry Pi has only a text (CLI) operation system installed together with a Hamlib package:
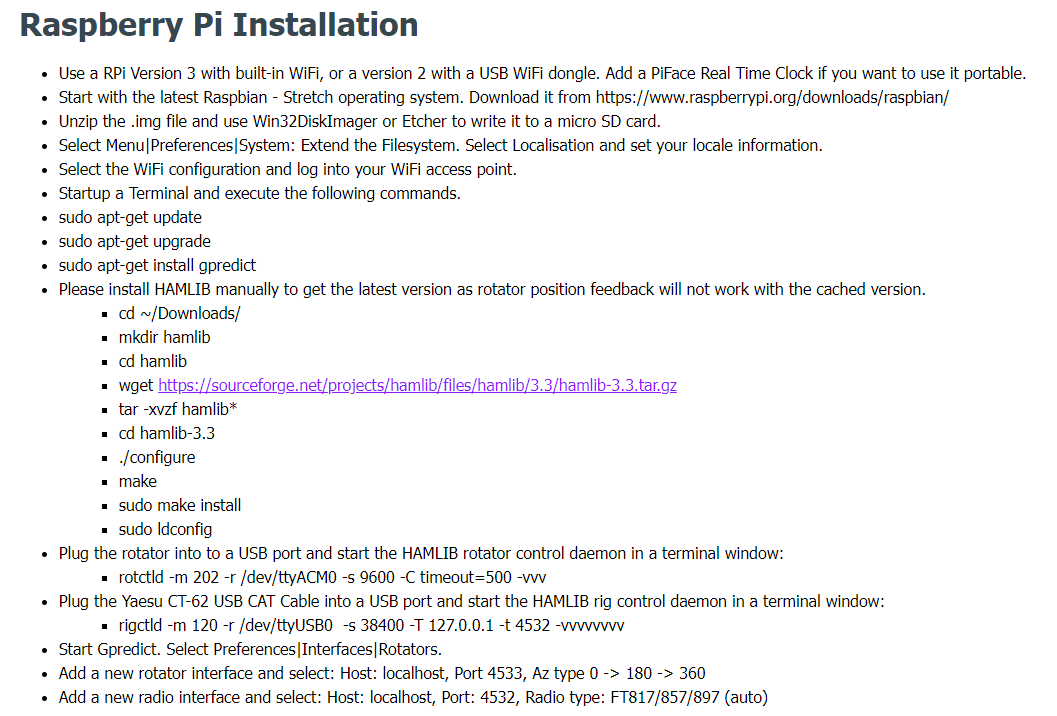
To run the software I created an executable file called rotator.sh
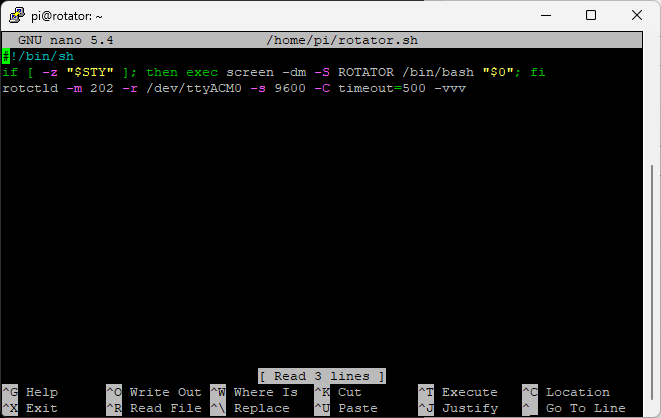
The script will open a screen function so you can detach from the terminal and it will work in the background. If you are not familiar with screen function, just simply type rotctld -m 202 -r /dev/ttyACM0 -s 9600 -C timeout=500 -vvv but you will have to stay connected to the terminal through putty.
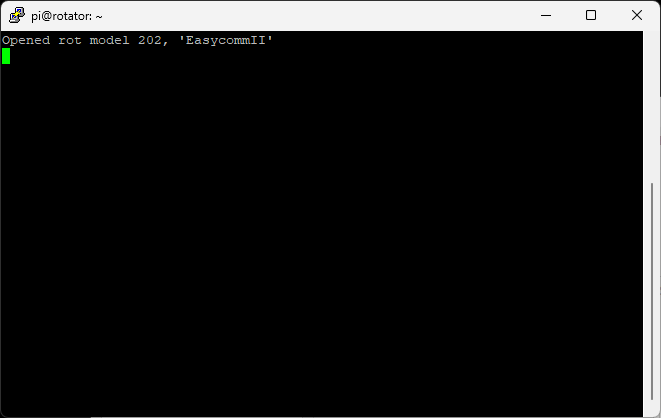
The picture above is showing the virtual EasyComm II server.
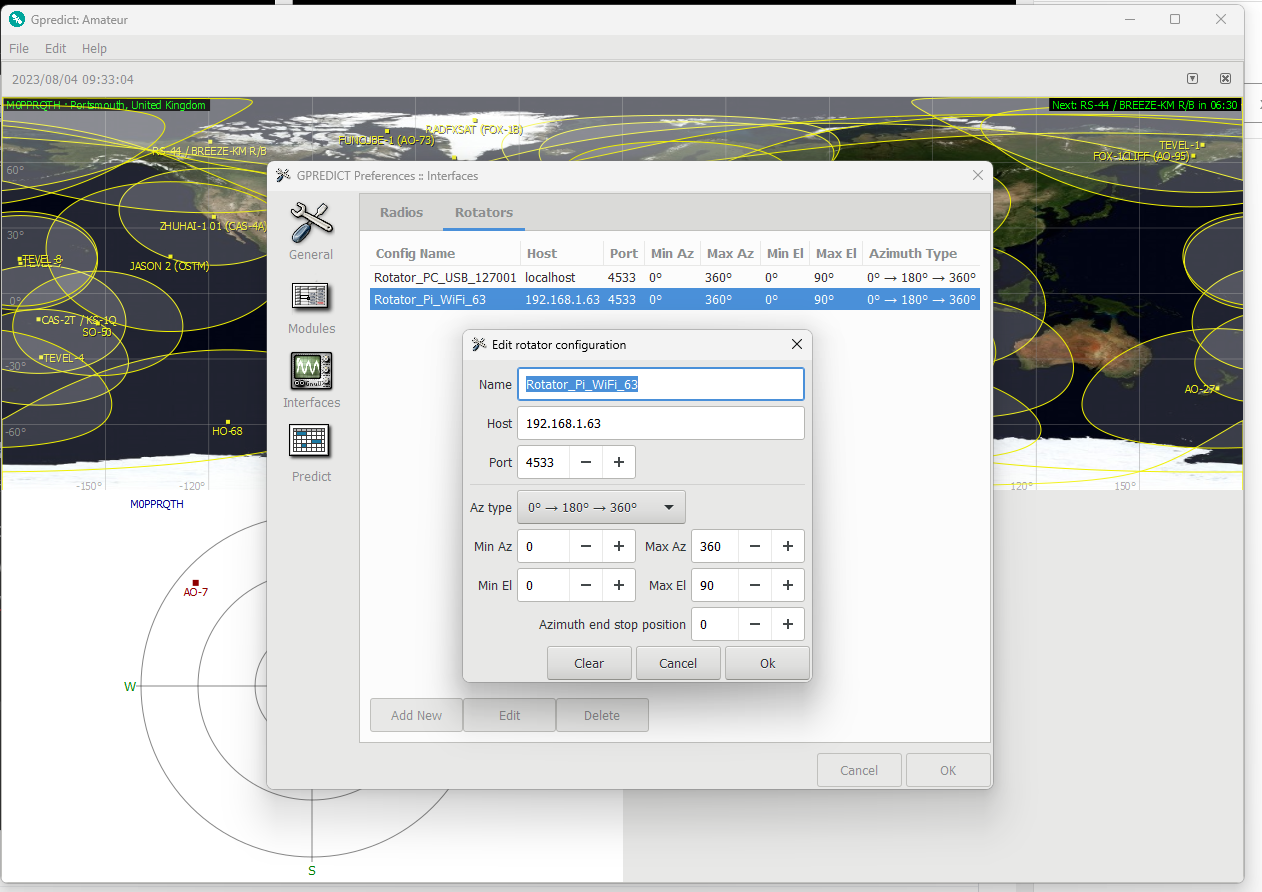
Now you can connect the Gpredict to the Raspberry Pi:
Disadvantage is that you now have to run two pieces of software – HRD to control your radio and Gpredict to rotate your antenna – but it is acceptable.
IMPORTANT: The newest Gpredict is working correctly, but you need to change the TLE servers to get automated updates!!!
Instruction how to do it is here: https://www.rozenek.com/gpredict-does-not-update-satellites/
Job done – have fun!!!
An example QSO done by me through SO-50 satellite – note that I can hear myself 🙂
but… I got disappointed after making some satellite contacts.
The problem is that the most satellites are visible for about 7…8 minutes. During that time the satellites spin, so the signal is changing polarisation. Practically during that 7…8 minutes period I get two or three 2…3 mins slots which let me do a QSO. In case you do not understan why, I can explain: despite the fact the satellite is visible on the sky for 7…8 mins, it spins. Because of the spin it changes polarisation. My arrow antenna is in vertical polarization for 70cm and in horizontal polarization for 2m. It is normal, as TX / RX antennas on satellites are separated by 90 degree angle – so it works perfectly for 1…2 minutes 🙂
What is the solution?
The antenna with a circular polarisation. Is it simple. Hm… In theory yes.
First of all, if you want to go for a circular polarisation, you must have *two* antennas, one for 70cm, one for 2m.
You need to choose between two type of circular polarization antennas
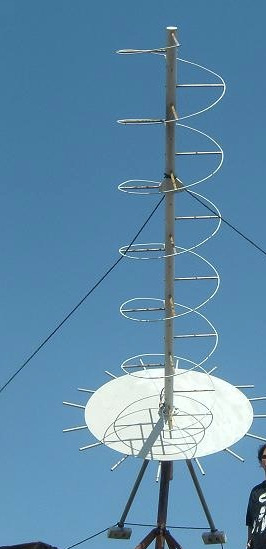
Helical Yagi (mechanically more difficult to make):
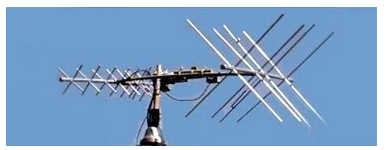
or Cross Yagi:
Whatever you choose, you need to add two antennas to your rotator. The MK1 version is NOT able to take two antennas. The single antenna is connected directly to the motor shaft, which is mechanically not good for the motor warm gearbox and also as mentioned impossible to add two antennas.
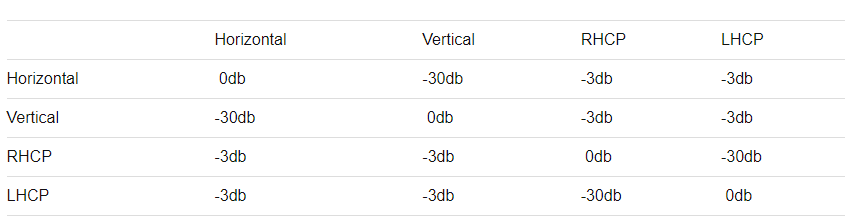
Will the antennas with circular polarisation resolve all problems? It will be a big improvement but it won’t resolve all problems 🙂 First of all, comparing to the best signal on the horizontal/vertical polarisation, you will get 3dB lost – see the table below. However it is acceptable, as you will not experience fading away signal anymore! Most satellites are spinning the way that you have to use RIGHT HAND circular polarisation, but not all of them. If satellite is spinning the other way, you will not receive anything, unless you make the antenna polarised the other way, or you will have to both versions or… you will keep switching polarisation which apparently is achievable on cross Yagi antennas (I need to find out how to do it) – generally you need to keep switching between how coax cables are connected to the cross Yagi antenna system.
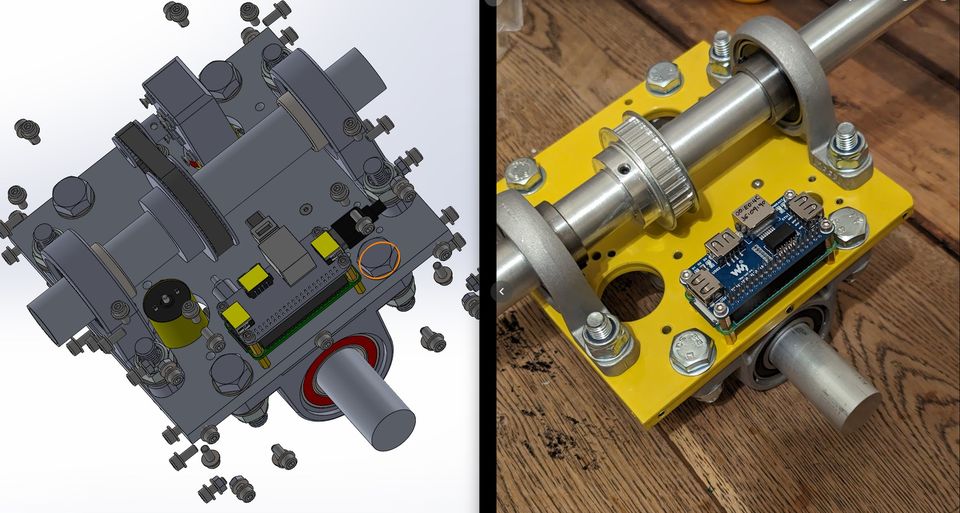
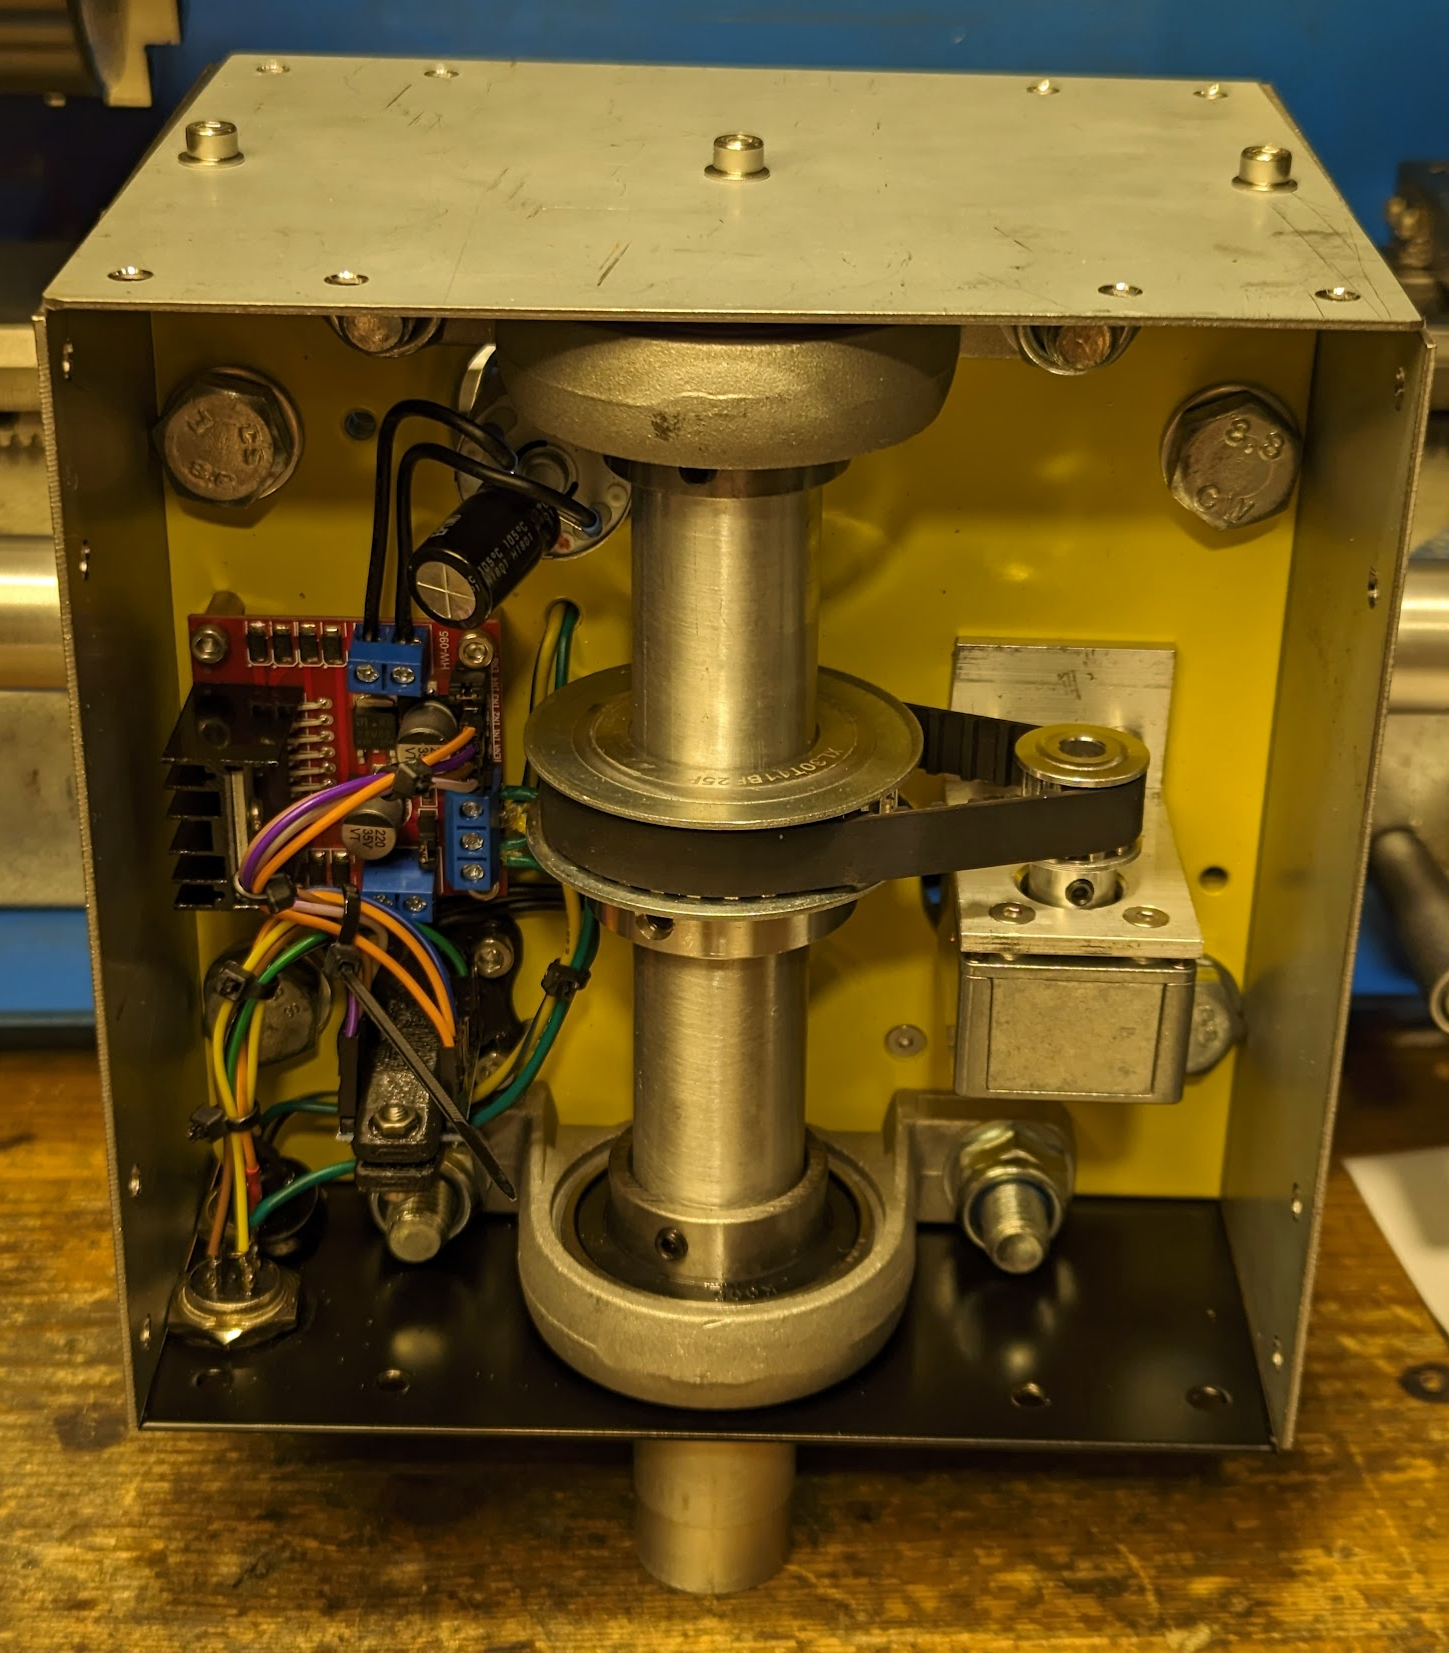
My inspiration was the Sarcnet SarcTRAC MK2 – I decided to add big pillow block bearings to unload some weight from the motors but also to add the shaft going through the box to both sides – to be able to have antennas on both sides!
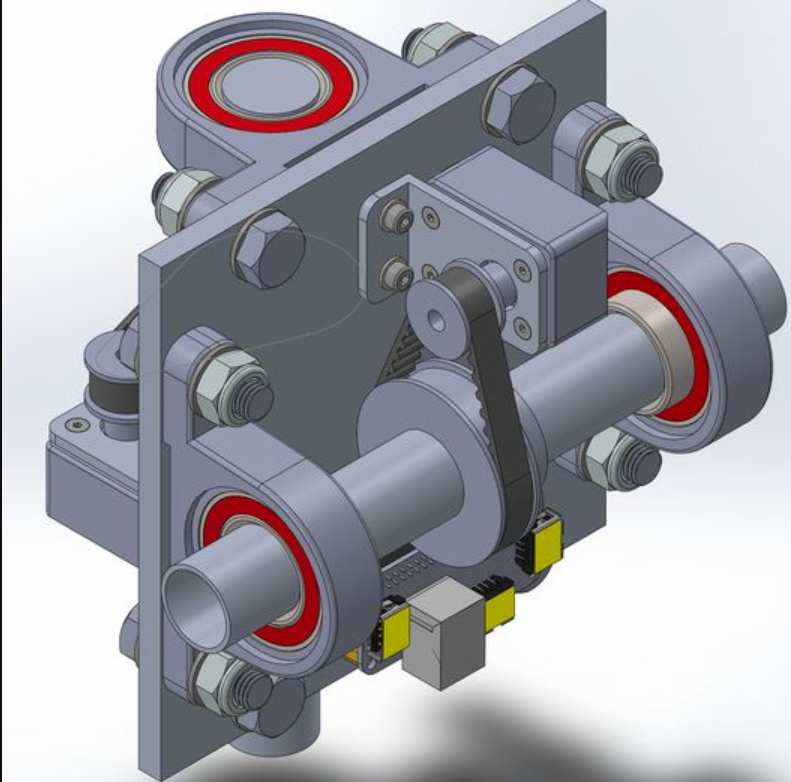
So far I have just designed the MK2 rotator, I am waiting for the parts and I will update this page very soon!
Some programming tips:
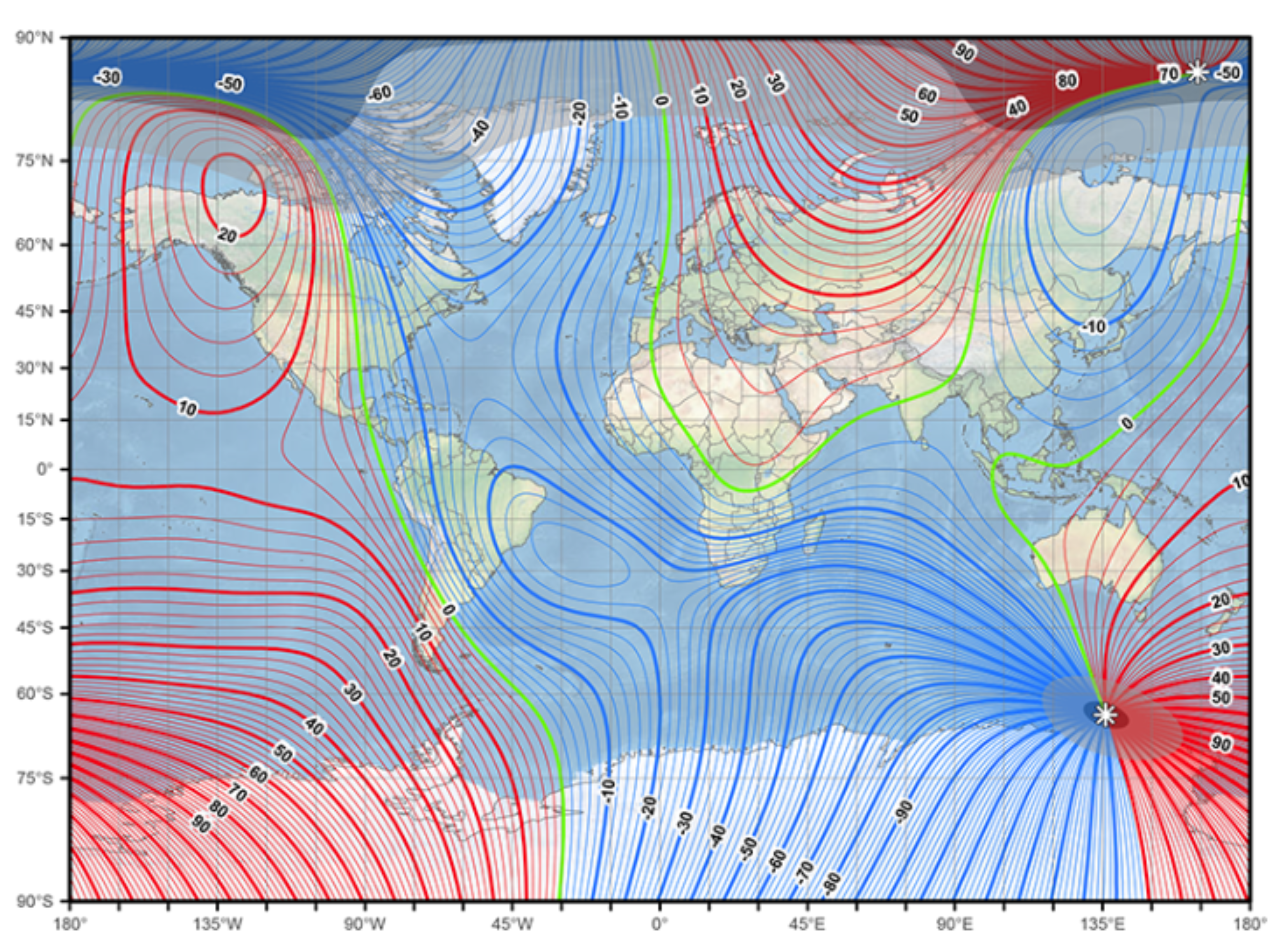
Magnetic declination map:
When instruction from https://www.sarcnet.org/rotator-mk1.html says start up the IDE Serial Monitor (button at top right) it means it is here:
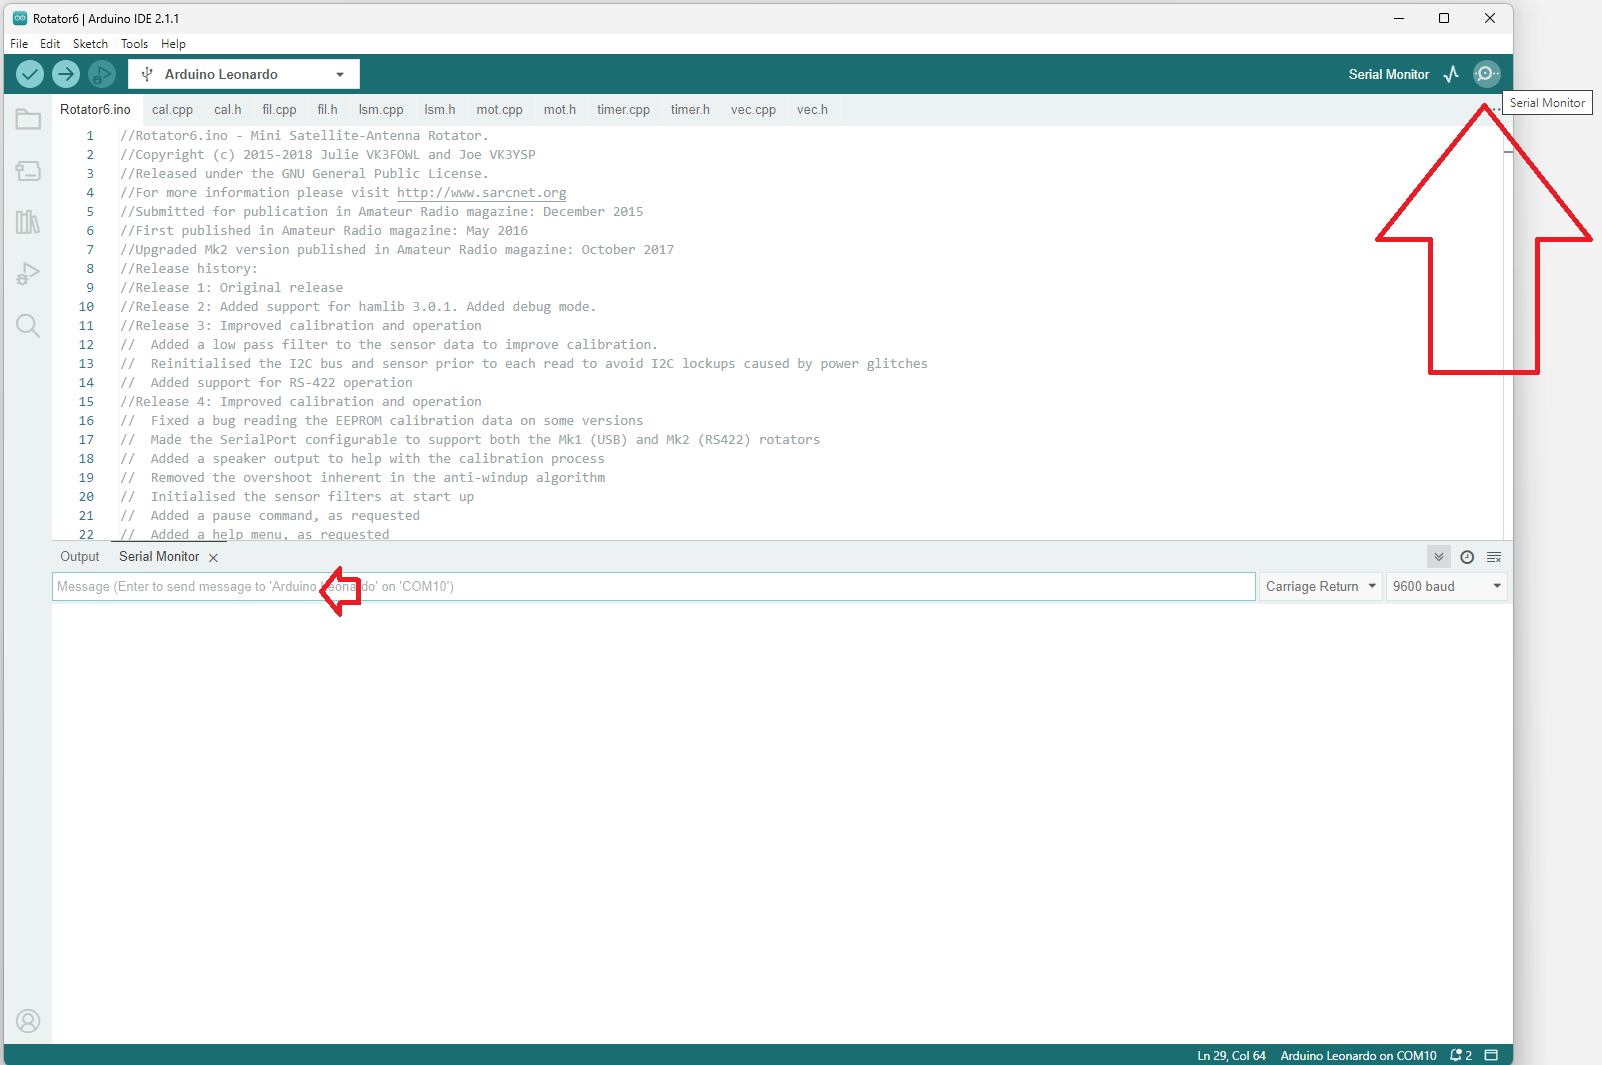
Do not get confused – for final checking your sensor use m (monitor command) – not the b (debug) command.
Also R command wipes the memory – it is NOT a restart command!