Disclaimer: I do not take any responsibility in case something goes wrong with your device. There is a small chance you may brick the Pluto or damage it physically.
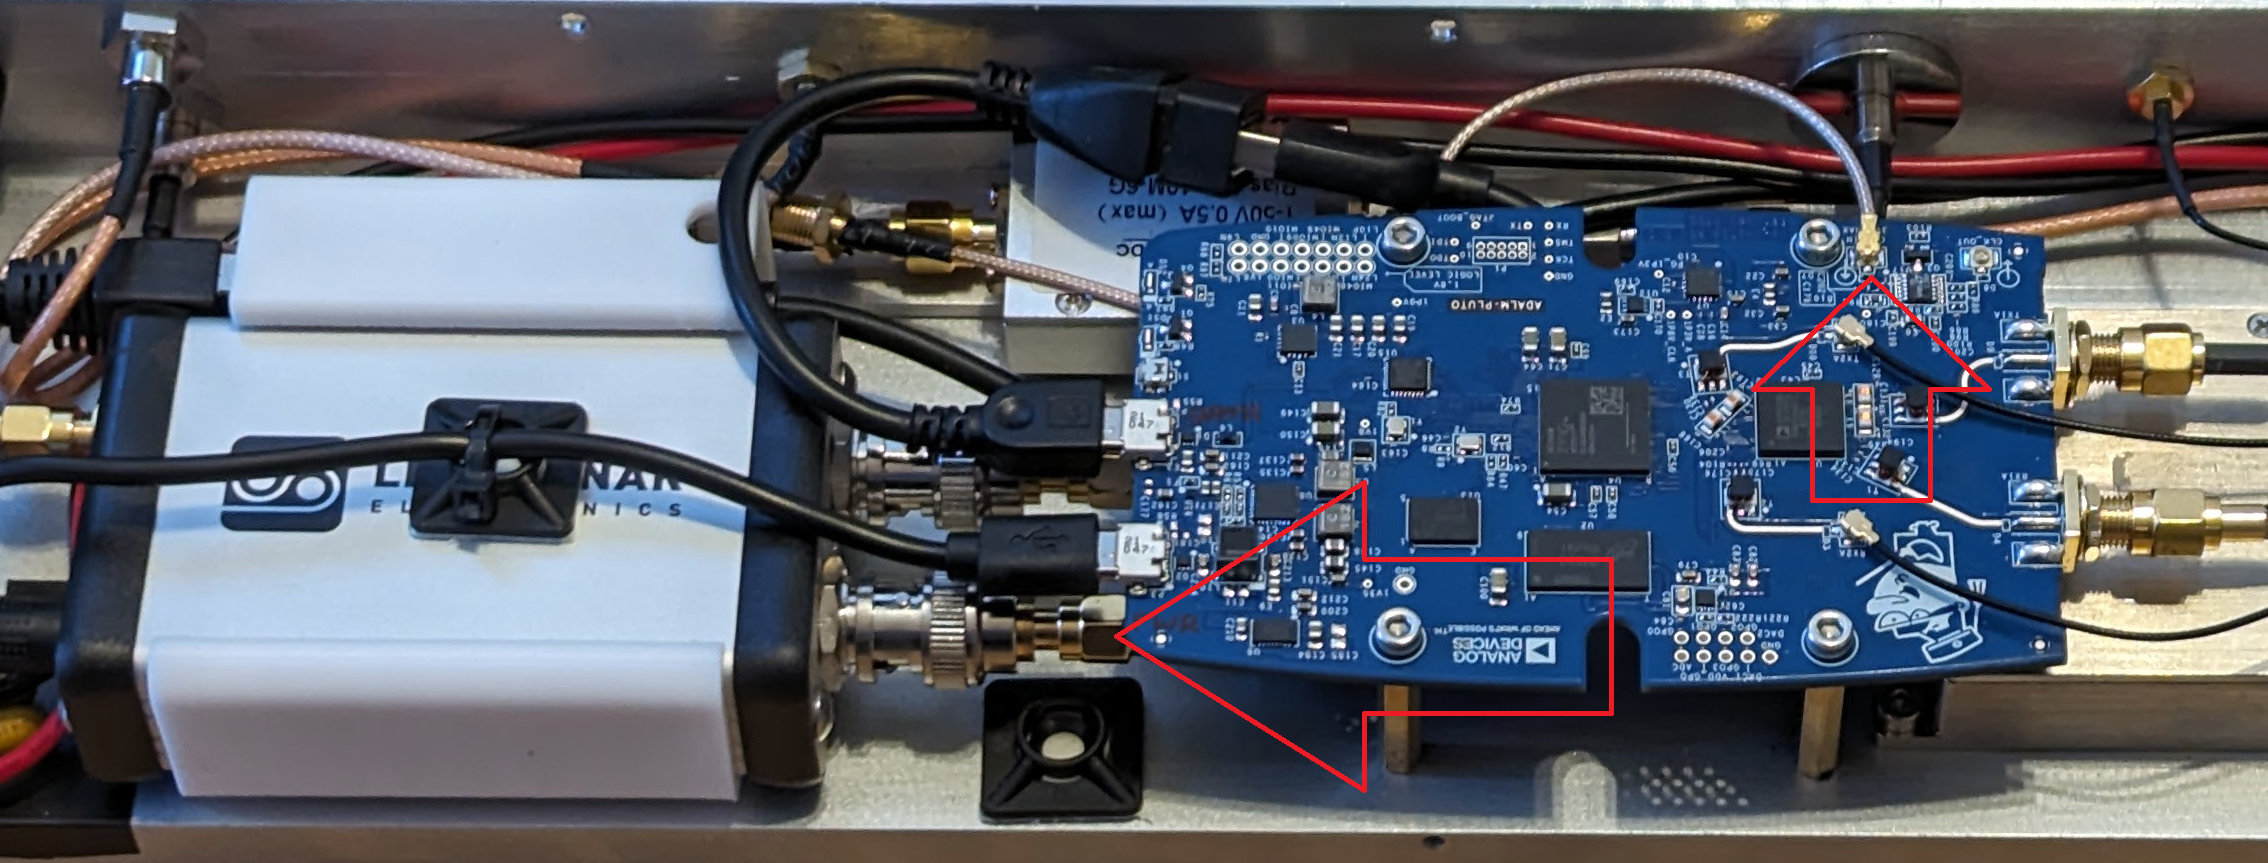
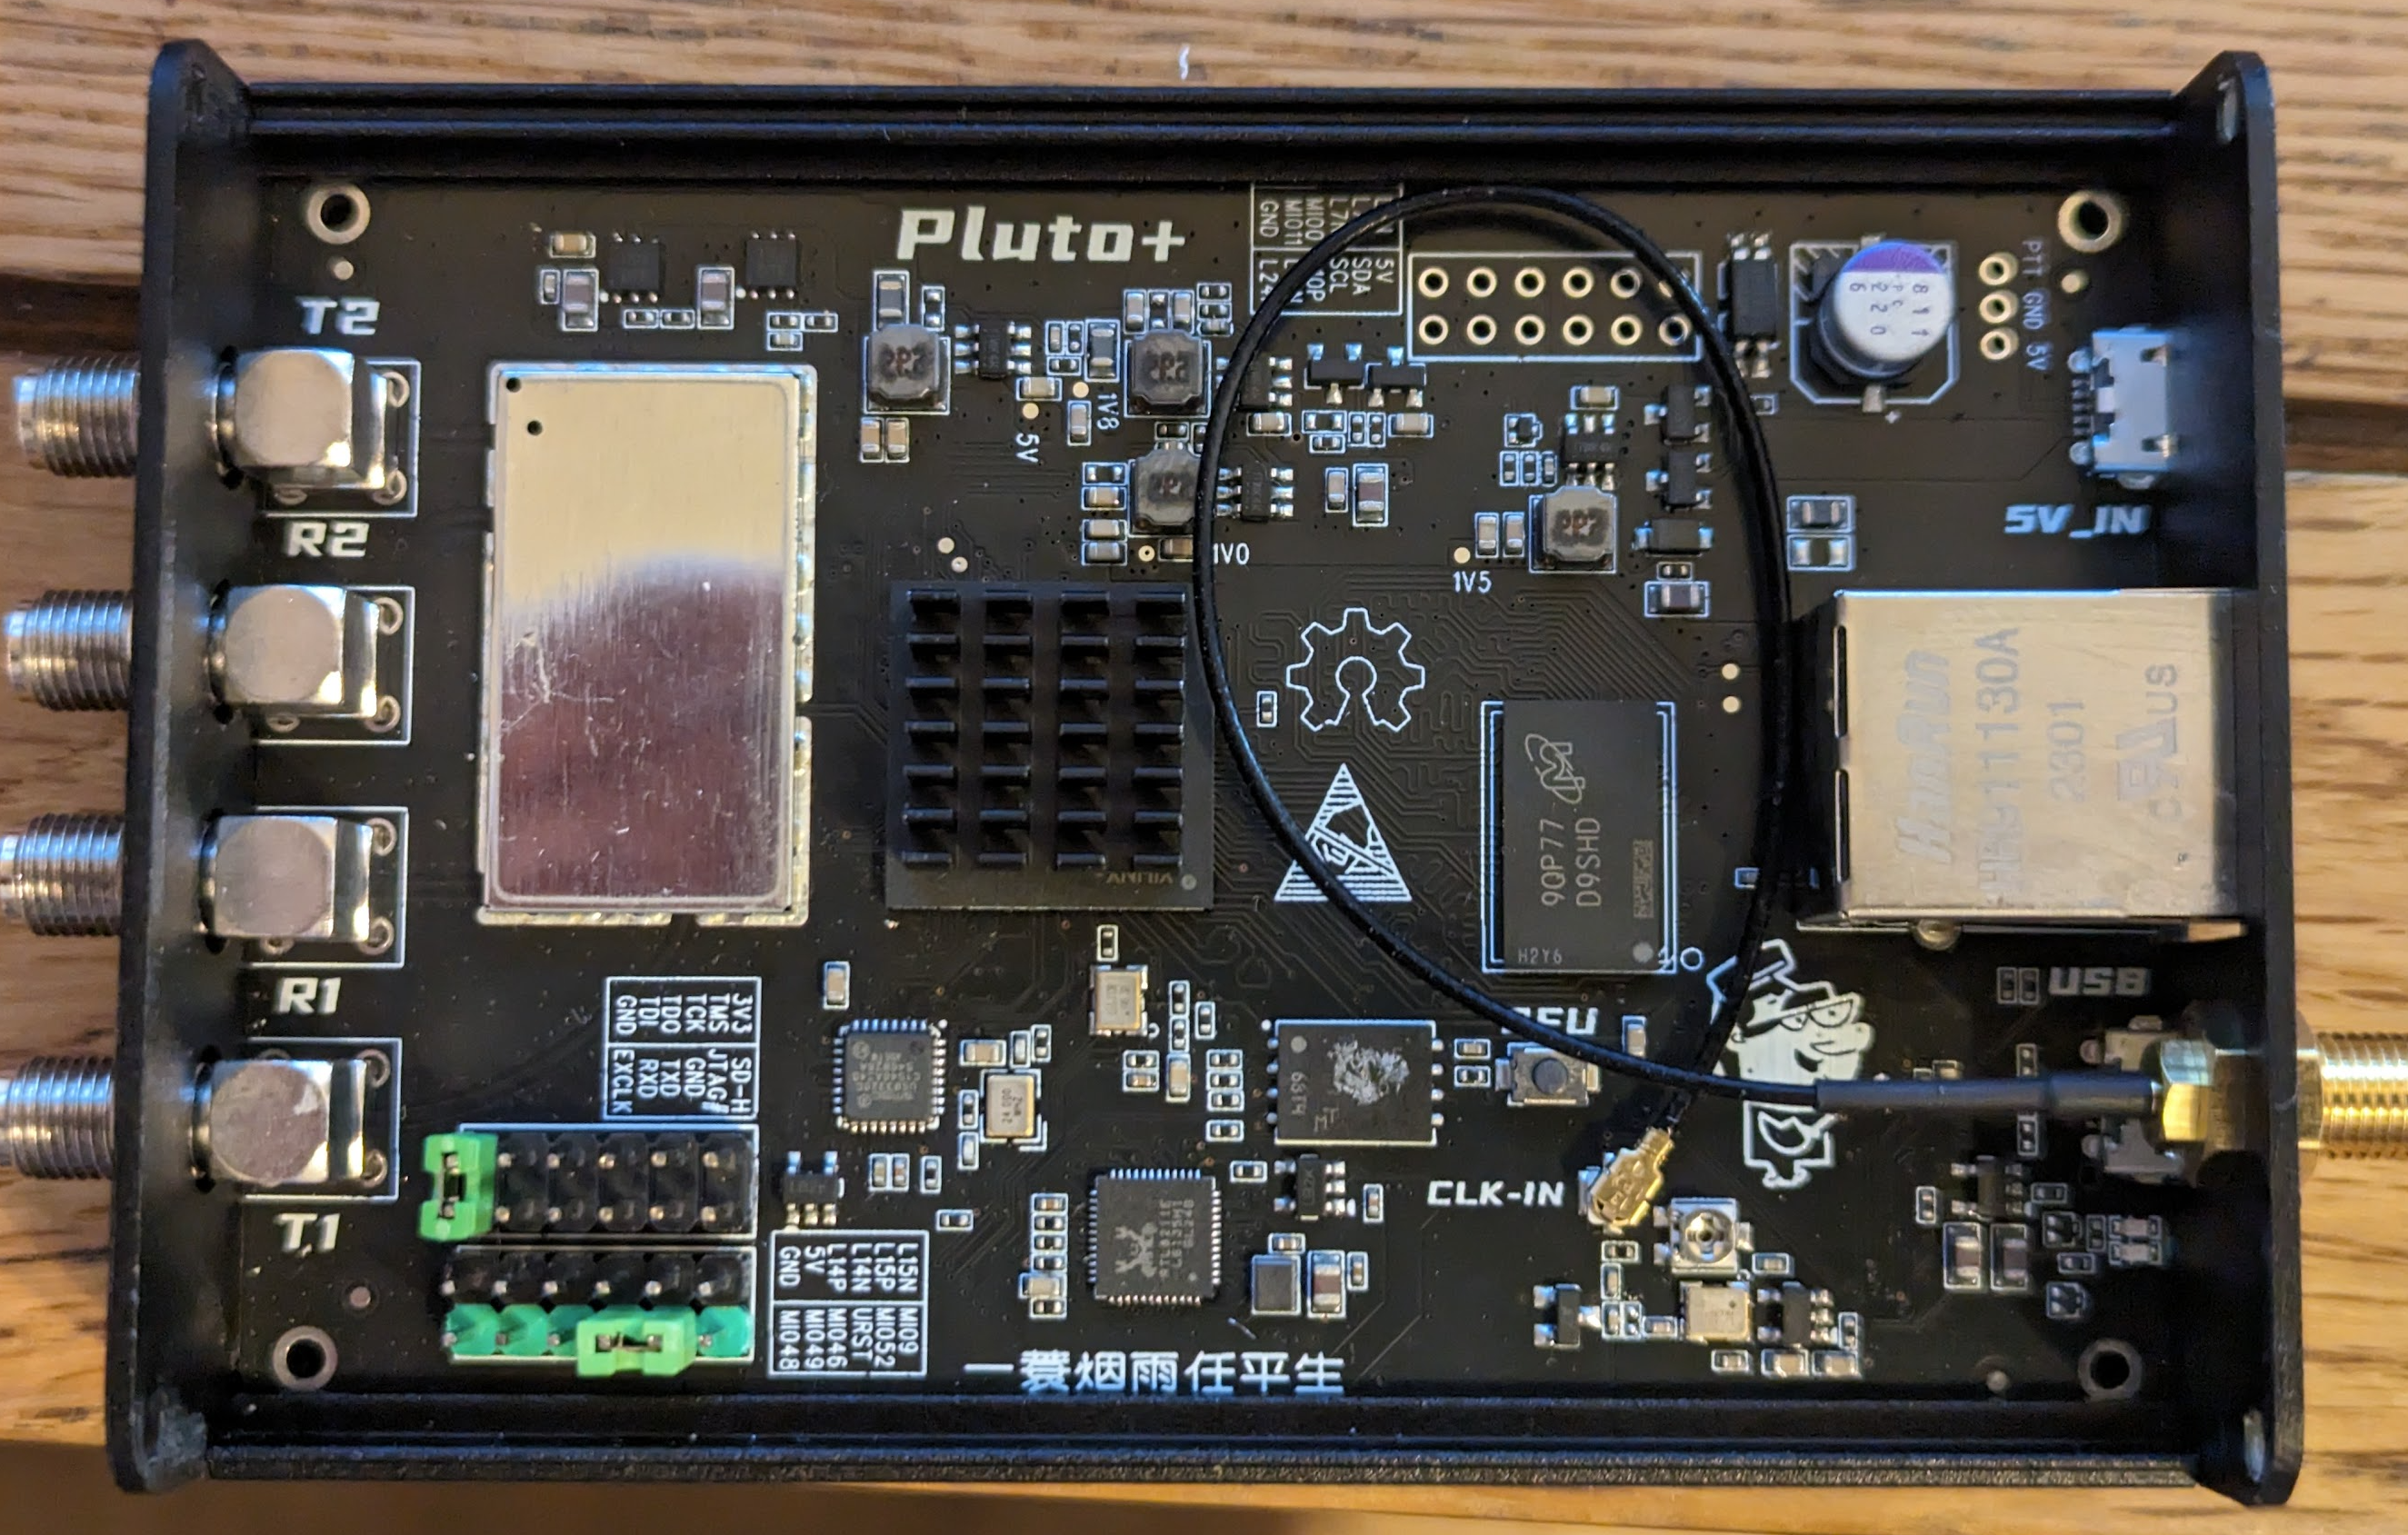
I use Adalm Pluto (rev C) to receive from and transmit to QO-100 geostationary amateur satellite. I keep mentioning Rev C as Rev C is the first revision with ports for RX2 and TX2 and also with added external uFL connectors for 40MHz signal.
Mod 1: GPS DO:
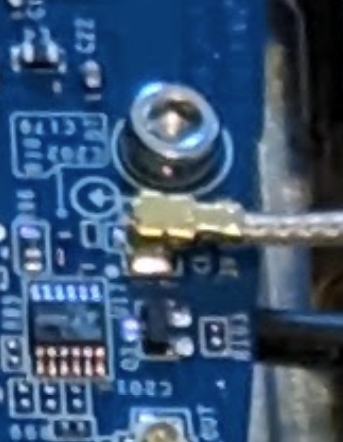
This is the first and the most easy mod for Adalm Pluto. Before I decided to buy the GPS DO from Leo Bodnar, I was using a middle beacon to stabilise the RX/TX frequency. Did it work? Yes, it worked very well. Article how to do it is HERE. So why did I decide to use Leo Bodnar GPS DO? Because… I can 🙂 I did not have to drill any holes in the front panel of the plastic case to add SMA connector for the GPS DO input. I simply removed the PCB and I keep it exposed on 4 standoffs. Then I used a BNC to female SMA adaptor and then a pigtail SMA male into uFL IPX connector. Make sure the uFL connector will not touch any electronic element nearby – keep it in the right position:
Programming Leo is not difficult when you know what to type 🙂

Please note that adding GPS DO signal into your Adalm Pluto will stabilise both RX and TX frequency for the device itself. However the LNB in your dish comes with the internal 25MHz oscillator and it adds additional frequency drift/offset into the Pluto’s RX frequency. So to avoid that I decided to program first output for 40MHz Adalm Pluto reference and the second output 25MHz to stabilise the LNB bullseye – which is relatively stable anyway, but not perfect. The mod for the bullseye has been described HERE.
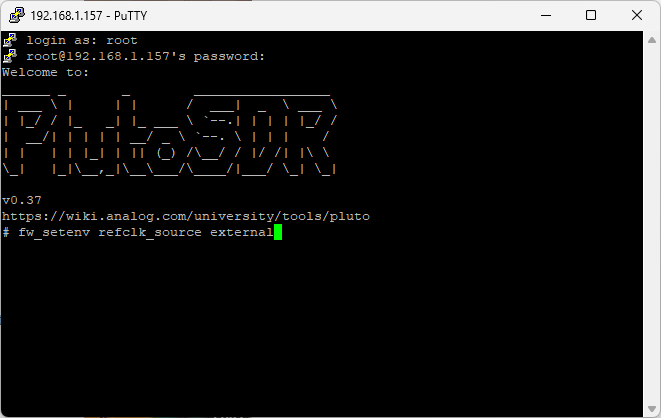
Now you need to tell your Adalm Pluto to use the external frequency reference rather that internal TCXO.
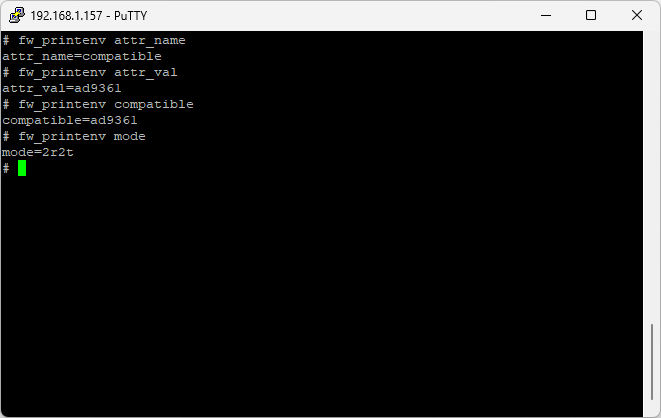
Log into your Pluto using eg. putty. Default login/password is root/analog
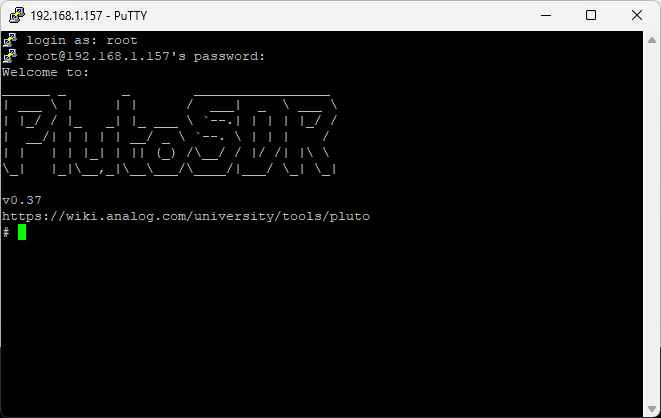
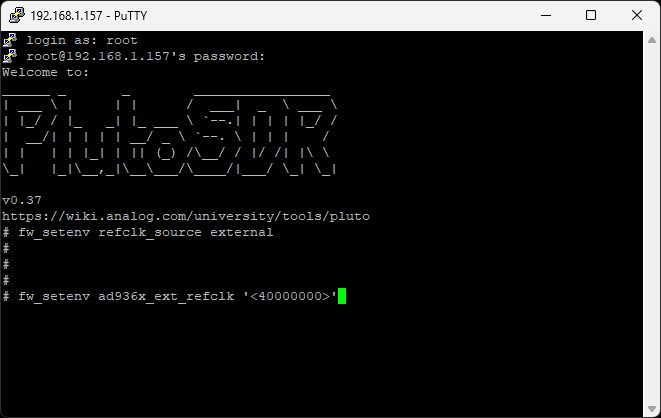
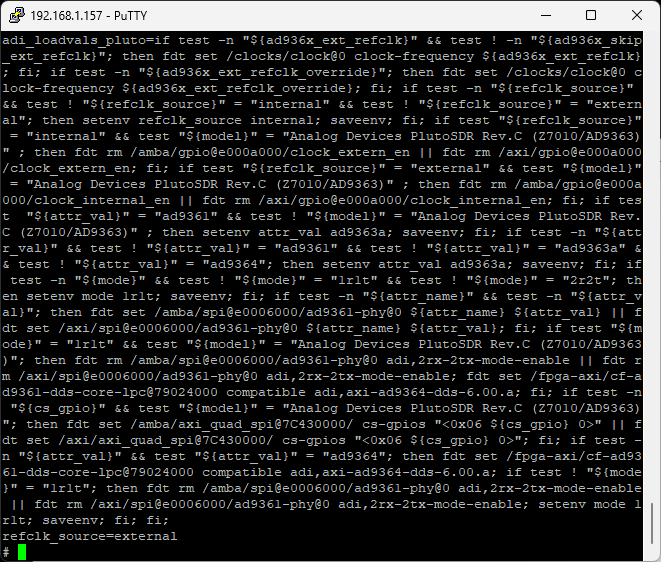
Now type: fw_setenv refclk_source external – this command switches Pluto into the external frequency source
From many internet sources you might find that the next command, which tells Pluto what is the external clock frequency is: fw_setenv ad936x_ext_refclk_override 40000000
However, in my case it did NOT work!!! Later I will show you how I found that out.
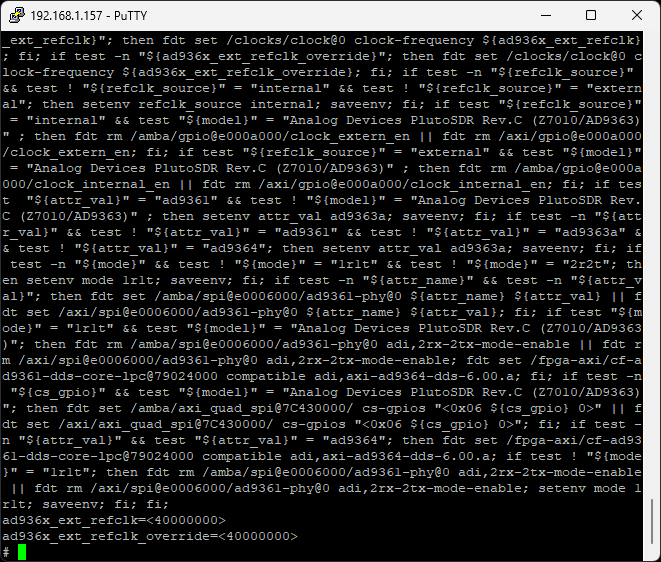
Instead, I had to use command: fw_setenv ad936x_ext_refclk ‘<40000000>’
Now, how to check if it works? Just type: fw_printenv ad936x_ext_refclk
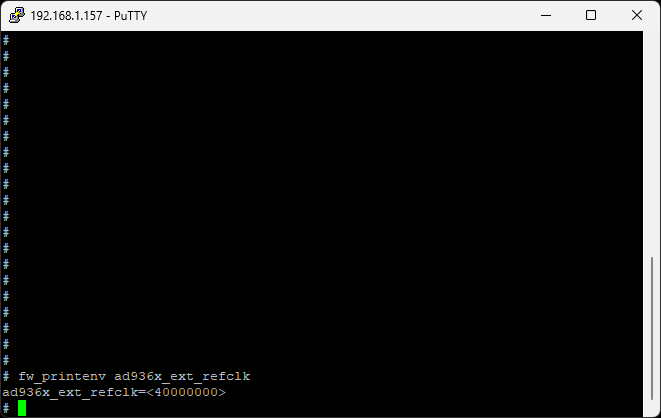
When I tried to type just fw_setenv ad936x_ext_refclk_override 40000000 and then fw_printenv ad936x_ext_refclk I did not see the 40MHz value.
Now you can reboot your Pluto by unplugging the power or typing pluto_reboot reset.
If you find out that after resetting the Pluto you cannot see your previously added external clock settings, type the following command:
fw_setenv qspiboot_extraenv true – this will preserve the settings still after a power off.

Some very useful commands:
fw_printenv – that will give a complete status of all settings

fw_printenv | grep ad936x_ext_refclk // Display setting for refclk:
fw_printenv | grep refclk_source // Display settings for source to clock
If you try to modify a Chinese Pluto clone – called Pluto Plus, do not waste your time and do not forget to add a jumper to the header. I modified original Adalm Pluto and then I modified a Pluto Plus assuming the procedure will be the same 🙂 Then I wasted few hours trying to sort out what was wrong 🙂 In Pluto Plus you need to connect EXCLK with GND. It was easy for me as I decided to add a header ages ago, so I just had to add a jumper between those pins.
Mod 2: Extended RX/TX Range:
By default Adalm Pluto receive and transmit between 325MHz and 3.8GHz. Note very useful especially when you want to listen (or/and TX) to 2m band. It is possible to extend RX and TX range to 70MHz…6GHz. Also the bandwidth will increase from 20MHz to 56MHz. To do that you need to do the following steps:
fw_setenv attr_name compatible
fw_setenv attr_val ad9364
fw_setenv maxcpus
pluto_reboot reset

Mod 3: Adding RX2 & TX2:
Edit: A bit bad news. I just realised that the SDR Console is NOT supporting dual RX/TX (do not get confused wit listening two frequencies simultaneously within one RX/TX as it is different).
Adding RX2 and TX2
fw_setenv attr_name compatible
fw_setenv attr_val ad9361
fw_setenv compatible ad9361
fw_setenv mode 2r2t
pluto_reboot reset

Check settings:
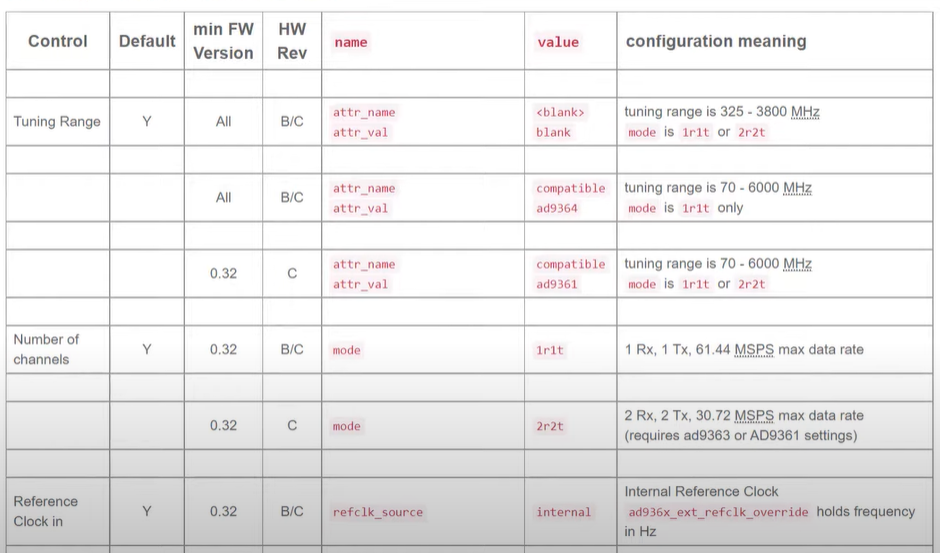
Useful table:
Now go to ths website:
https://analogdevicesinc.github.io/pyadi-iio/
This to be continued!!!