The symptom – a random painting depth then printing using Bambu Lab P1S and Bambu Studio software. However, the problem will for sure affect any printer using that software with AMS unit.
What I found was that the Bambu Studio makes the fill painting tool depth a bit random. This is what I initially thought, but I was a bit wrong, however not fully wrong 🙂 It is still pain in the bottom but once you understand how it works you are fine.
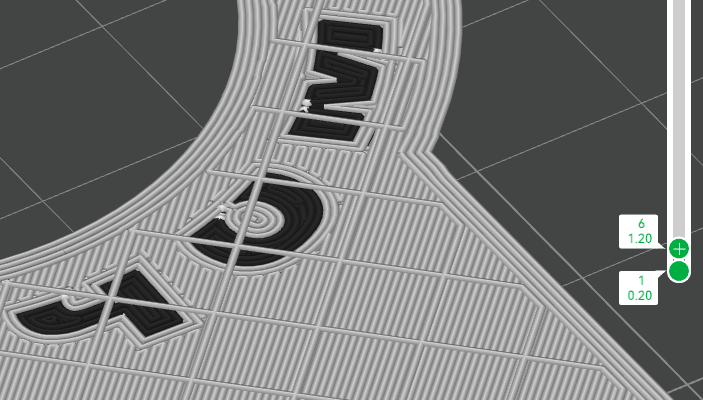
So, let’s start. The part I print looks like this:
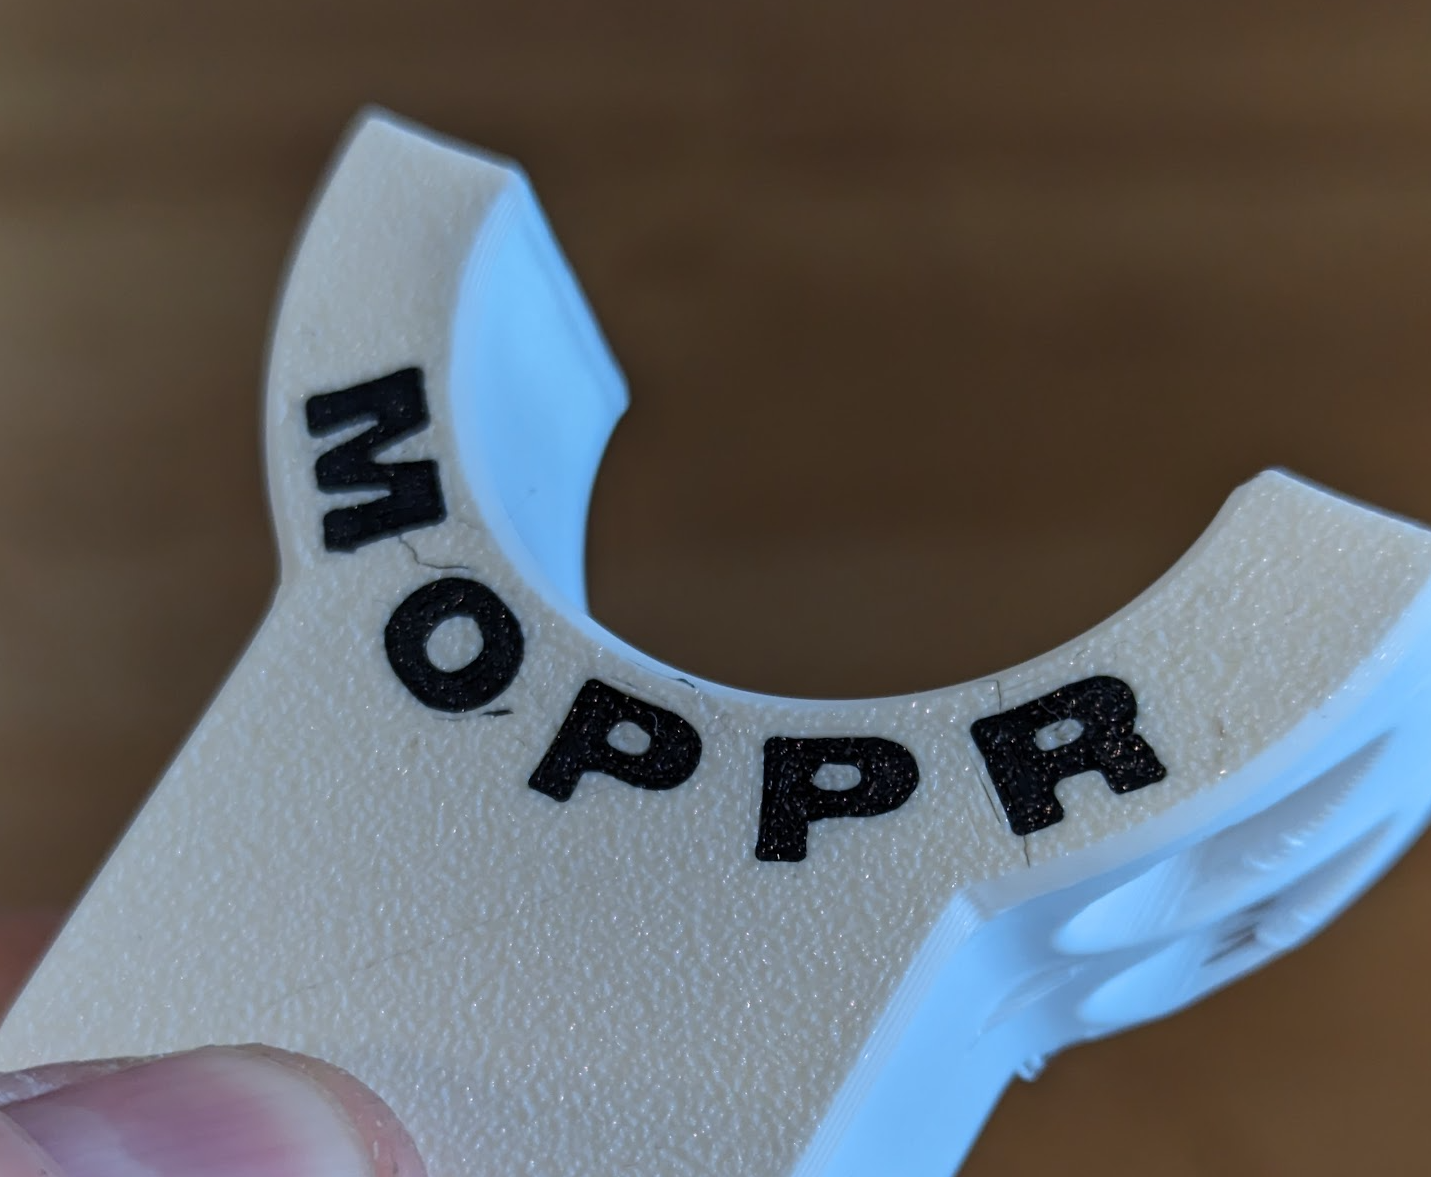
I stopped printing in the middle as I realised that there are some very tiny gaps between black and white colour, which is kind of understandable but not acceptable, as the part will be kept outside and the water may get into the infill:

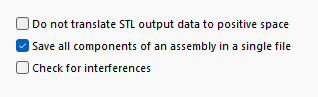
So, why it happens? First of all, I will explain how I make my STL files using Solidworks. I create the main part and then I create, as a separated part the sign. I put both together in Solidworks assembly and I save it under one STL file. In Solidwoks do not forget to check option Save all components of an assembly in a single file. One helpful tip: the thickness of the sign needs to be at least the same as required paint thickness.
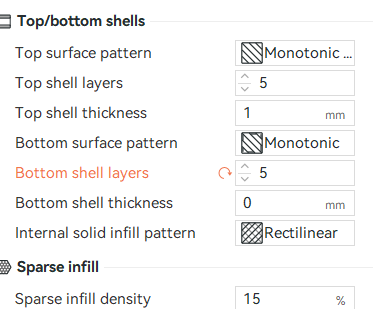
Before you start printing, I would like to explain why it is a good idea to have more than one black layer for the text. Just one single layer is very often not thick enough and the other colour will shows through the text layer. Now, let’s assume you want to have 3 layers thick black text (3 x 0.2mm = 0.6mm), covered with another 2 layers of solid white to make sure it is perfectly covered and water tight. Do not get confused. I know, you need 5 solid layers all together! But… do not set 5 solid bottom layers. Why?
Let’s do it INCORRECT way:
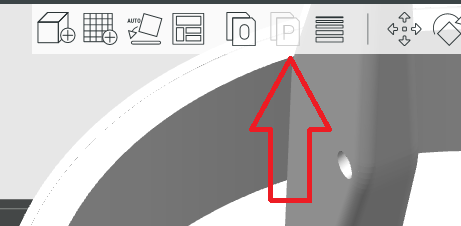
Bring the model into your Bambu Studio:
Do not forget to separate the parts:
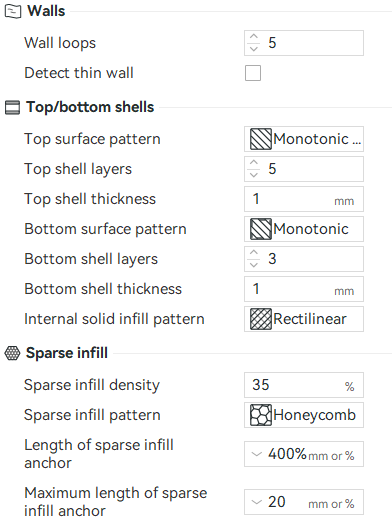
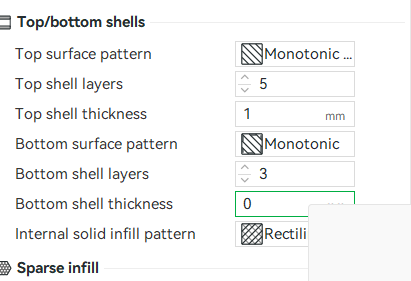
Set up 5 layers:
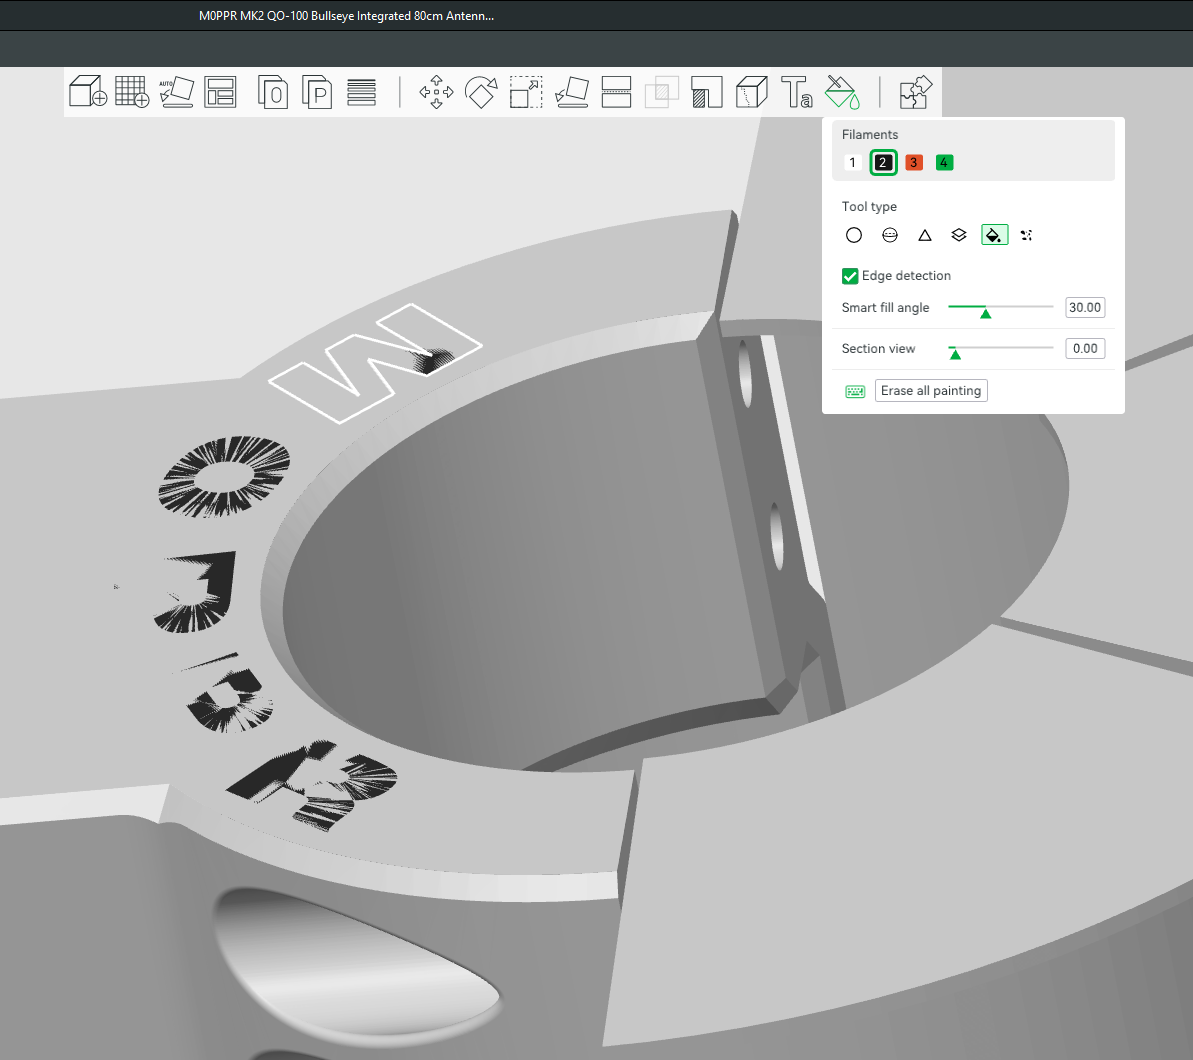
Paint it:
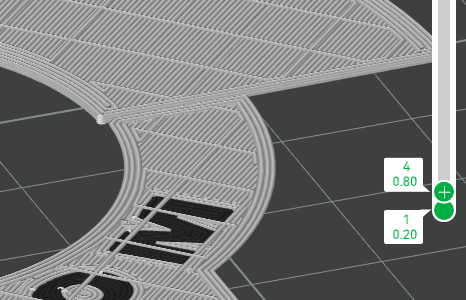
Slice it, and the first 5 layers will look like this:
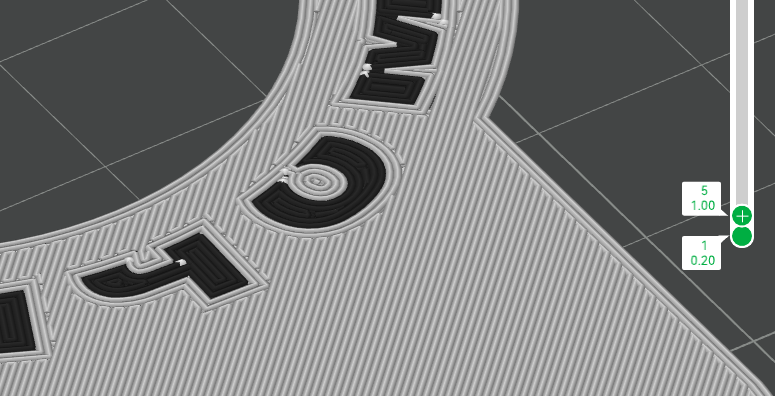
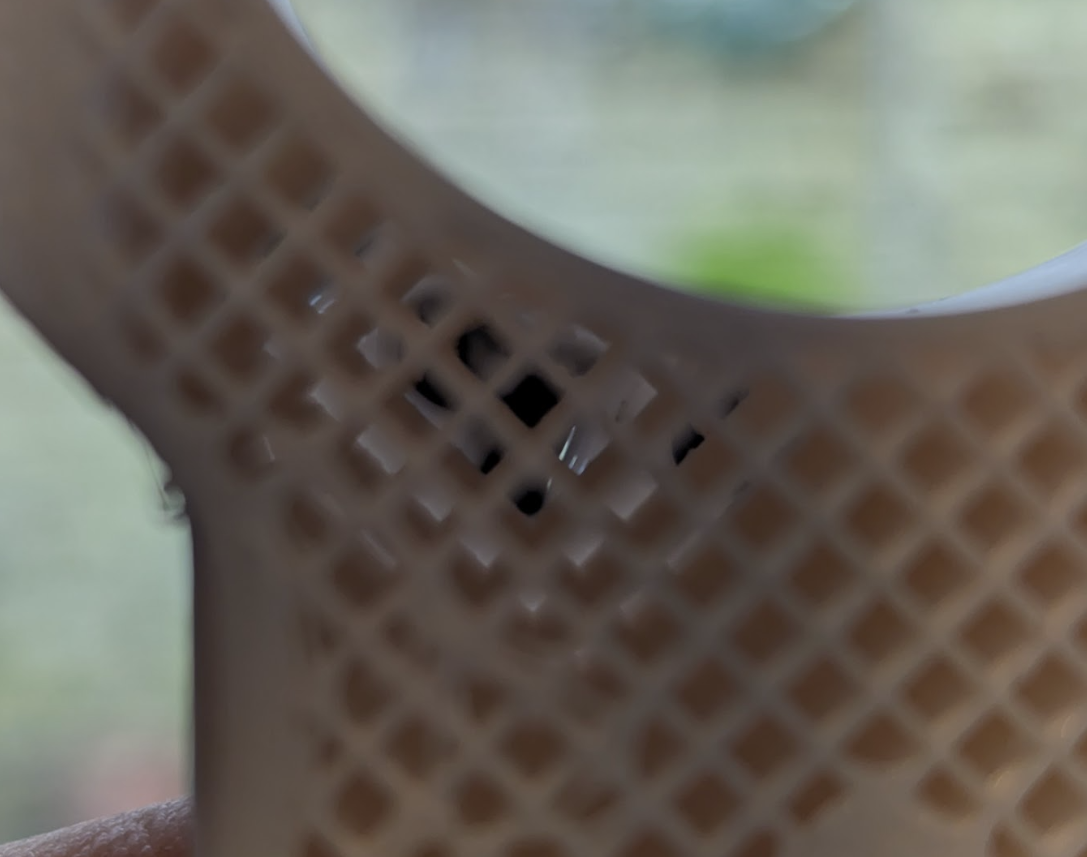
and the sixth layer will start with the infill:
So we did all wrong. 🙂 The black text is too thick, and there will still be a water coming into the inside of the print!
So how to fix it in the Bambu Studio slicer?
Let’s do it CORRECT way:
Arase all painting (you can skip the first step below if you start from scratch):

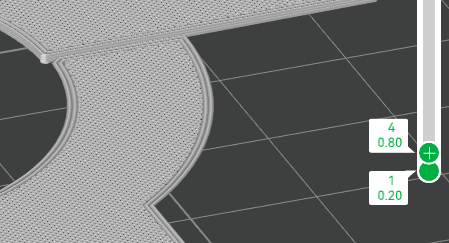
Set up bottom layers to 3:
Paint it:
Slice it now, yes, NOW – I know it is stupid!! But this is the only one way to force Bambu Studio to get it correct!! If you don’t slice it now, it won’t work. After slicing, it will look like this on the 4th layer, which is a good start, as we want 3 solid layers with both colours…
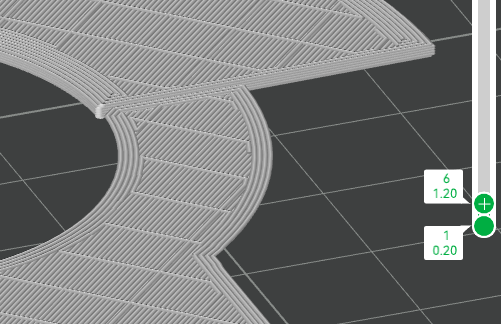
…but we also want another 2 solid, white layers. So, now, change the number of layers to 5:
Now slice it again (and nothing change, I still think it is stupid, but it is only one way to get it correct) – the first 3 layers look like that:
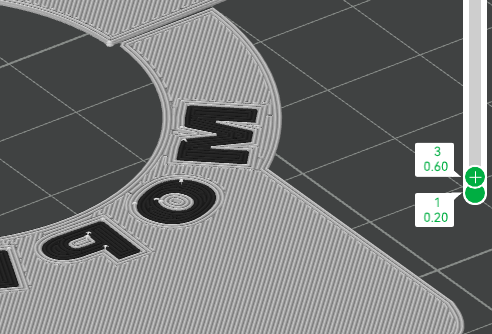
4th layer:
5th layer:

6th layer is starting with the infill.
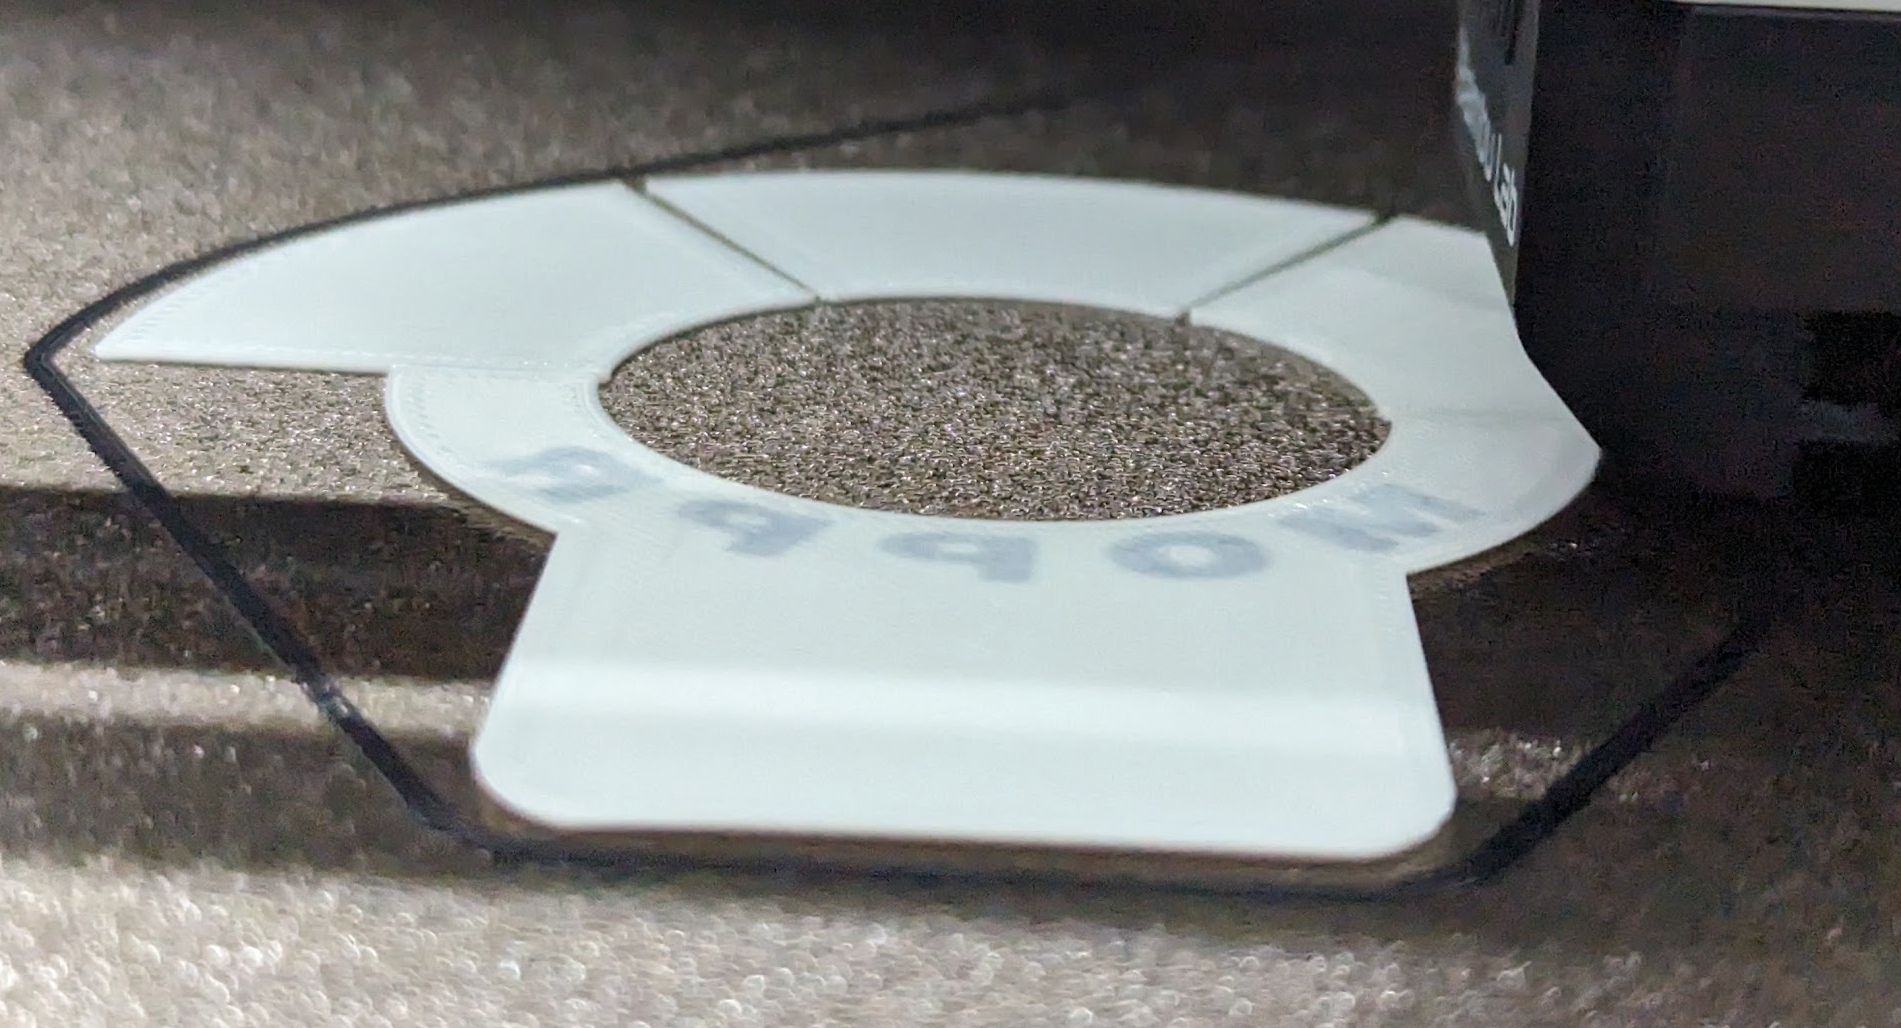
This is how to correct printing looks like:
If for whatever reasons you need to print the part again, after reopening the project you will have to slice it again, then your coloured layer settings get back to “normal bad” again and you will have to repeat the process. Thank you Bambu Lab for making things so hard!!!
Another solution, which randomly works is 3 bottom layers and bottom thickness 1mm