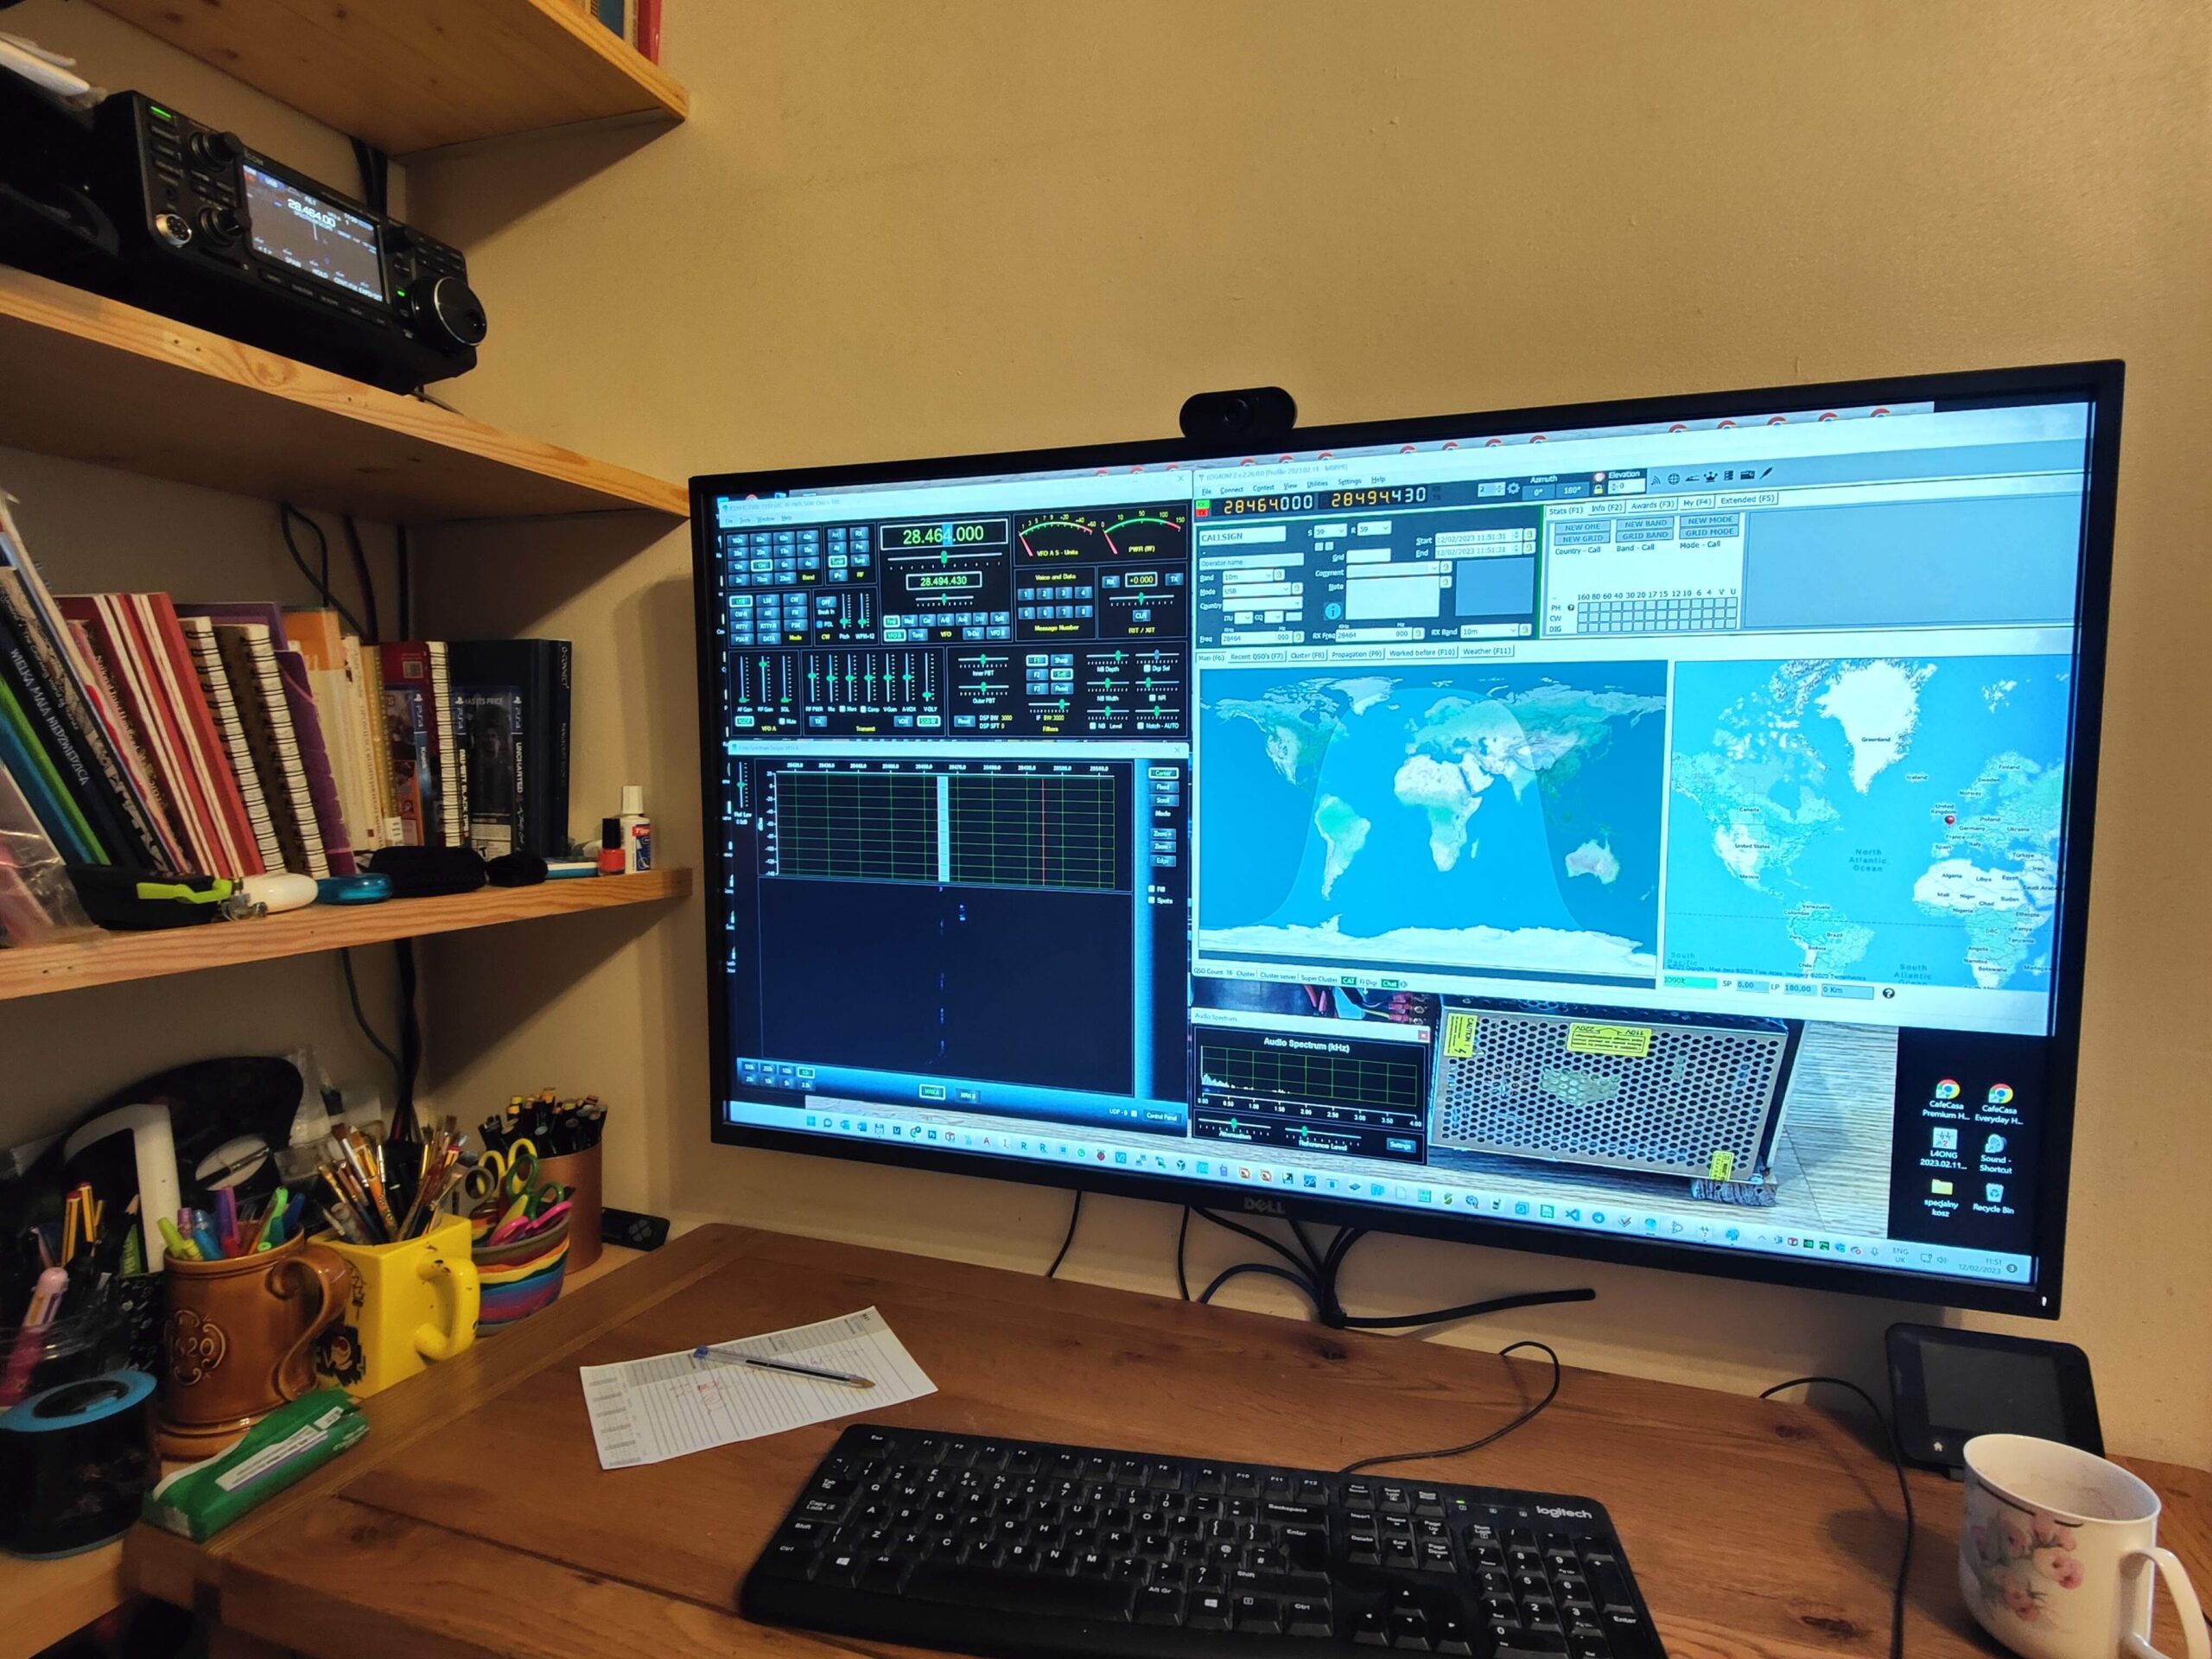
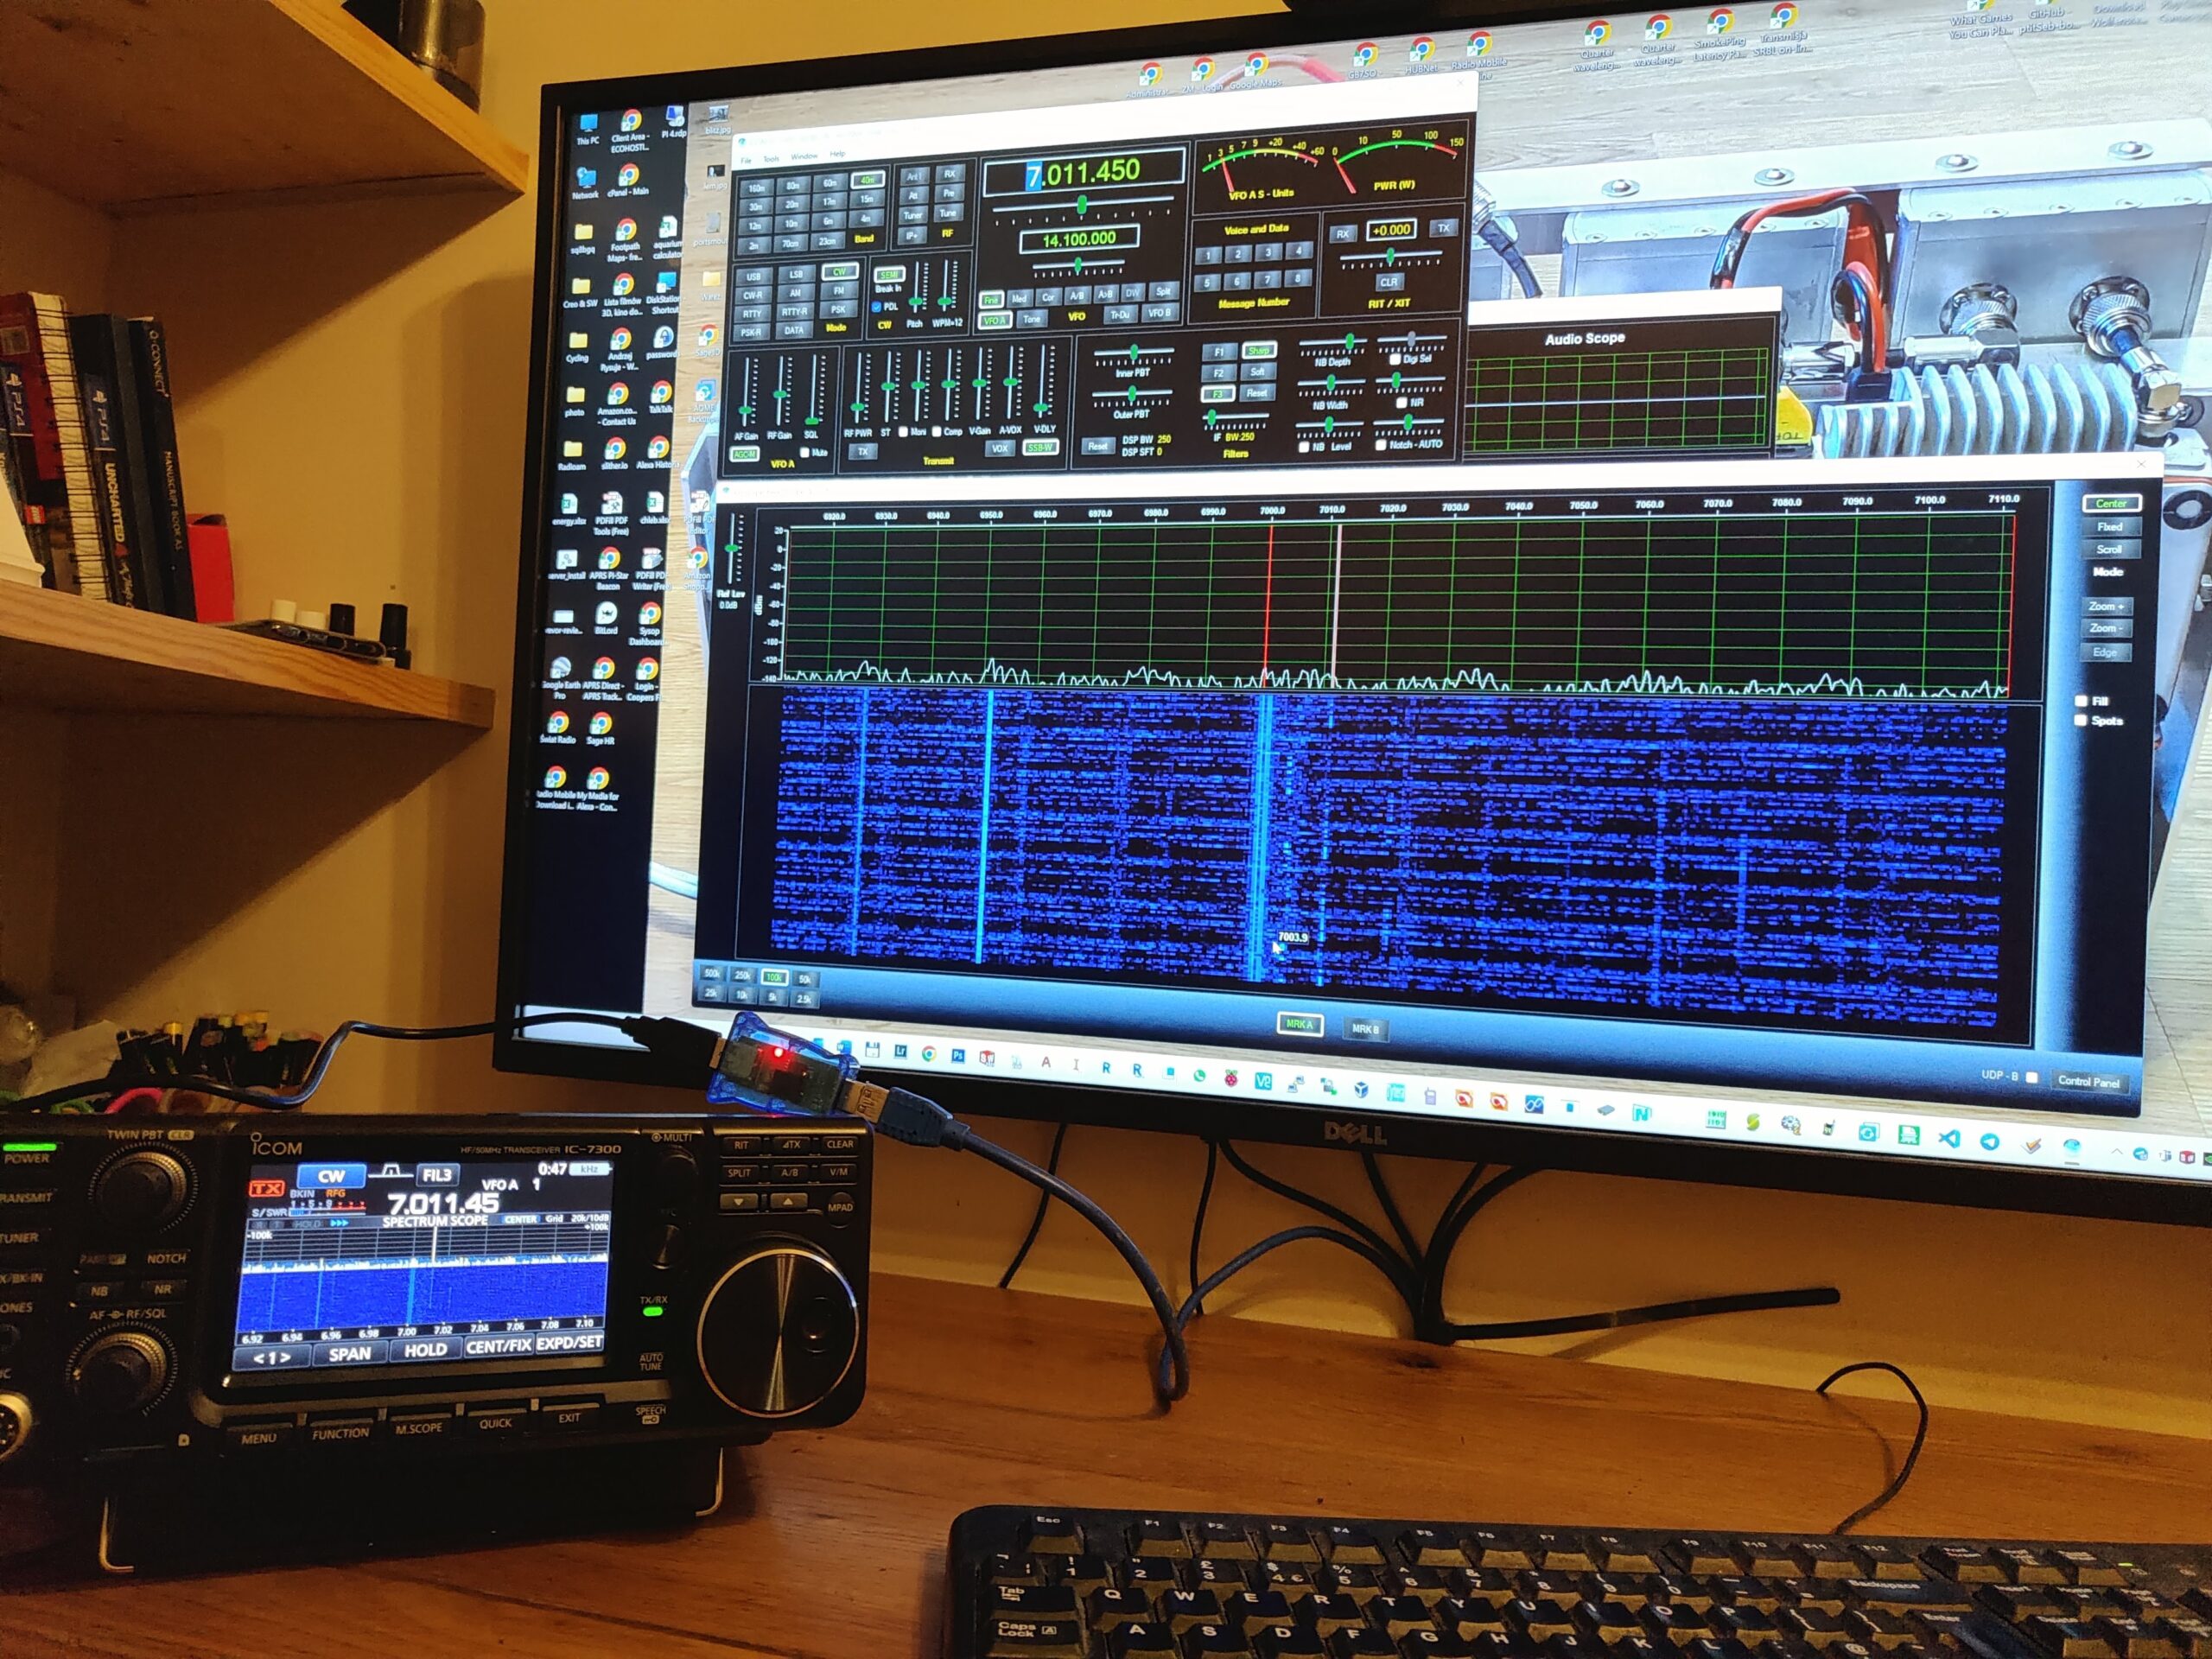
I have recently decided to reactivate myself on short waves after many years break. My house is not big so I do not have an intended room for my hobbies and my daughters are still not big enough to keep the radio within reach of their hands – they may accidently damaged the device. So I decided to keep the radio a bit higher. But… it is impossible to operate the radio from there. Also it could be a bit awkward to keep moving the radio from the shelf to my desk.
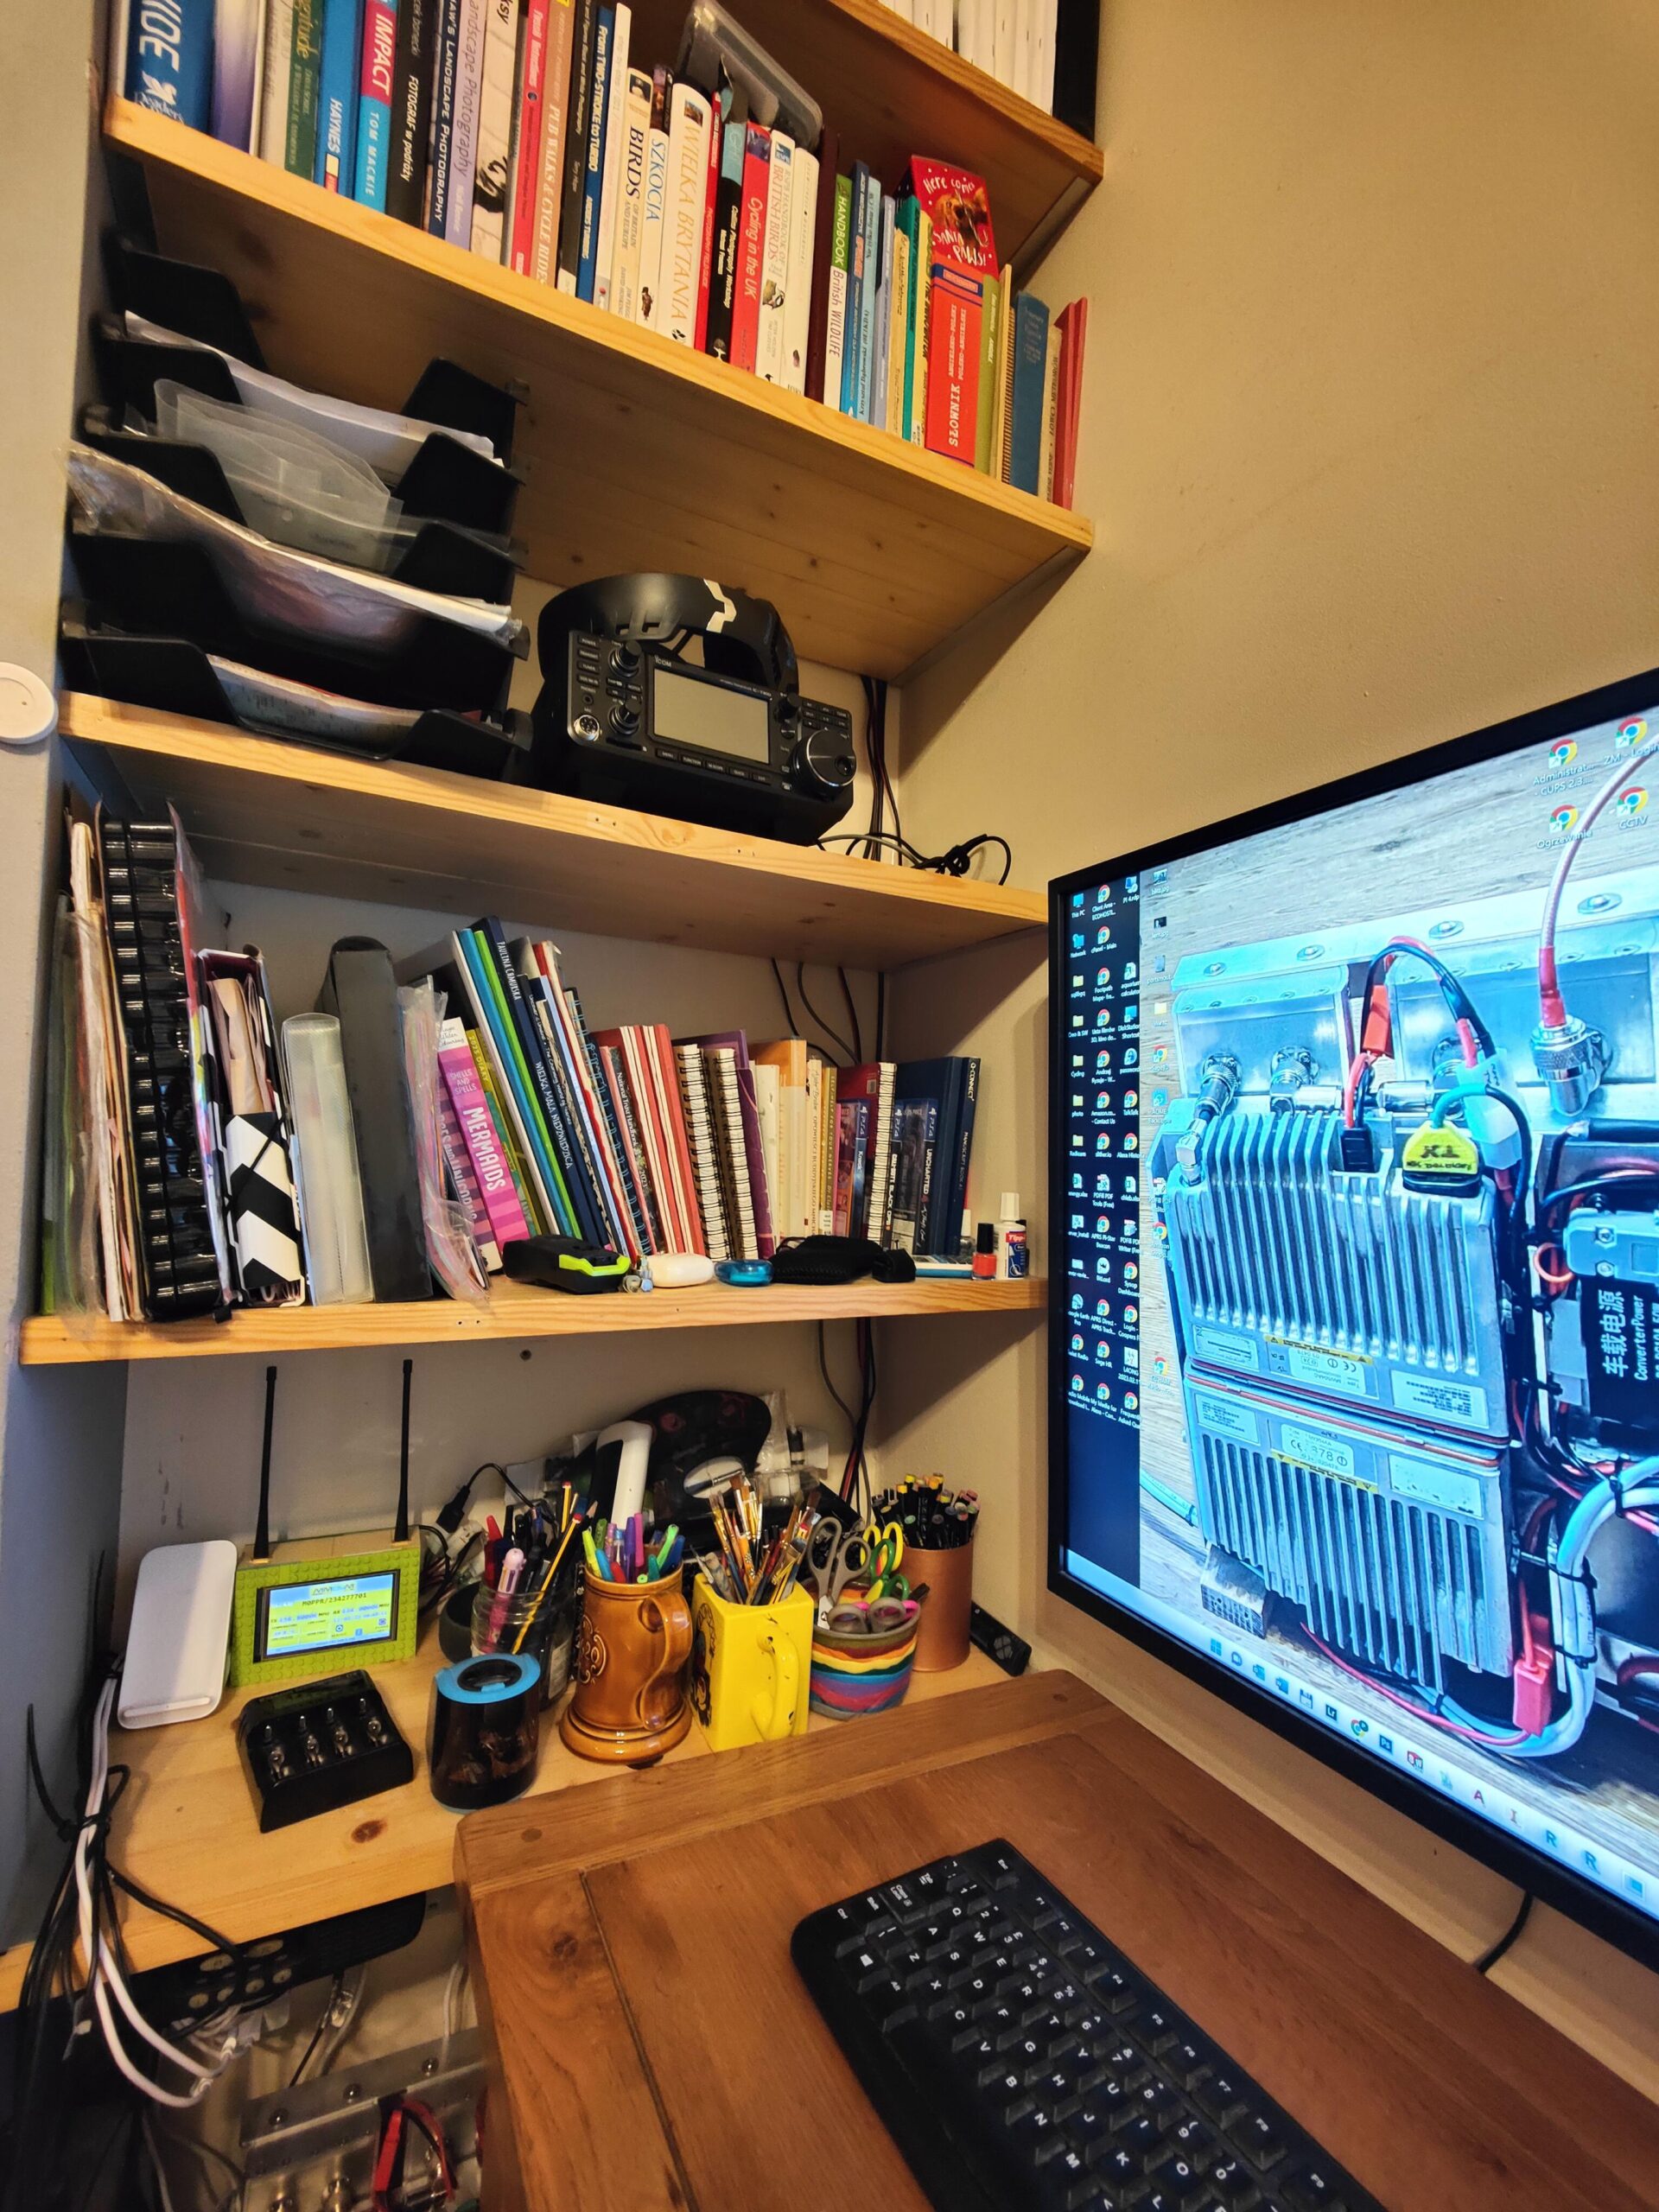
The solution is Win4Icom. Unfortunately it is not free software and a bit costly, but worth every single penny.
OPPO Find X5 (3.5mm, f/2.2, 1/33 sec, ISO1200)All procedures described below are base on Icom IC-7300 however many other Icom radio models will work the same way with Win4Icom. Moreover, procedure of integration with Log4OM will be the same for manu other brands like Yaesu, Kenwood etc etc etc. The software will let you control your radio within the range of the USB type B cable. I personally use 5m long cable.
Safety of your devices
Yes, it is quite important. Just after I bought the radio and connected the radio to my PC through the USB cable. Everything was fine. When next day I tried to turn on my PC I found the PC died. Fortunately the radio was completely fine! Later on I found that the motherboard of my computer died. Good news was that the HDD was fine so I did not have to worry about getting my data back from the backup. I can only imagine the damage happened when I pressed power button in my PC so an electric impulse went thru the UCB cable and did the damage. I learnt the lessen and I connected the body of the PC with the body of my radio and with the body of my power supply using a thick cable. Since then (2 weeks now in Feb 2023) nothing wrong happened again.
Damaged PC motherboard was not only one issue. Other issue was that pressing PTT and transmitting through the radio was making the software crazy. I was getting error messages saying about problem with the connection to the radio. It was caused by the RF signals coming thru the USB cable into the PC. It is a known problem.
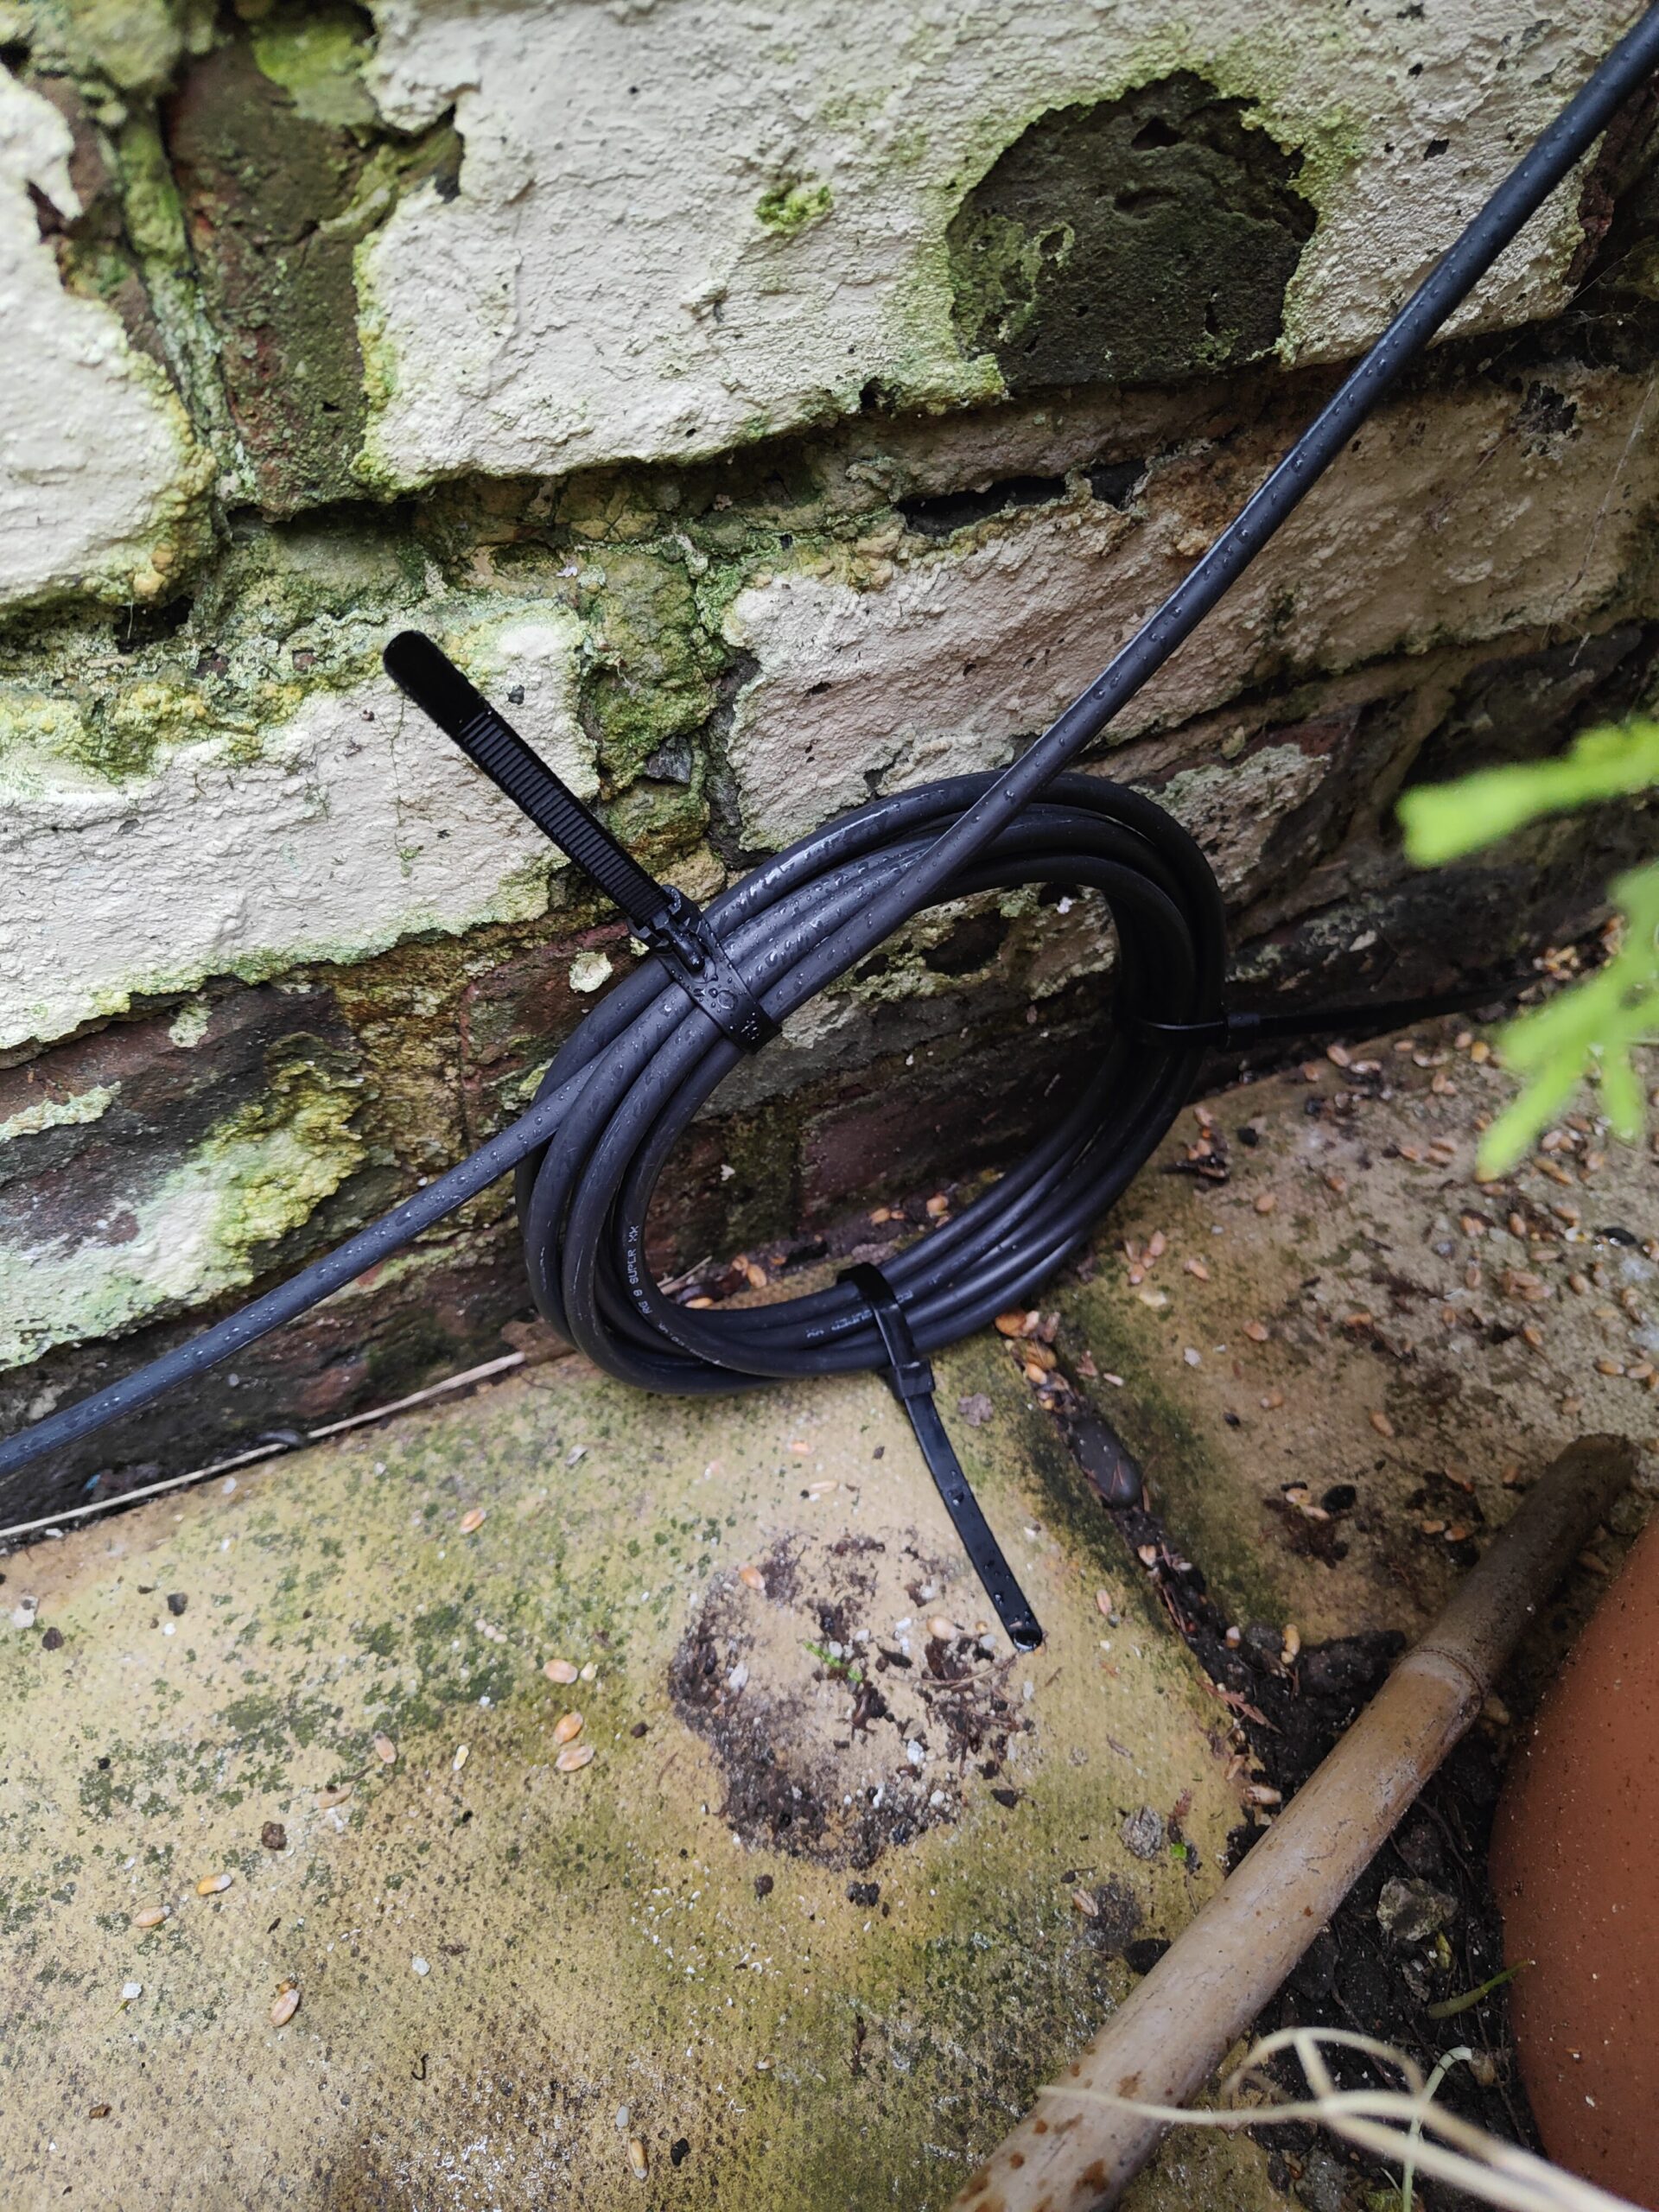
The solution was to add some ferrite cores with few loops around them on both sides close to both ends of the cable. Of course you can buy a good quality cable with ferrite rings. Of course the cable must be shielded. Also the other preventing action was to do 10 turn loops on about 100mm diameter on my antenna cable close to the radio and then the same close to the antenna. Loops are nothing wrong for the RF signals going inside of the cable but they stop the antenna cable being used as a radial.
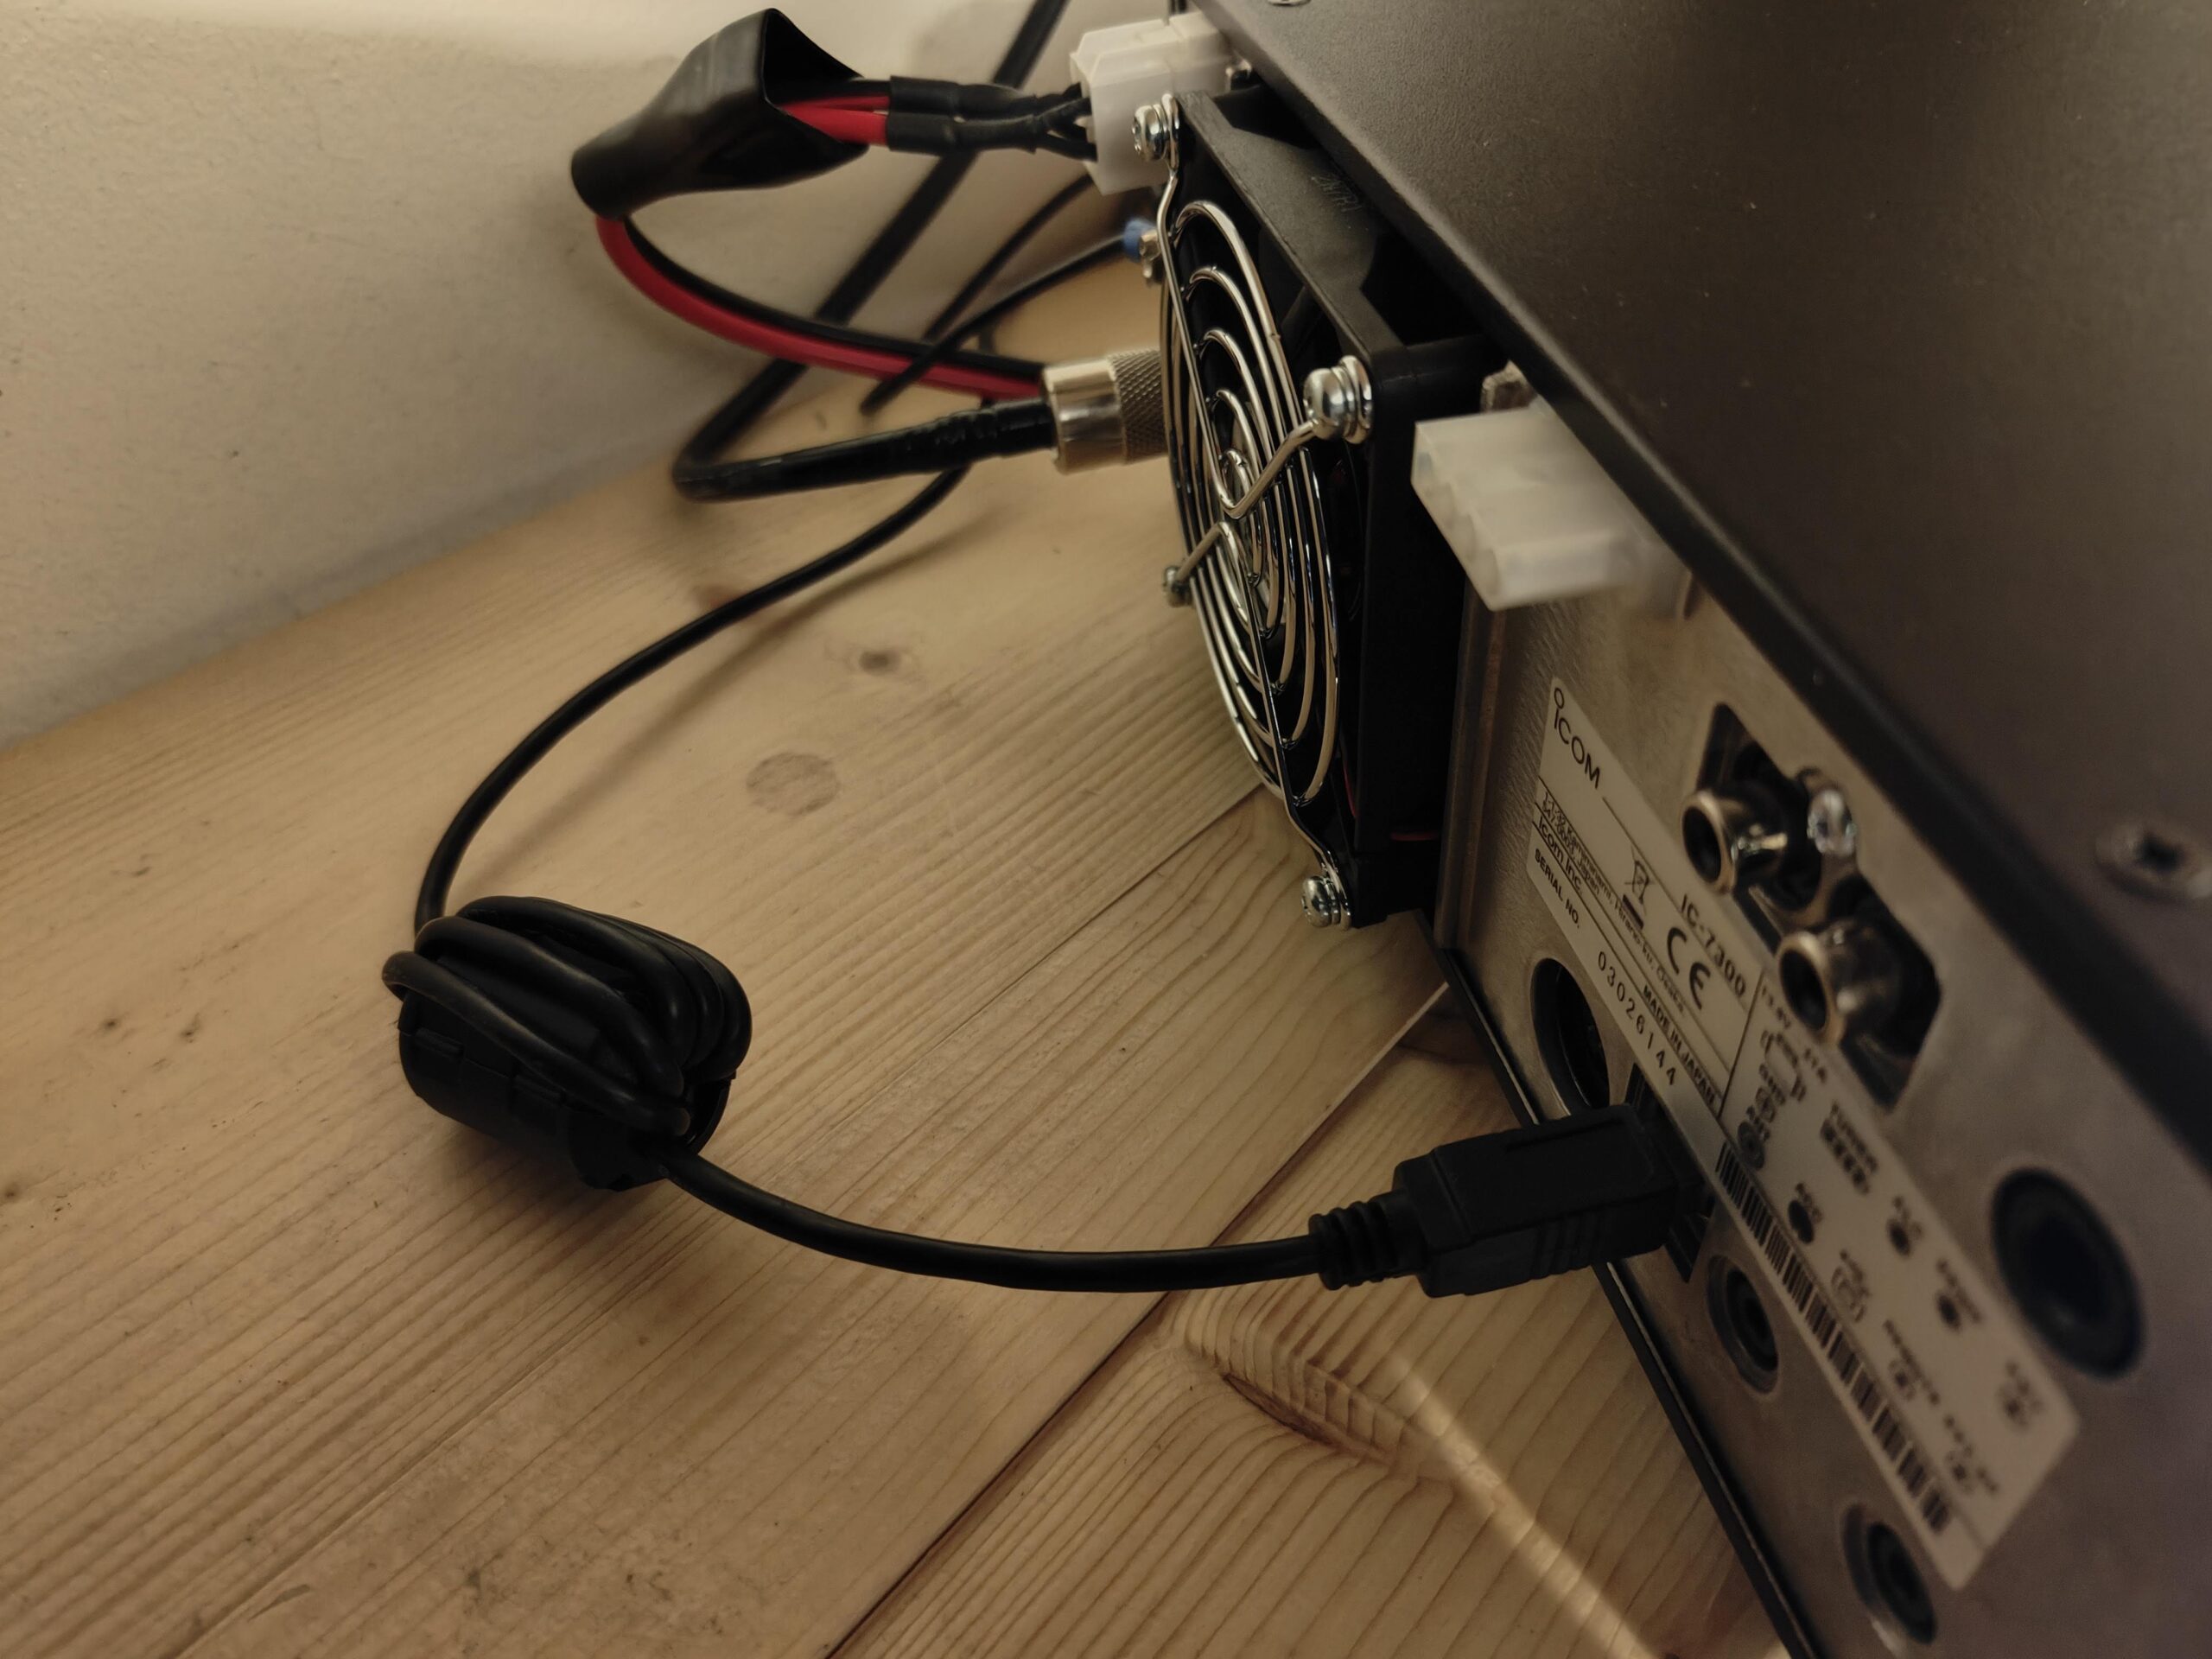
Very important bit is also to use an optical USB separator – you can get it from Amazon or other places.
OPPO Find X5 (5.59mm, f/1.8, 1/20 sec, ISO2722)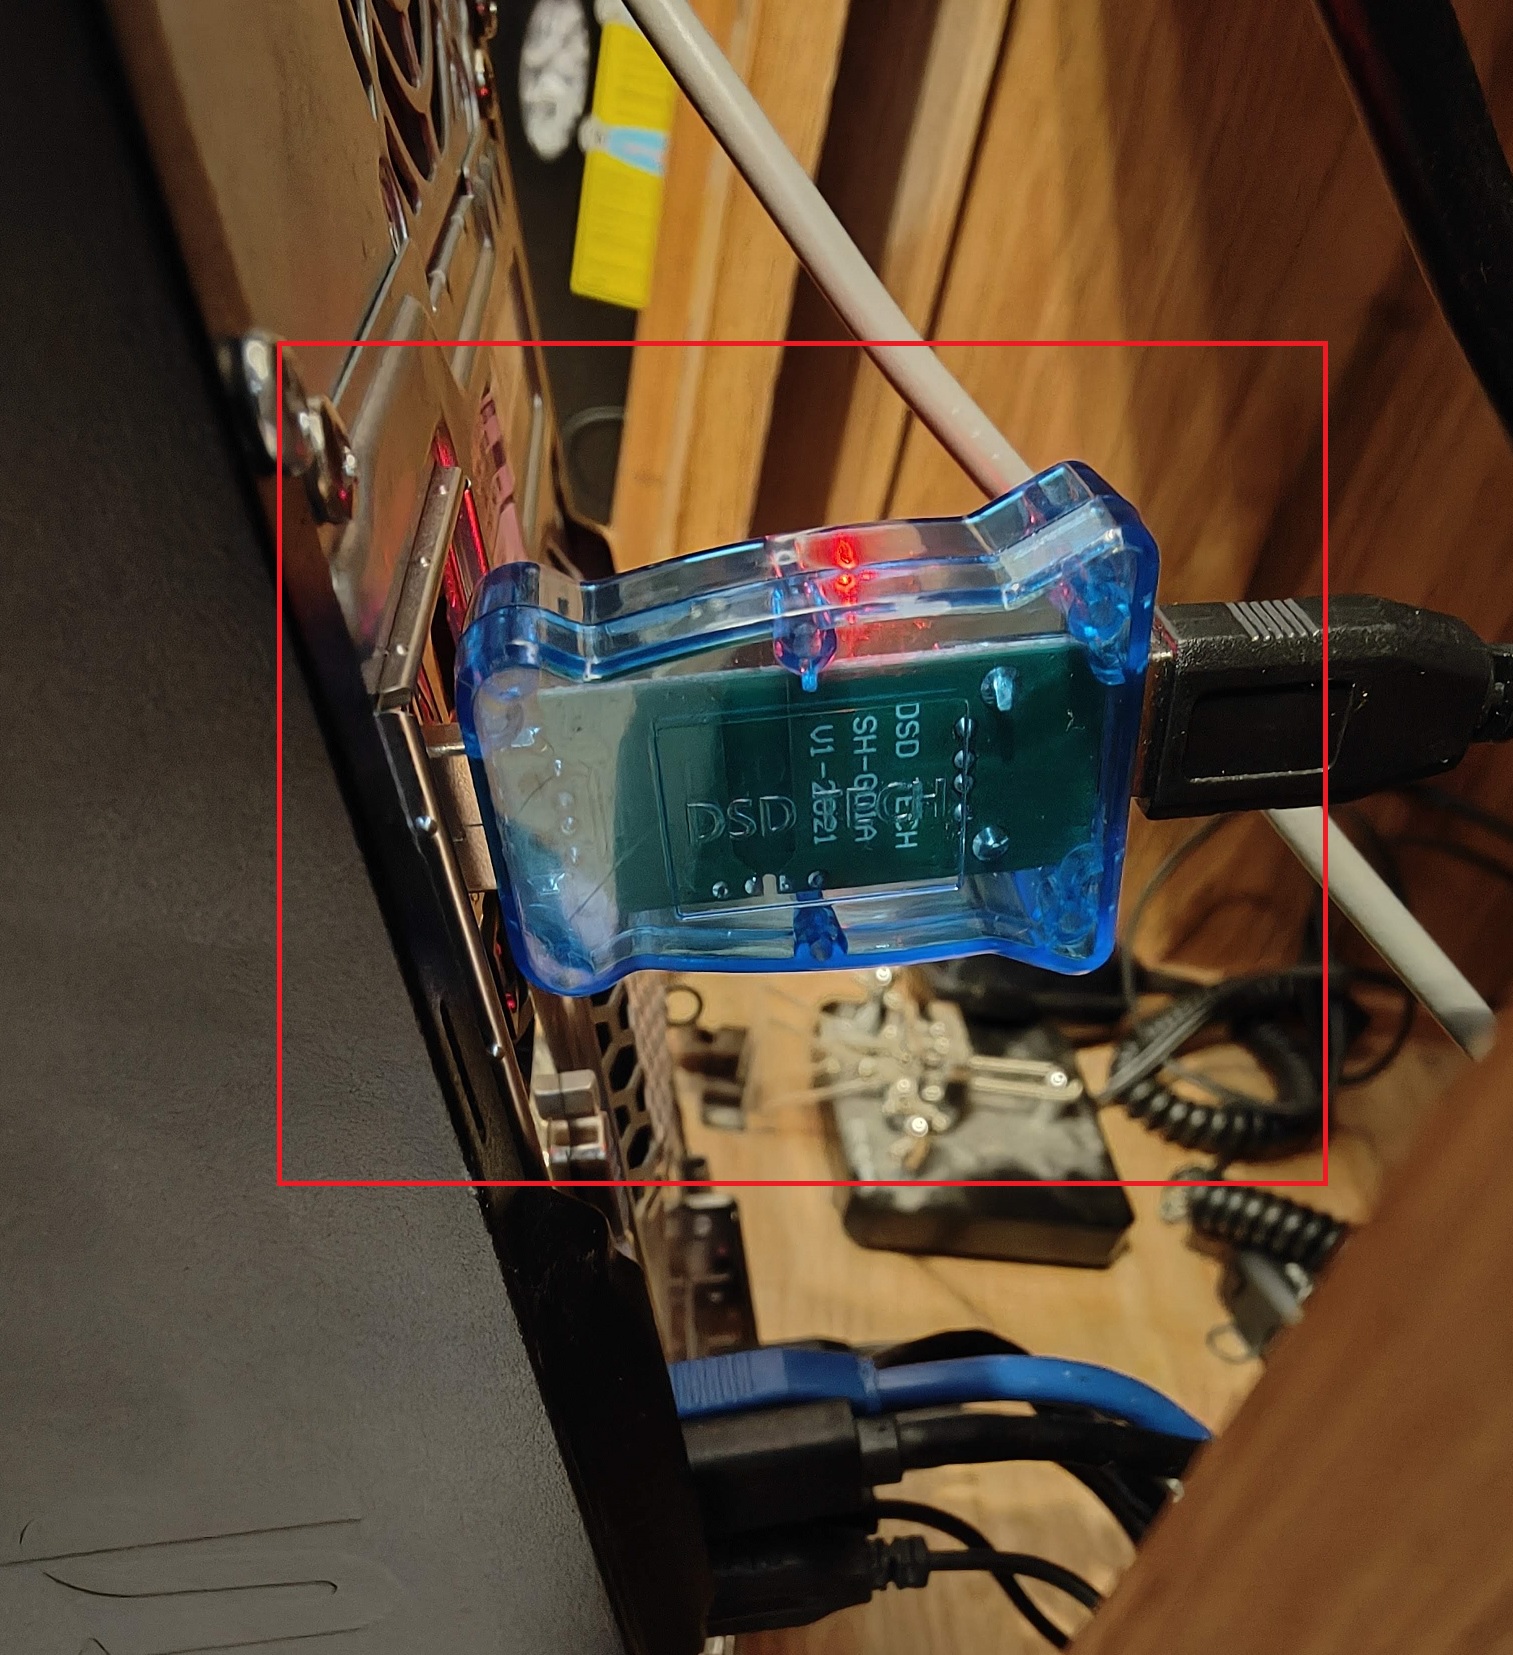
Integration of Icom (IC-7300) with Win4Icom
Ok, let’s start. I am not going to explain step by step all aspects of installing and using Win4Icom. The YouTube tutorials and manual is doing that. However there are some tricks which are not fully describe on the internet. Before you install the software, from the Icom website download driver which will make USB seen as COM port.
https://www.icomjapan.com/support/firmware_driver/2417/
You need to install the driver BEFORE you install the Win4Icom software!
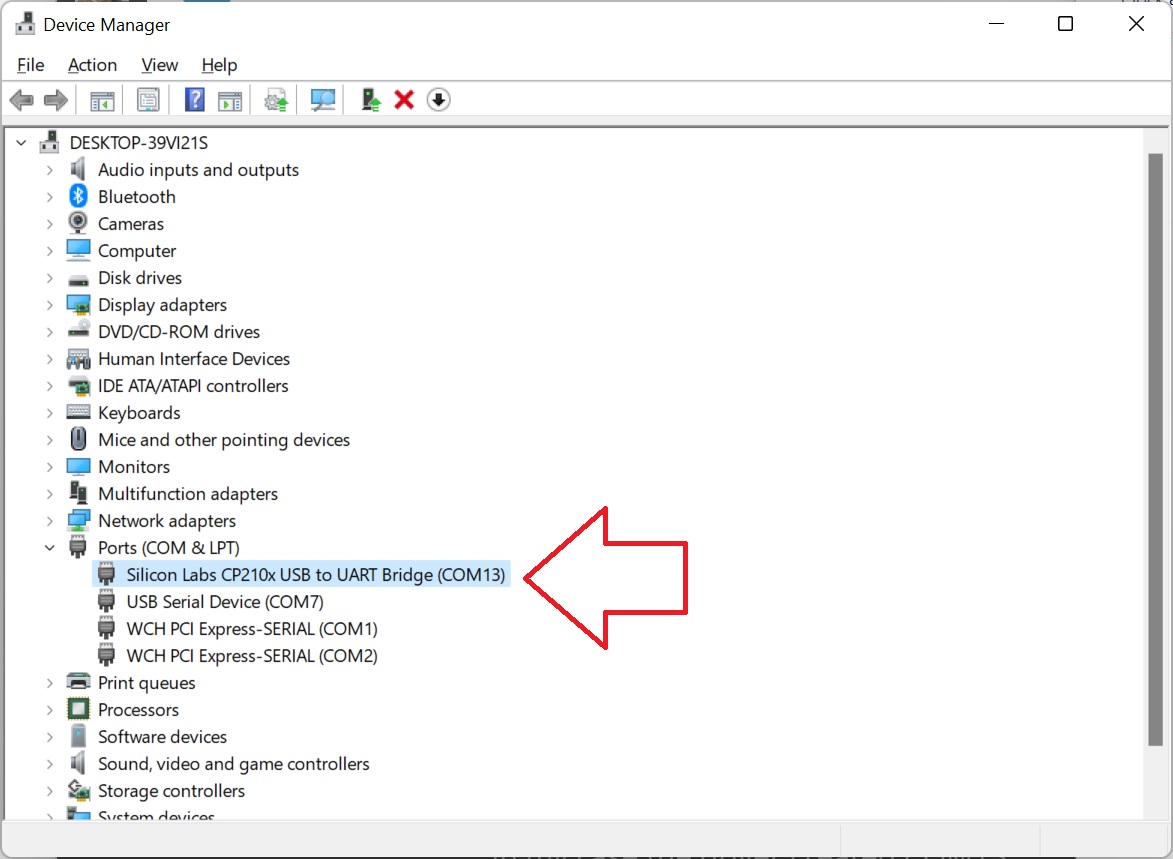
Now install Win4Icom. The software is quite intuitive and I am confident that you will not struggle with it. However, a big tricky bit is to listen the audio on your computer. You do not really have to do it on your computer but this is how I decided to do it. Also listing and transmitting audio through the computer will let you hide the radio if you wish. Then your wife will not say anything about spending money on another radio 🙂 Also turning on the software will turn on the radio too – very nice!
Author of the software claims that the software has nothing to do with listening on the PC however it is not fully true. The PC will not send a signal from the microphone into the radio if you do not change one option:
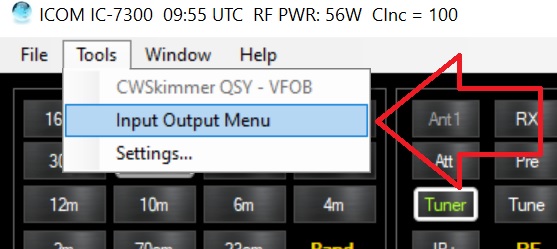
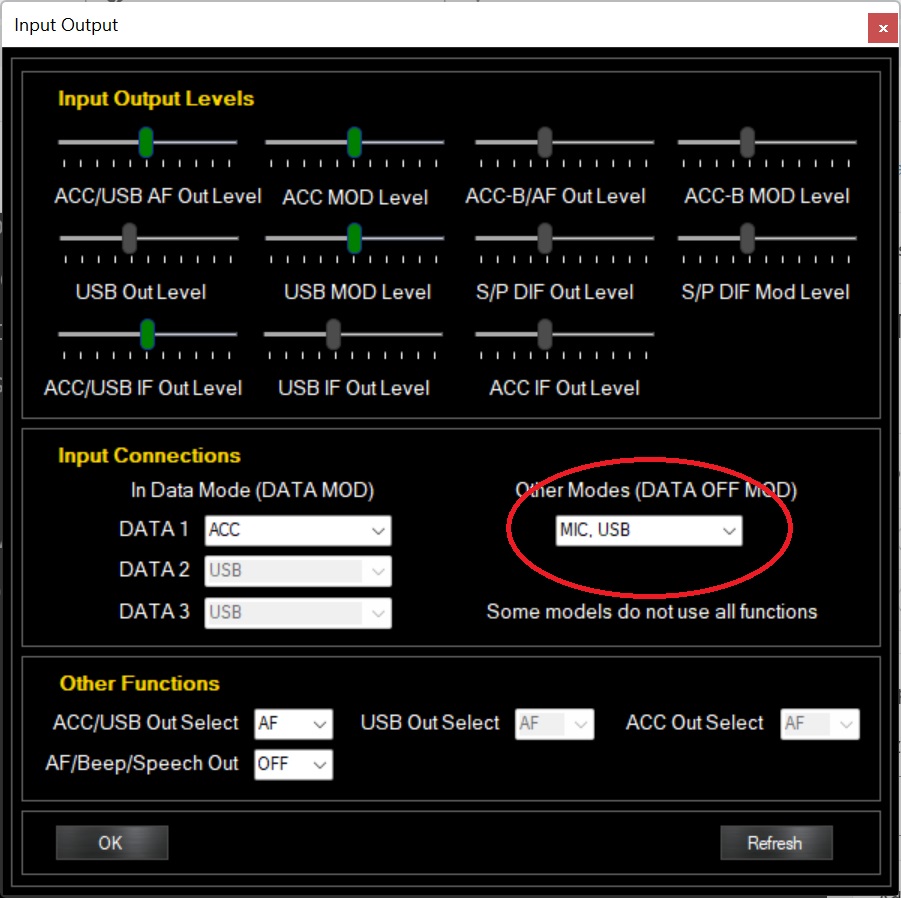
WARNING!!! Picture above shows DATA 1 as ACC. It is wrong. Make change and set this up to USB!!!
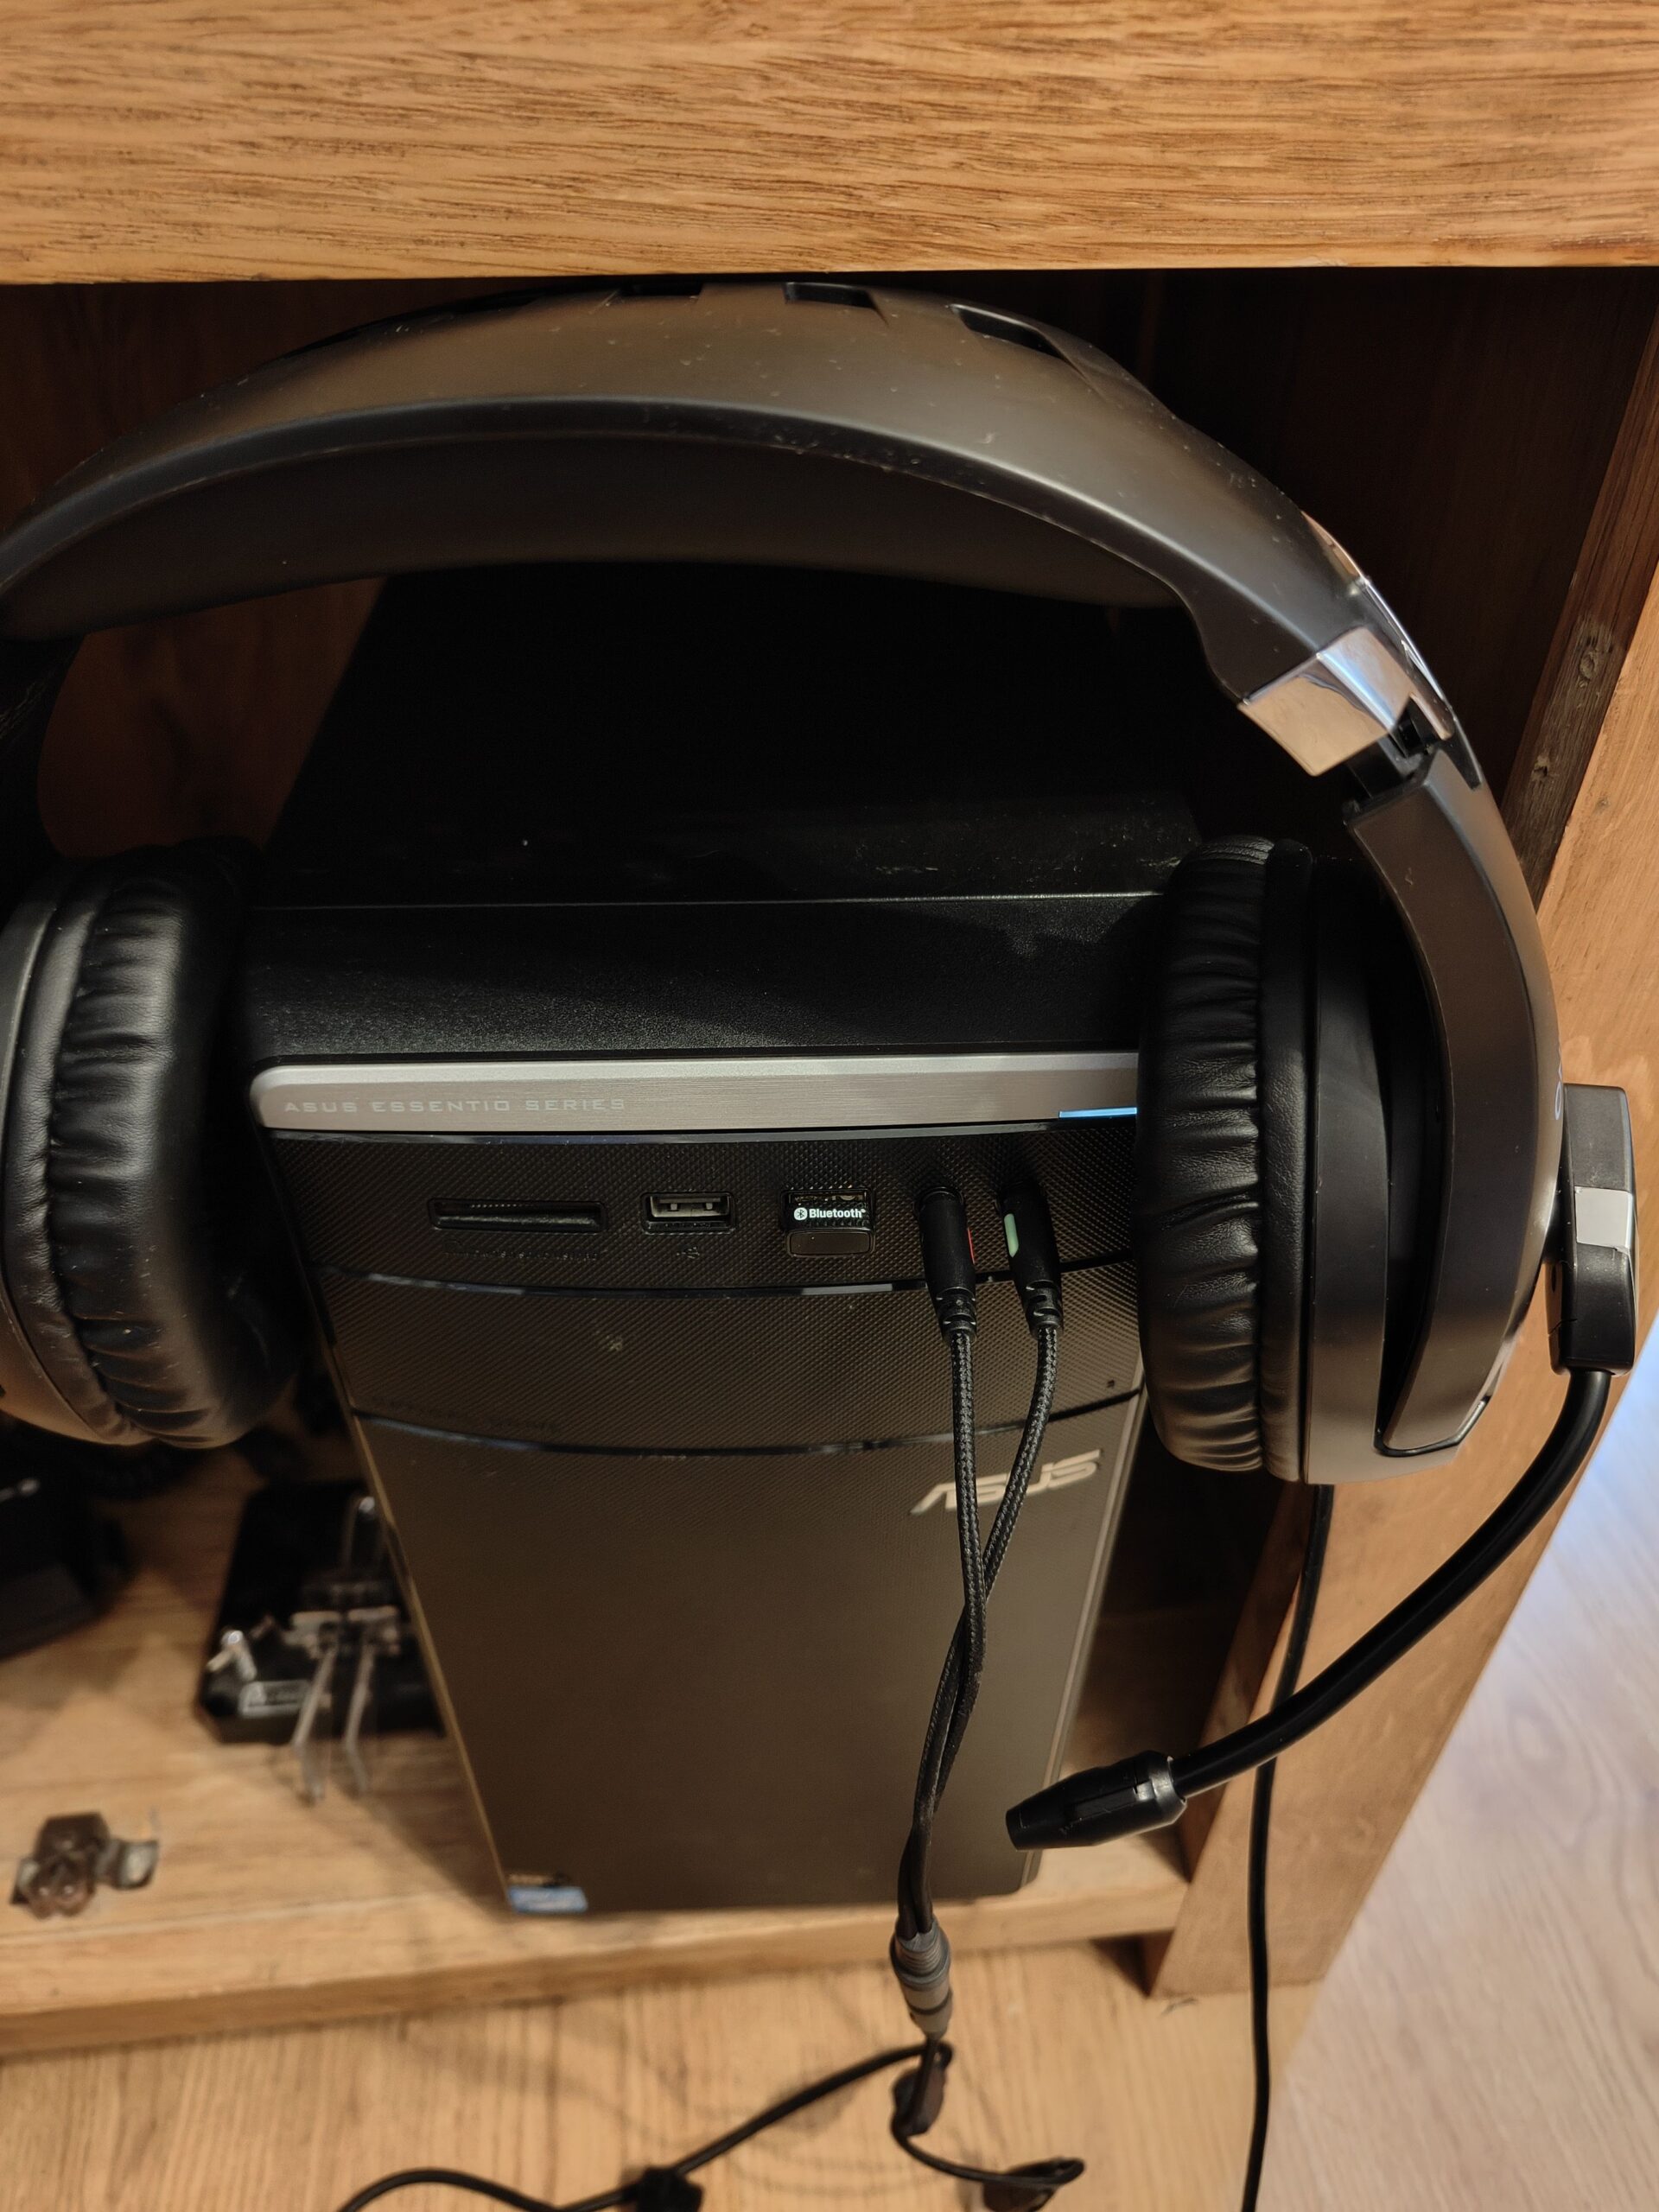
Now you will have to play with the Windows sound settings. I use my daughter’s gaming headphones with microphone and all settings will based on it.
In control panel open your sound settings:
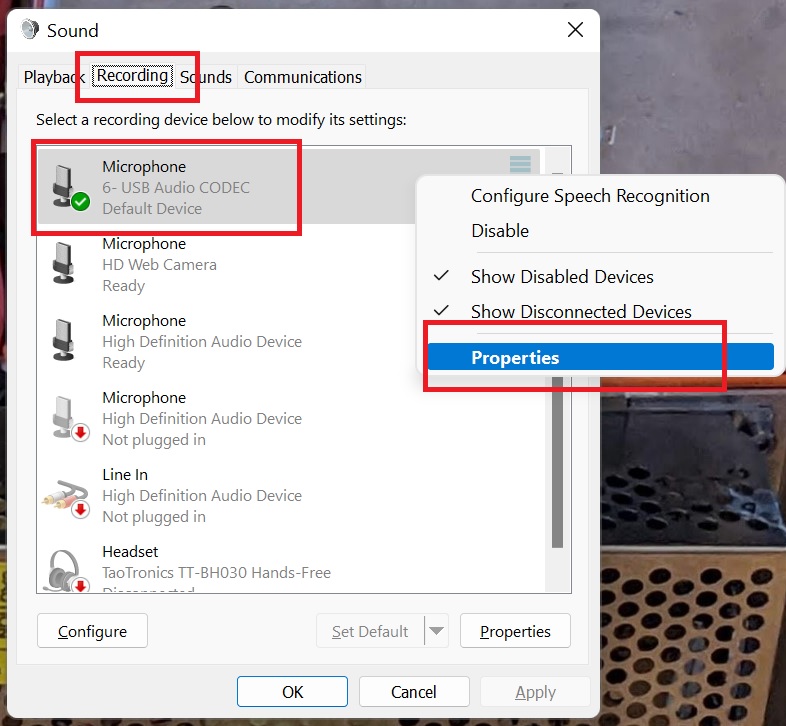
OPPO Find X5 (5.59mm, f/1.8, 1/20 sec, ISO1721)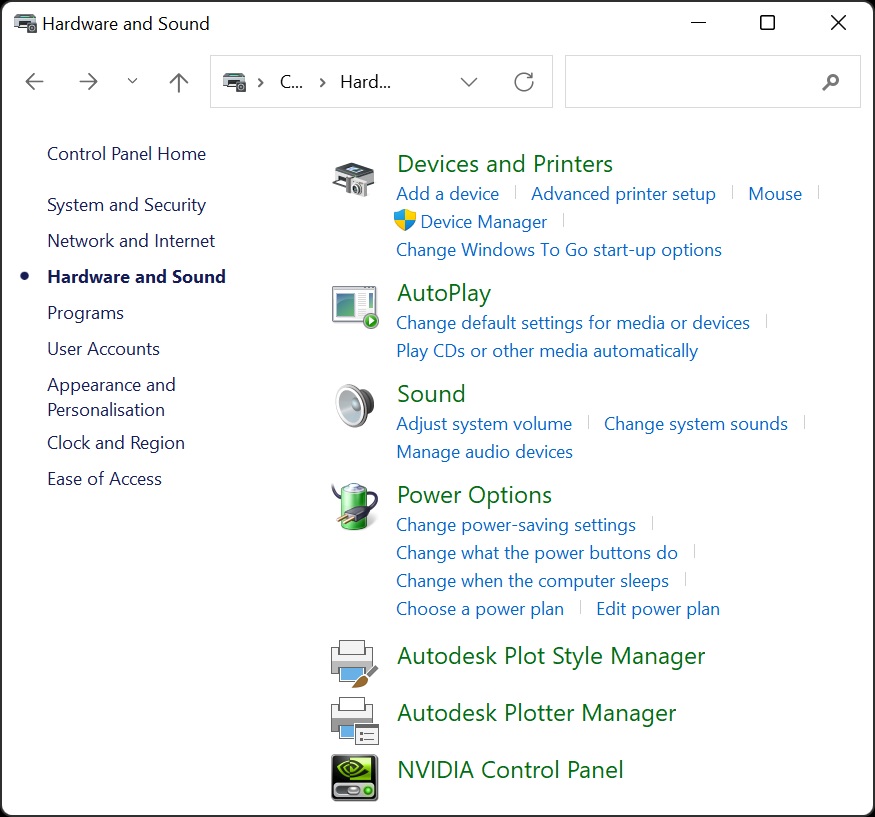
In recording tab go to the device you want to listen (I ma not sure why my headphones are called Microphone) and click Properties. Note you will have to choose s device having in description something like 6-USB Audio Codec – it can be called a bit differently on your machine.
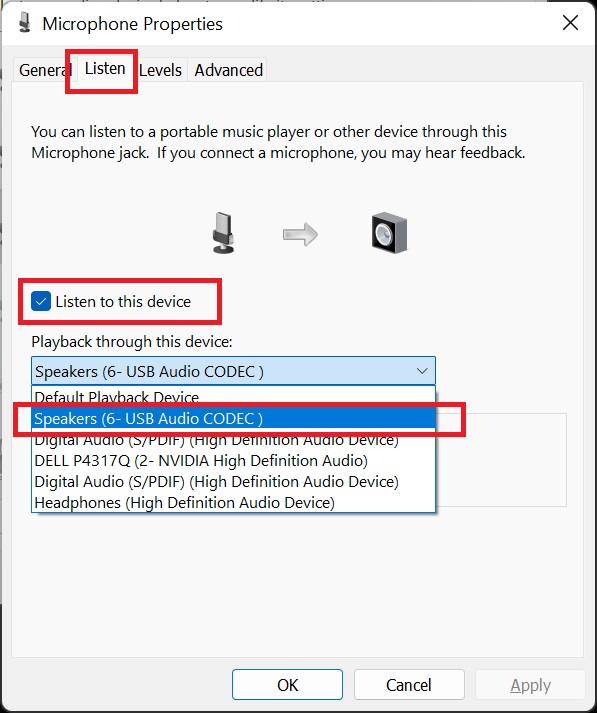
Now in the Properties go to Listen Tab, select Listen to this device check box, select device and choose your playback device, however it is better to leave it in Default Playback Device, so when you unplug your headphones it will switch to your speakers.
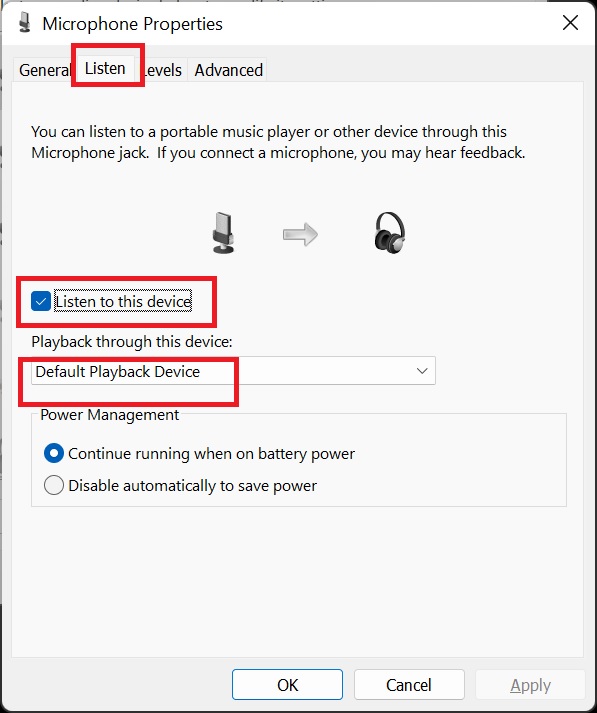
A bit more tricky bit will be to configure your microphone. Go again to your sound settings, Recording tab and then select your microphone (device will appear once your headphones are connected). Right click and select Properties. Edit: I have just found that if the computer is not playing the audio from the radio, you need to switch default playback device to anything else, apply, then go back to the default device and apply again. The audio will be back.
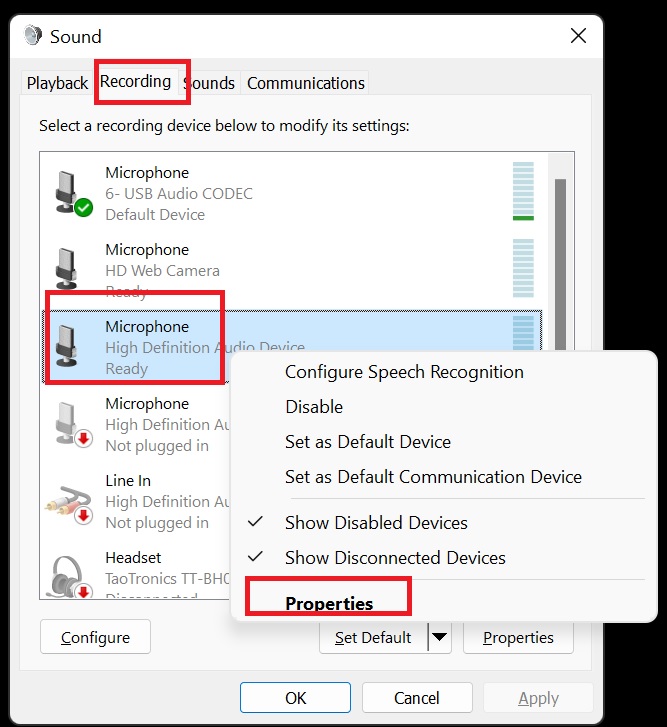
Go then to Listen tab, select Listen to this device checkbox, and then (important!!!) select your 6-USB Audio Codec device. Otherwise your default device are your headphones or speakers so you will hear yourself in your speakers. That’s selecting that 6-USB is essential. Please note your 6-USB device could be called slightly different.
Job done (for Win4Icom)!
Integration of Icom (IC-7300) with Log4OM
My favourite logging software is Log4OM. Configuration of the radio is easy, however a bit different to what I had to do when I was the owner of the Yaesu FT-450D. In the Log4OM go settings and then Program Configuration

In the left part of the window select CAT Interface and then select Omnirig (for my Yaesu I was using Hamlib, but this time it did not work for me. A lot of people says Hamlib is useless and it is better anyway to use Omnirig.
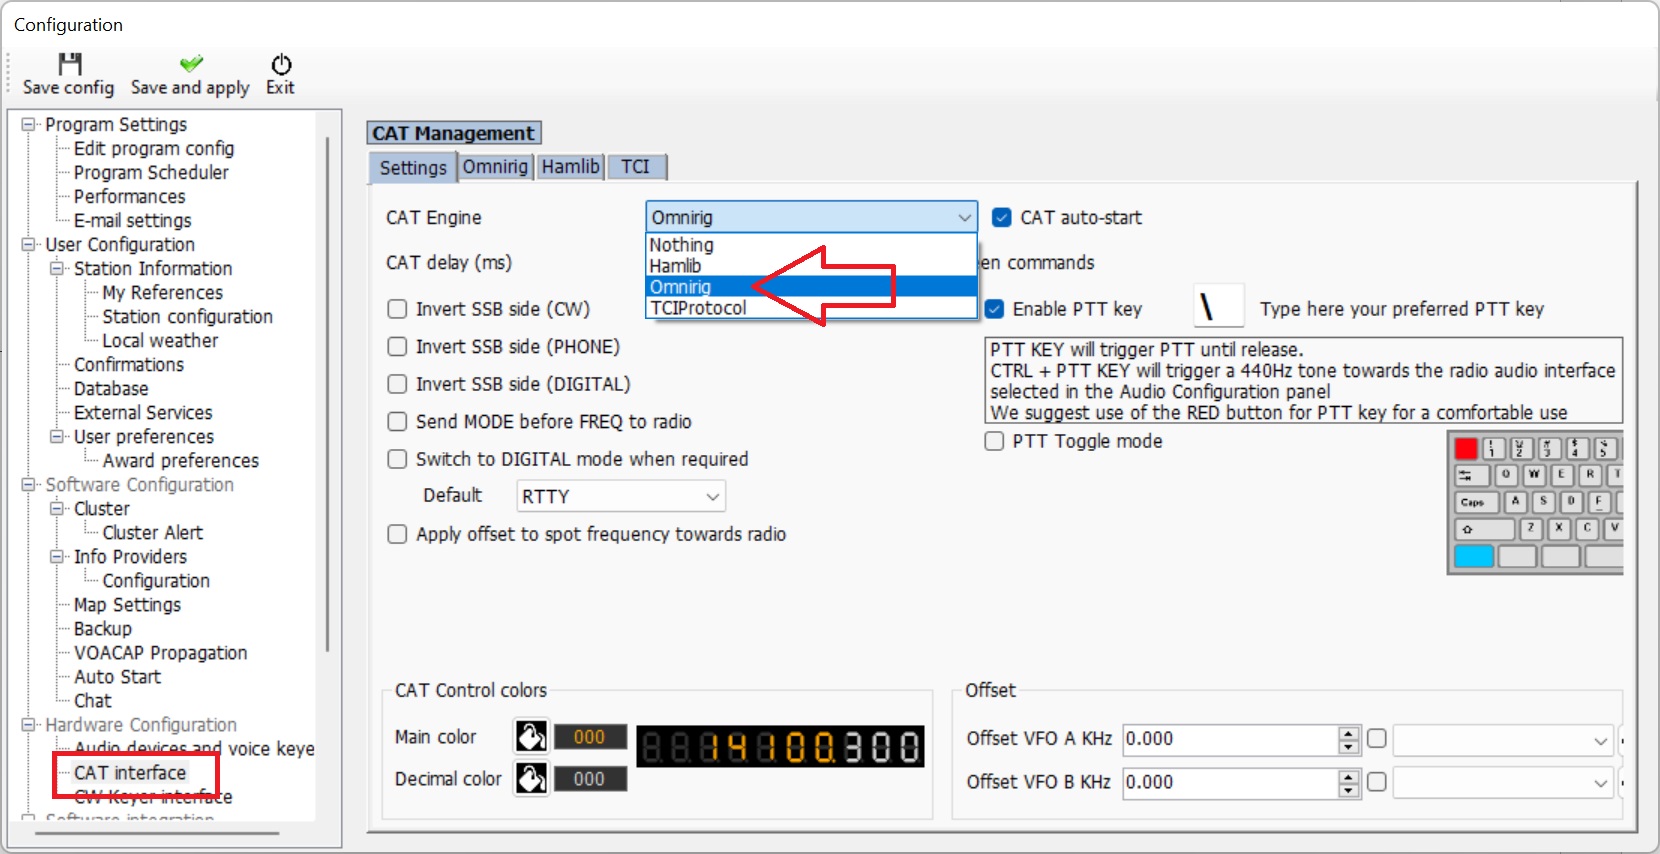
Now press save and apply grin tick to save changes and to go back to the main menu. Press the last icon to get into the CAT settings

Select your radio, com and speed:
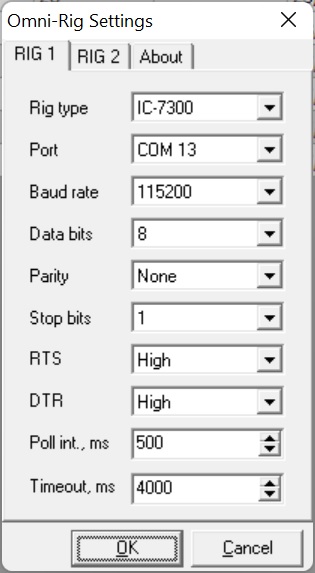
Job done, now your Log4OM is integrated (I know, there is much more settings to do, I show just settings which are responsible for connecting the radio to the PC).
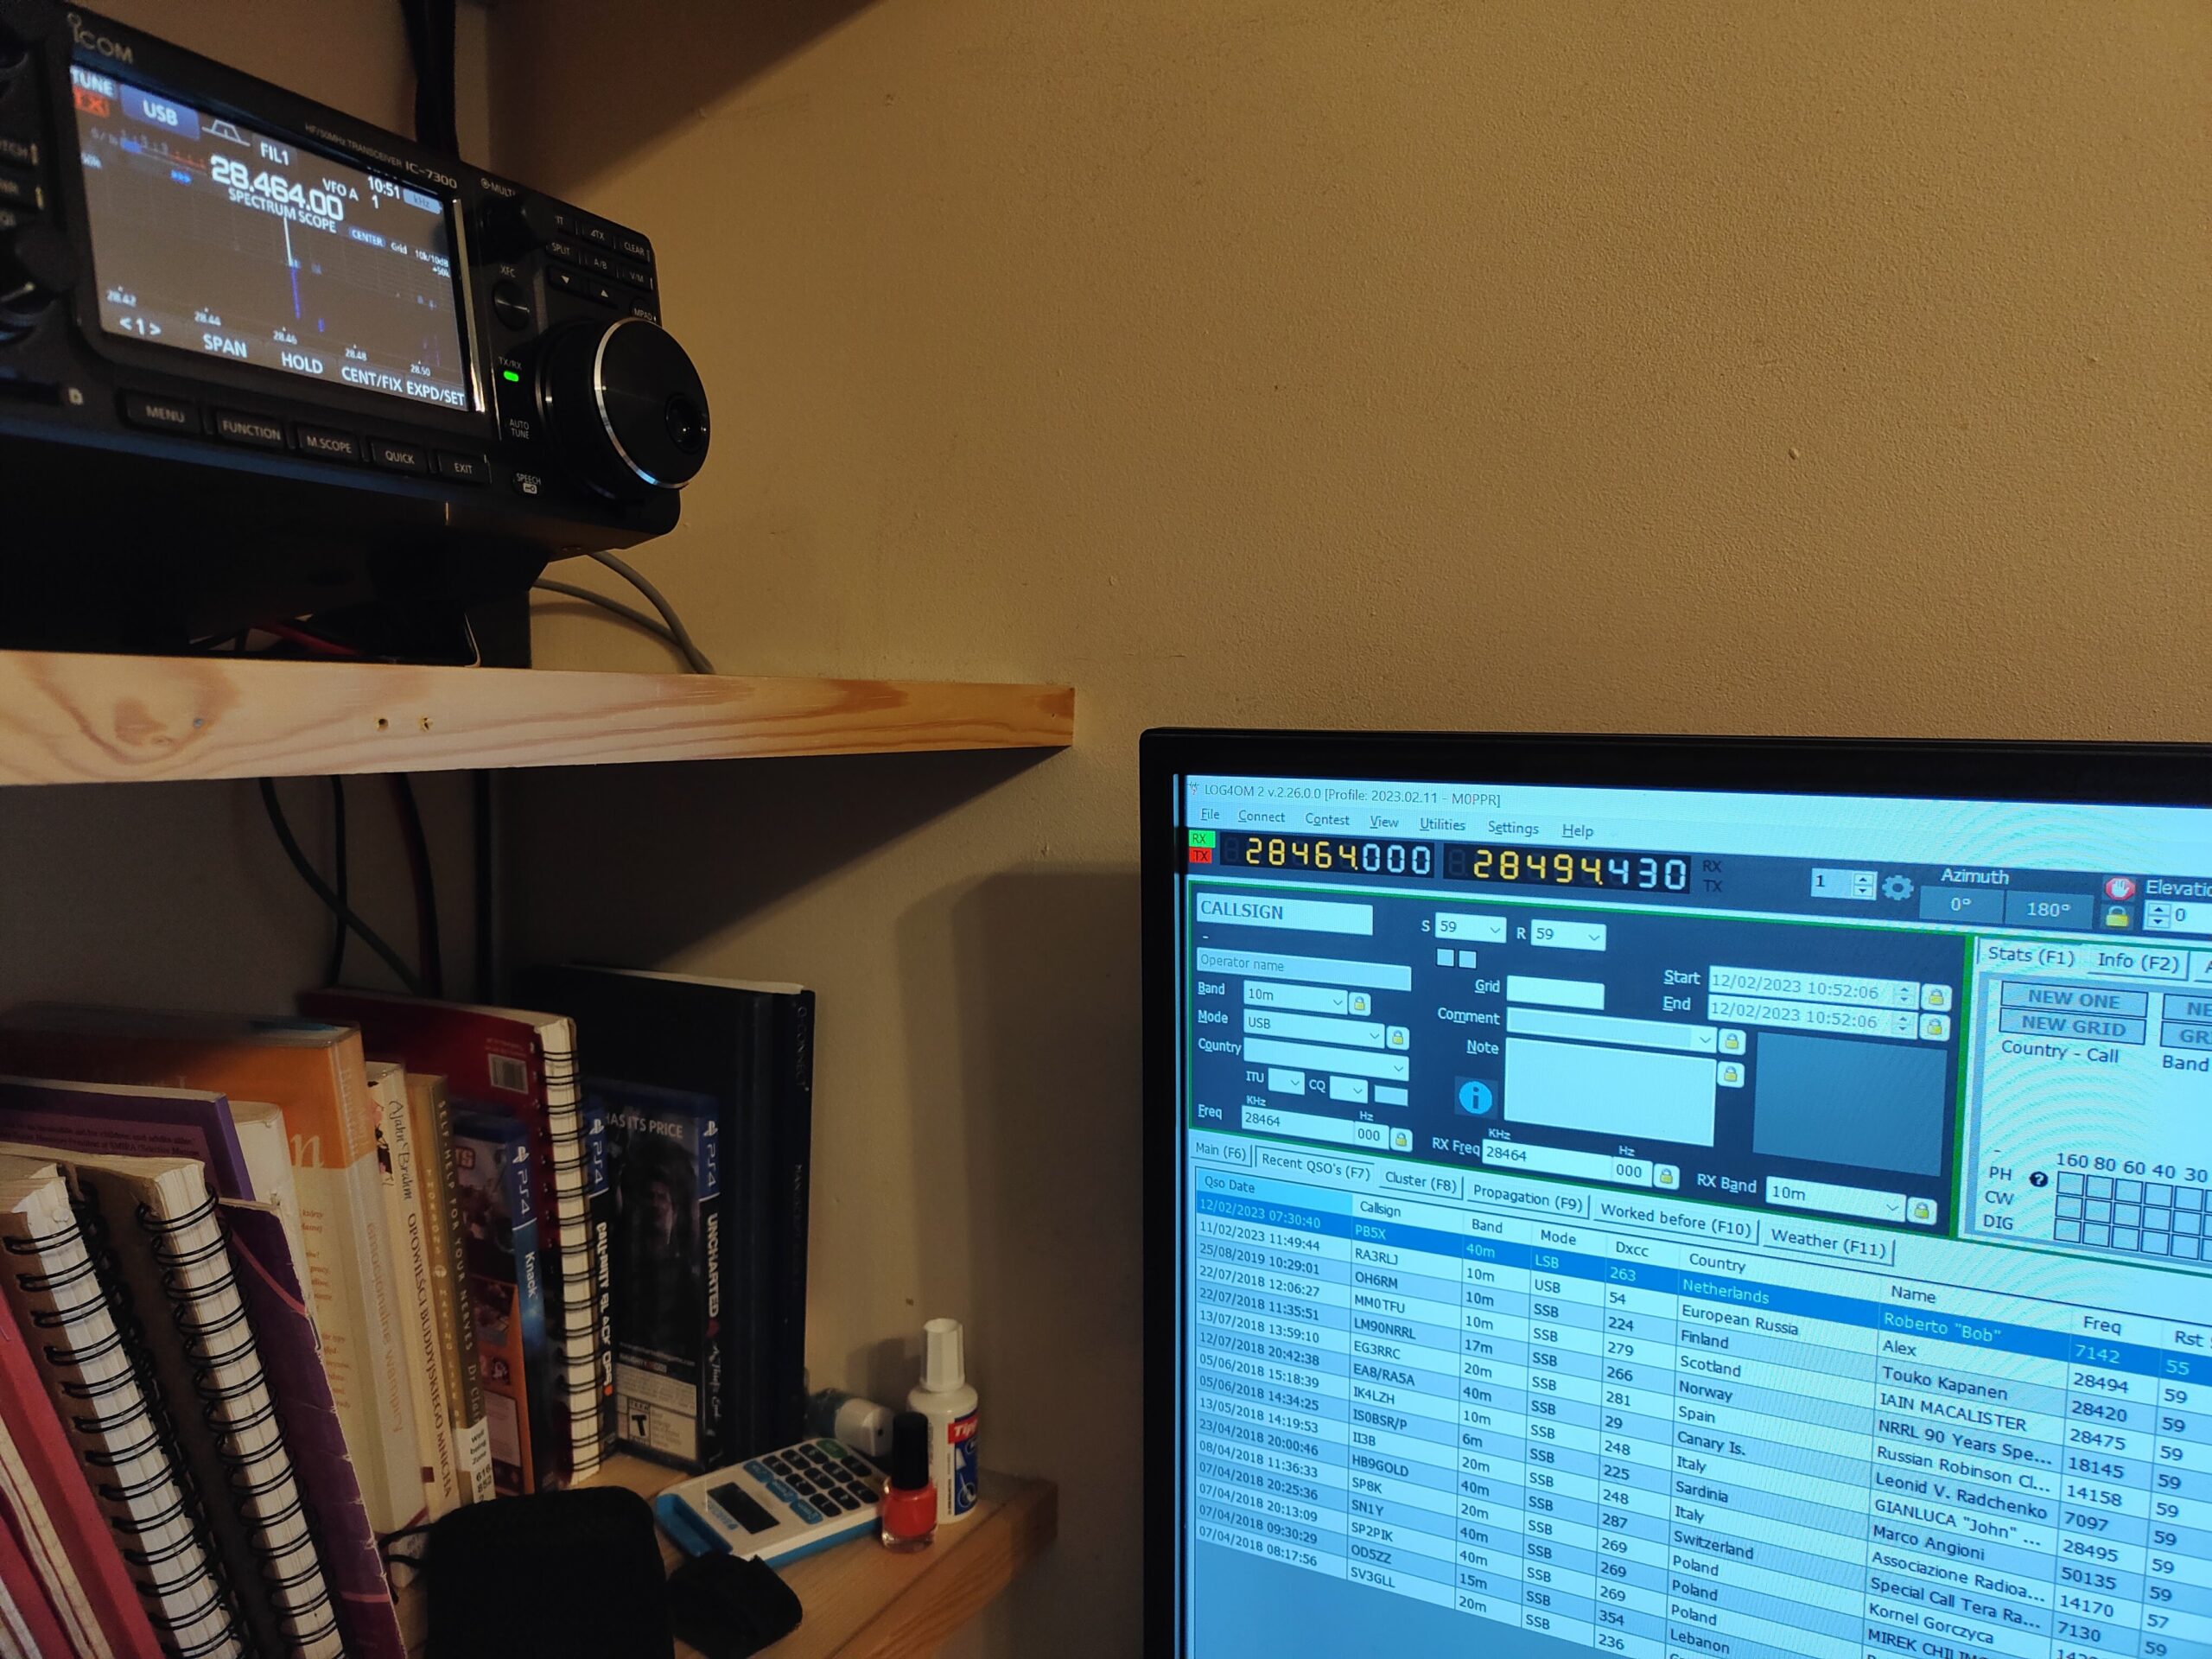
Integration of Icom (IC-7300) with Log4OM and Win4Icom simultaneously
Now the is a problem if you want to use the Win4Icom and Log4OM simultaneously. Both software trying to use the same COM13 (in my case) create the problem. There is a solution 🙂
The Log4OM communicates with the radio through the Omnirig, and Omnirig was (last time) connected to COM13 and that was creating a conflict. The solution is to download and install com0com software from here: https://sourceforge.net/projects/com0com/
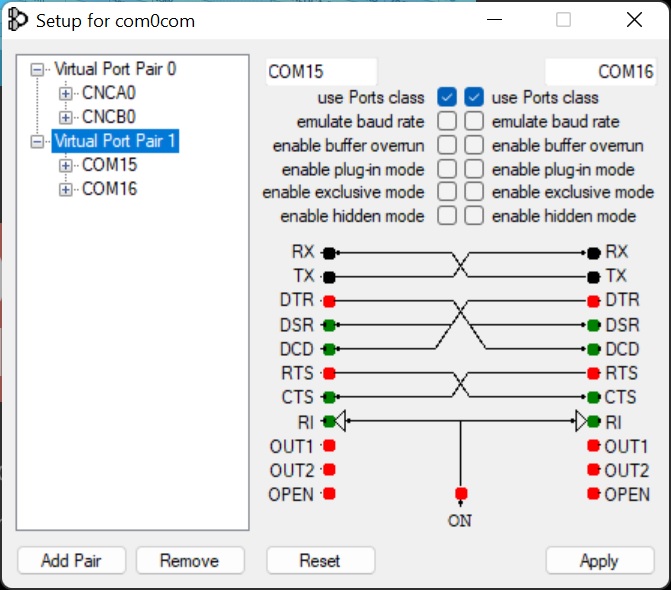
After installation process only what you need to do is remember numbers of the new virtual com ports created by the com0com. It is like a cable with two plugs, one marked com 15, one marked as com 16, so you will make decision which plug will be connected where.
Now in menu start type Omni and open Omnirig. Change previously selected COM13 into COM16. Also I decided to lower the speed to 9600. Speed 115200 is needed only by Win4Icom to get the waterfall speed correctly on the PC screen.
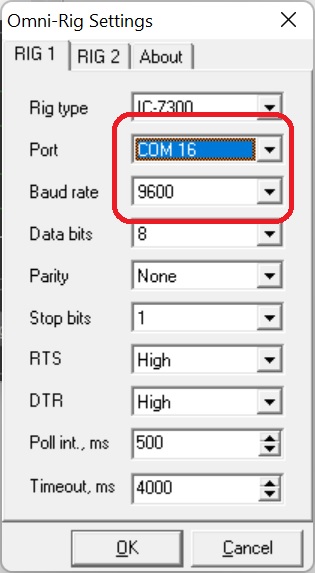
Please do not forget the Omnirig is used in Log4OM so we virtually connected the software to the one side of the cable (COM16). We have to now connect the other side of cable – COM15 – somewhere 🙂 So now it is a time to go into the Win4Icom, go to settings:
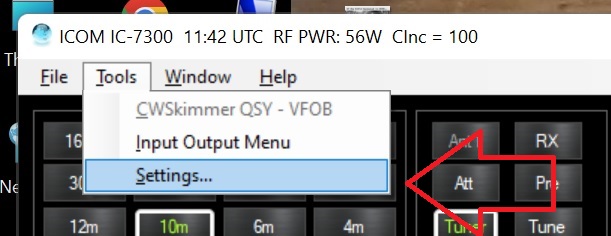
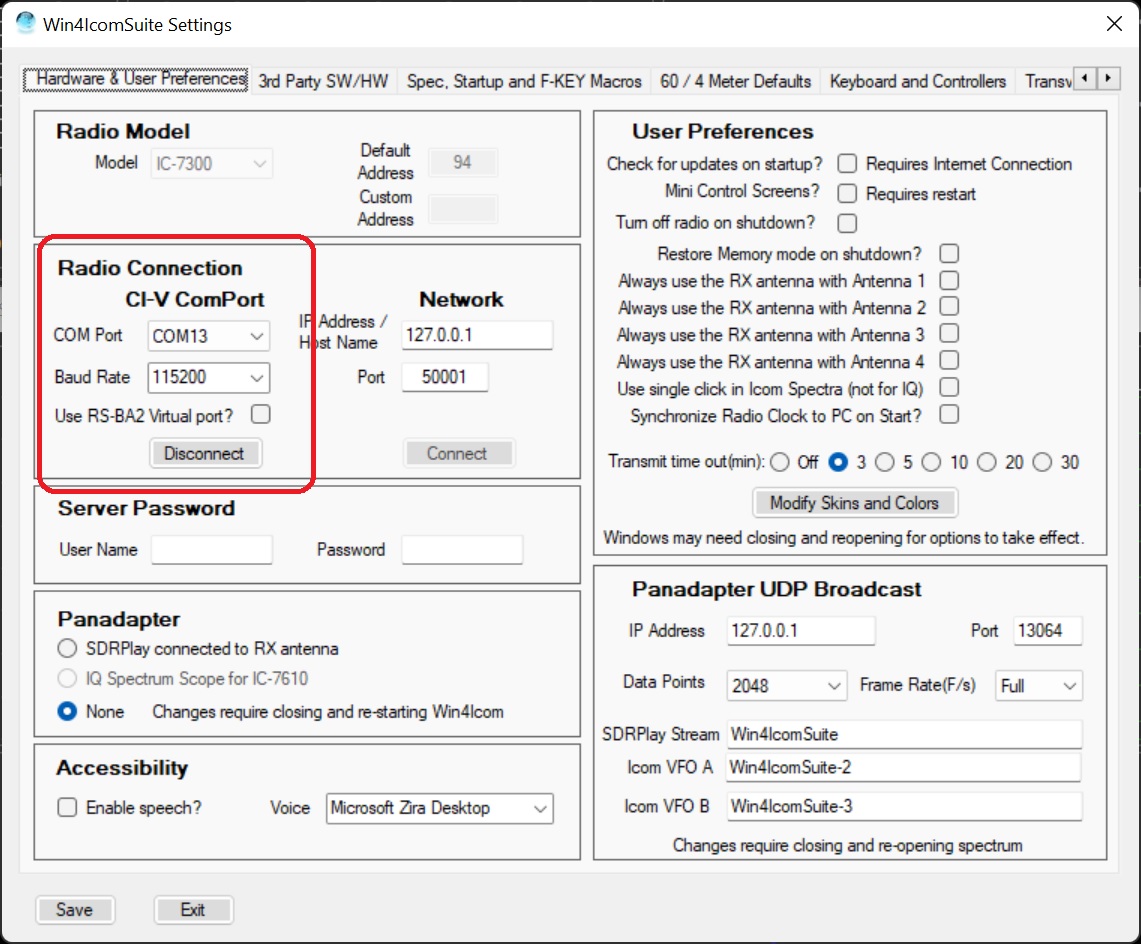
In the first tab make sure your radio is correctly connected to the “real” COM13 port (I keep repeating that on your computer the COM will have probably different number!)
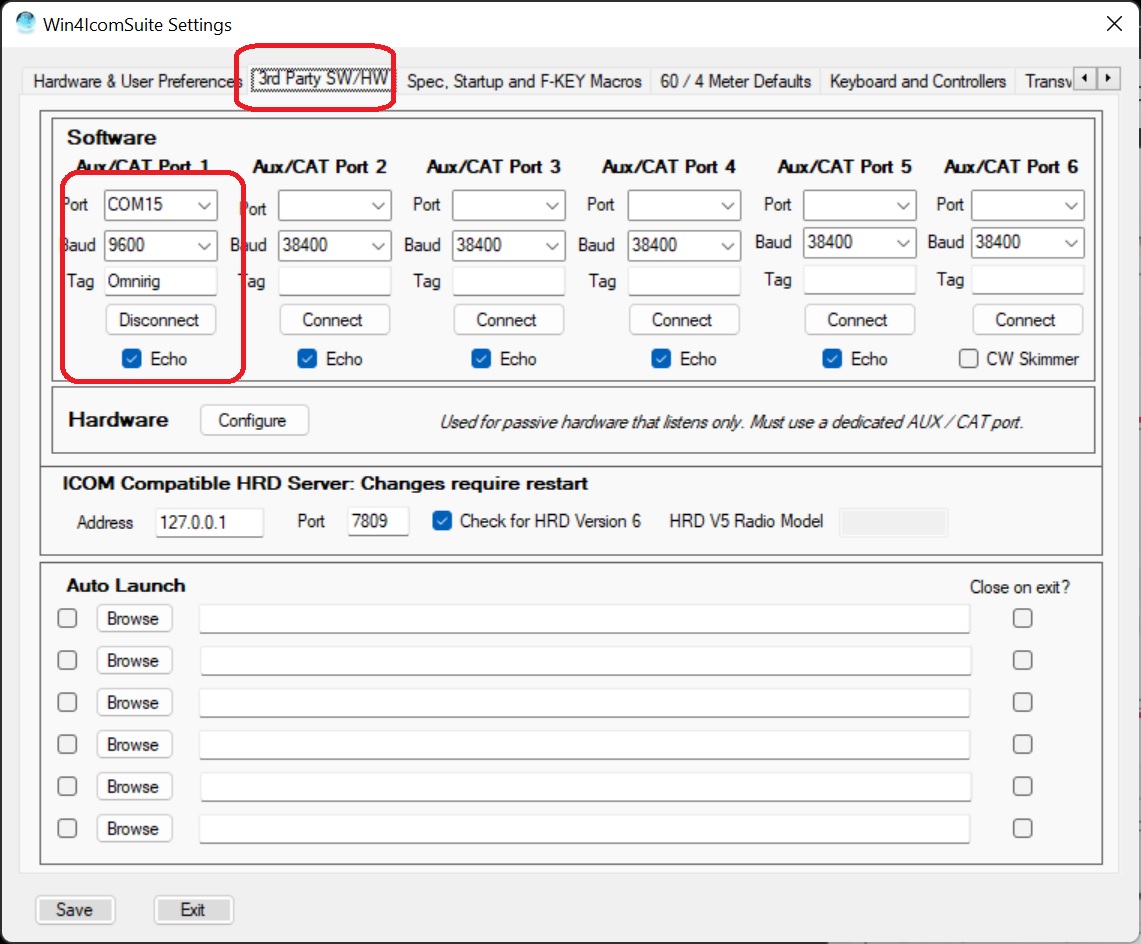
then go to the next tab which is 3rd party SW/HW and select the other side of your virtual cable (COM15). Make sure the speed is set up to 9600 which is a safe speed and then in the Tag you can type anything (I typed Omnirig) and then click Connect. Make sure Echo stays selected.
Jon done! Now we have both Log4OM and Win4Icom working in the same time!!!!!
