This is a small tutorial showing how to use relations in PTC Creo.
To create a part related to the other part, especially in moving Creo assemblies, the best option is to use Creo relations.
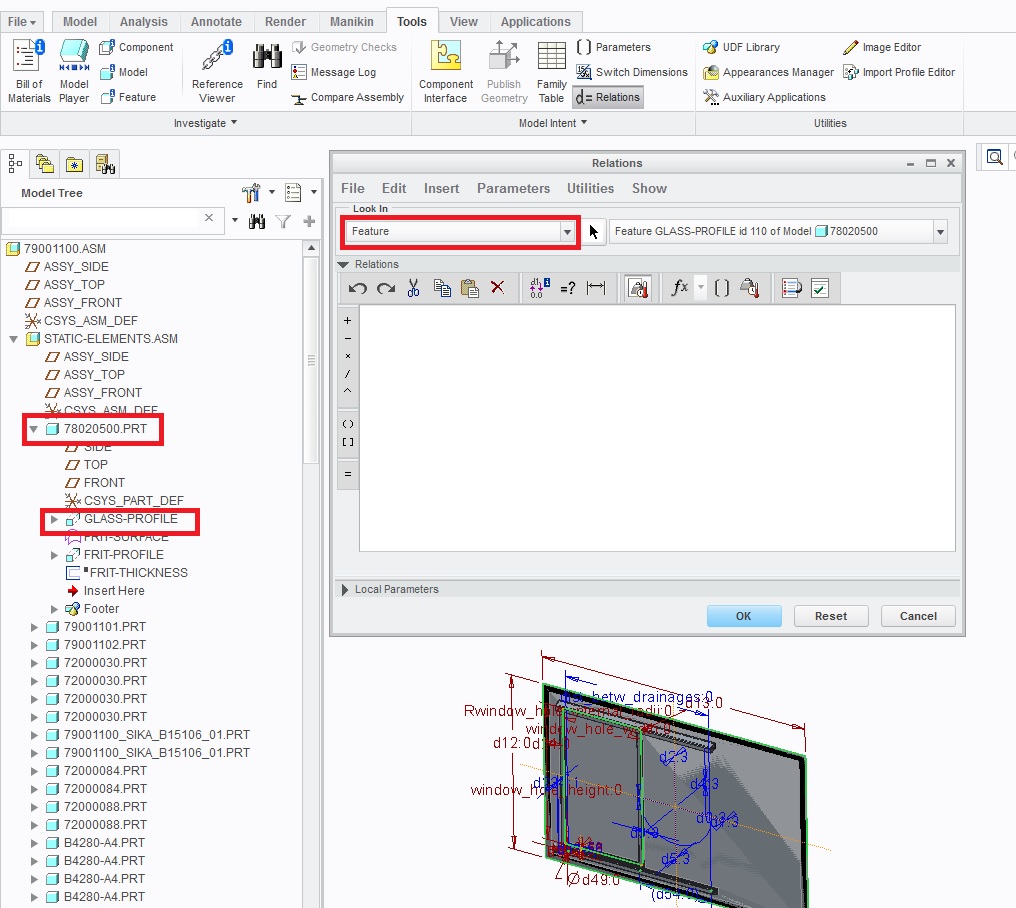
Assembly below shows a sliding window, where a metal flat extrusion length is related to the window hole width.
To use the relation please go to tools tab, click Relations and then in the drop down menu select option features. Then select both: feature in a ‘parent’ part, where the extrusion length will be taken from, and then driven feature, in my case it will be the extrude feature. Note, some new dimensions will appear on your 3D model:
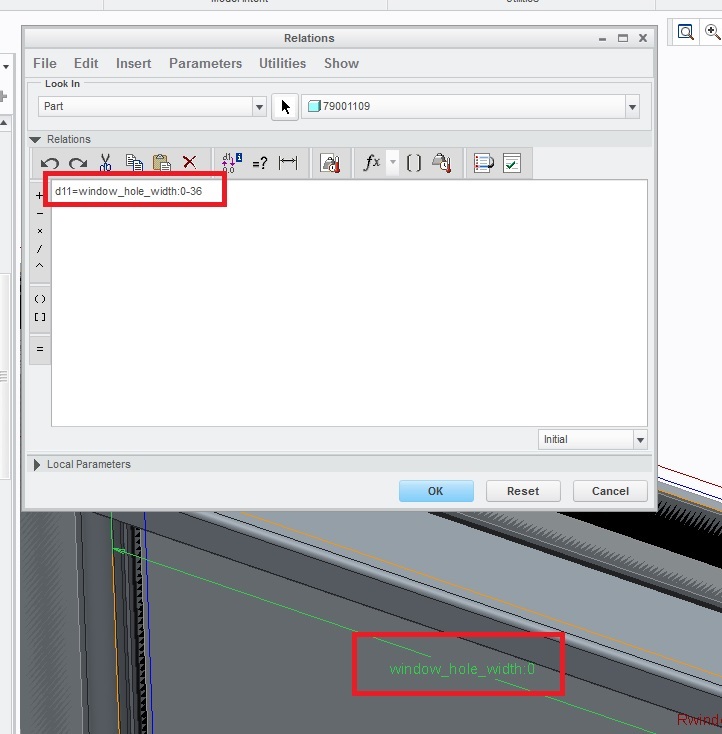
Now in the drop down menu change feature option to part, and select your part to be driven in the left tree. Your part number will appear automatically in the relation window:

Now click the dimension to be driven (in my case it is d11) and type ‘=’

Now select the dimension where your part will get the length from. My flat bar have to be shorter by 36mm than the window hole width:
Now regenerate the 3D model to get the new part length.
If you prefer to change your driven dimension from (in my case) d11 to the more friendly name, you can open your driven part, right click the extrude feature and select edit (not edit definition). Some dimensions will appear on the screen. Select the driven dimension and right click, select properties:

Then type your friendly name:

If you open your relation again, you will see, that the d11 (in my case) dimension has been automatically renamed to the friendly name: frame_extr_length:
